Configuring Linux Mint
CS-160: Software Engineering
Instructor: Rob Bruce
Fall 2016
OBJECTIVE: to install the Linux mint distribution on a bootable USB flash drive.
- This is the first step in getting Linux Mint installed on your Apple or Windows computer.
- In this step-by-step tutorial you will build a bootable USB flash drive containing a Linux mint distribution.
- You must have a Windows or Apple (Mac) computer and a flash drive at least 2 gigabytes in size.
- WARNING: Your bootable flash drive will be completely erased if you follow this tutorial.
Download Linux Mint.
- Download the 64-bit ISO of Linux Mint (MATE edition) at http://mirrors.kernel.org/linuxmint//stable/18/linuxmint-18-mate-64bit.iso
Download USB creator tool.
- Download UNetbootin for either Windows or OSX from the official UNetbootin Homepage at http://unetbootin.sourceforge.net
MAC USERS
Step 1 of 8: Start OSX.
- Once OSX is booted and running, insert your flash drive into a USB port.
- Do not format, erase, or do anything with the flash drive.
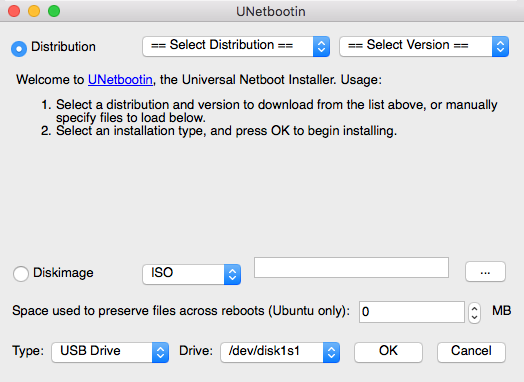
Step 2 of 8: Run UNetbootin (OSX).
- Here is a screenshot of UNetbootin running on OSX version 10.11.6:
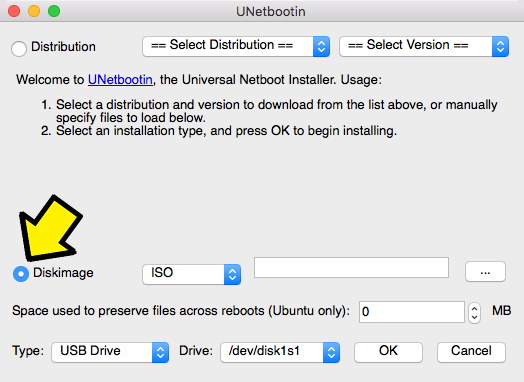
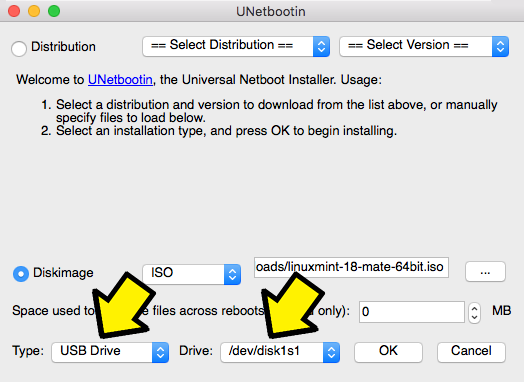
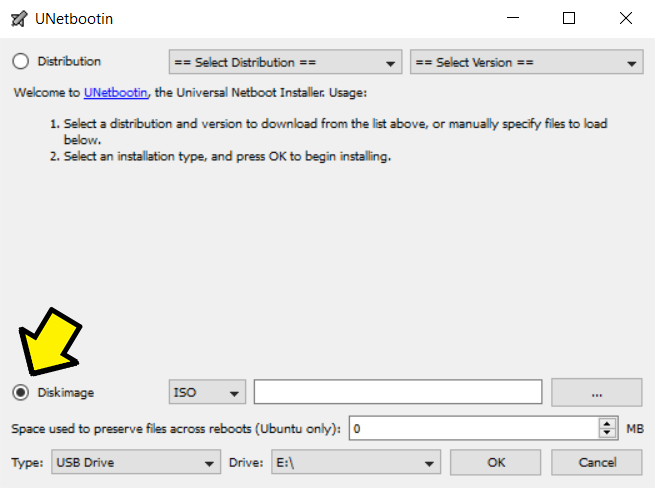
Step 3 of 8: Select radio button labeled "Diskimage" in UNetbootin (OSX).
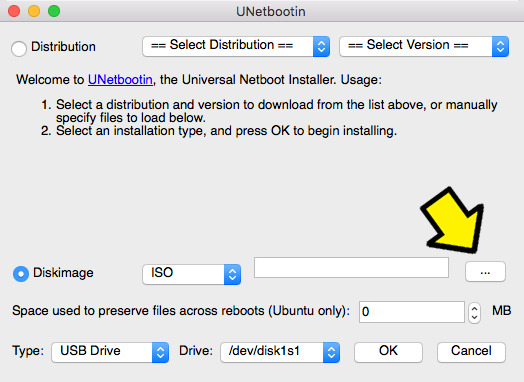
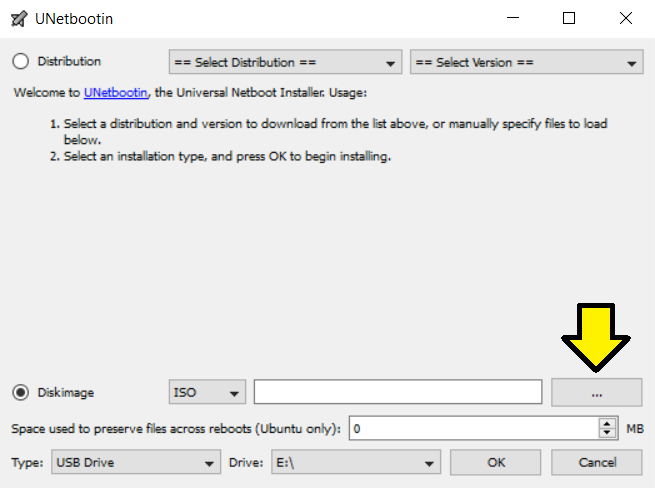
Step 4 of 8: Select browse file button labeled "..." in UNetbootin (OSX).
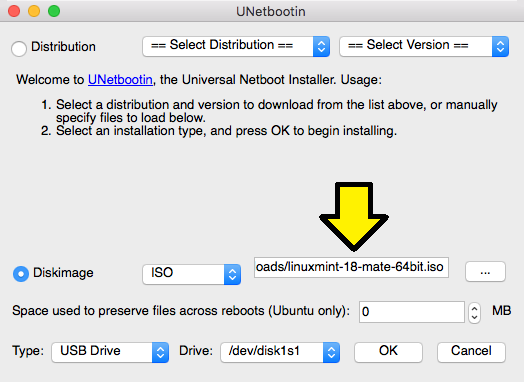
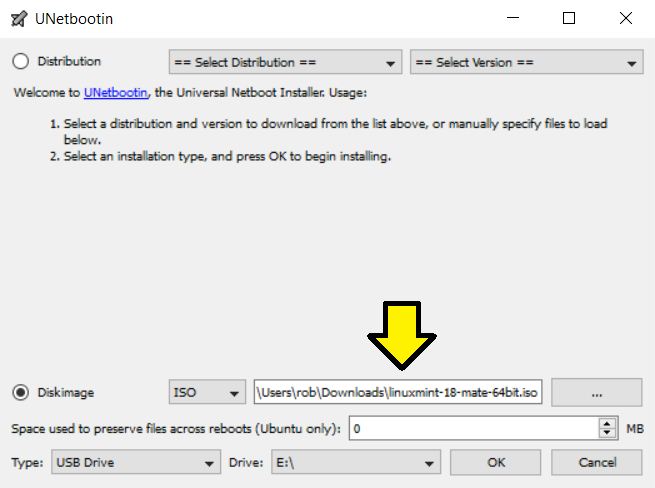
Step 5 of 8: Select the location where you downloaded "linuxmint-18-mate-64bit.iso".
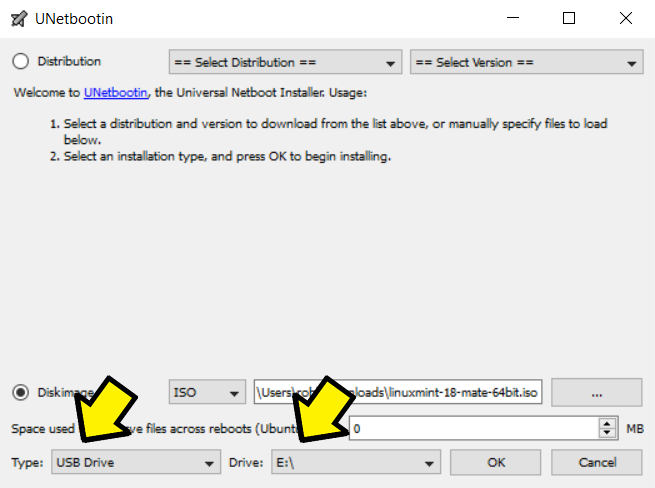
Step 6 of 8: Confirm flash drive is correct drive to write image to.
First pull down menu at bottom of screen should display "USB Drive"
Second pull down menu at bottom of screen should display a drive letter corresponding to your Flash drive. Please confirm this is correct.
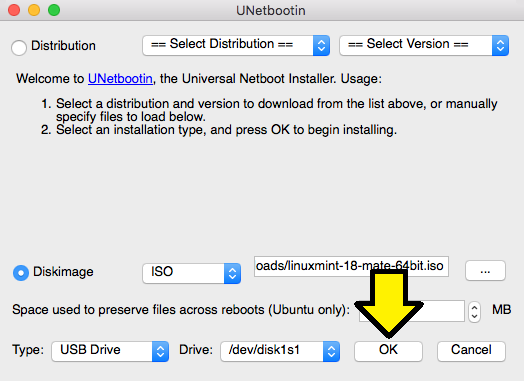
Step 7 of 8: Write ISO image to flash drive.
WARNING: YOU ARE ABOUT TO COMPLETELY OVERWRITE YOUR FLASH DRIVE WITH THE ISO IMAGE. YOU WILL LOSE ALL EXISTING DATA (IF ANY) ON YOUR FLASH DRIVE!
Select the OK button "OK"
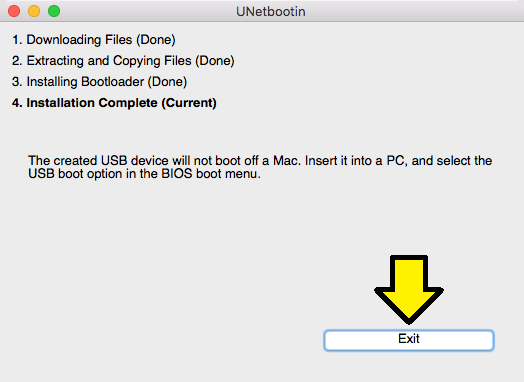
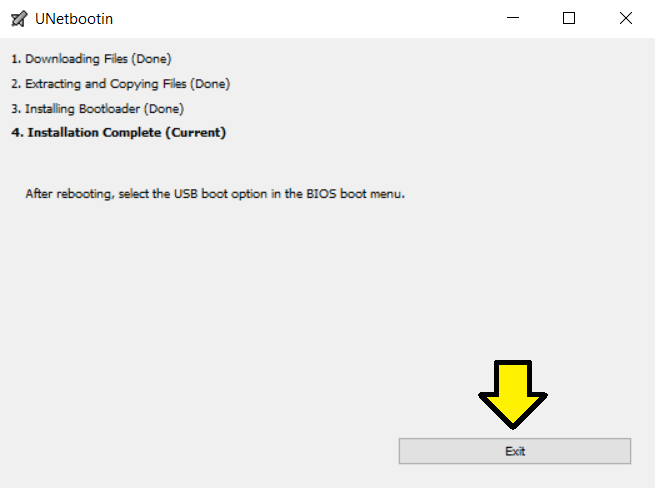
Step 8 of 8: Confirmation screen that drive is finished!
Now press the button labeled "Exit"
NOTE: UNetbootin says, "The created USB device will not boot off a Mac. Insert in into a PC, and select the USB boot option in the BIOS boot menu." This statement is FALSE. After creating these step-by-step screenshots, I really created a bootable flash drive on my Mac Mini. I kept the flash drive inserted in my Mac Mini while rebooting OSX. While the computer was rebooting, I held down the OPTION key. The drive showed up just fine as a bootable device. I was able to successfully run Linux Mint from the flash drive on my Mac Mini. I am using OSX version 10.11.6.
WINDOWS USERS
Step 1 of 8: Start Windows.
- Once Windows is booted and running, insert your flash drive into a USB port.
- Do not format, erase, or do anything with the flash drive.
Step 2 of 8: Run UNetbootin (Windows 10).
- Here is a screenshot of UNetbootin running on Windows 10:
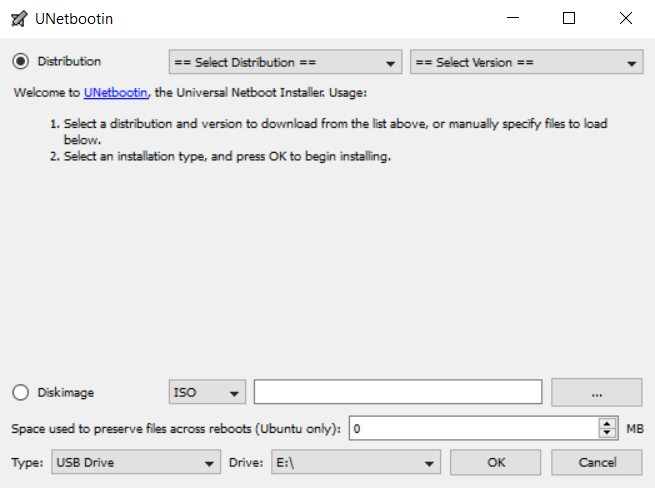
Step 3 of 8: Select radio button labeled "Diskimage" in UNetbootin (Windows 10).
Step 4 of 8: Select browse file button labeled "..." in UNetbootin (Windows 10).
Step 5 of 8: Select the location where you downloaded "linuxmint-18-mate-64bit.iso".
Step 6 of 8: Confirm flash drive is correct drive to write image to.
First pull down menu at bottom of screen should display "USB Drive"
Second pull down menu at bottom of screen should display a drive letter corresponding to your Flash drive. Please confirm this is correct.
Step 7 of 8: Write ISO image to flash drive.
WARNING: YOU ARE ABOUT TO COMPLETELY OVERWRITE YOUR FLASH DRIVE WITH THE ISO IMAGE. YOU WILL LOSE ALL EXISTING DATA (IF ANY) ON YOUR FLASH DRIVE!
Select the OK button "OK"

Step 8 of 8: Confirmation screen that drive is finished!
Now press the button labeled "Exit"
Robert Bruce
Research
Courses
Fall 2016, CS-160:
Lectures:
- What is software engineering?
- Postgres RDBMS (Relational Database Management System)
- Document management
- FFMPEG library and systems programming tools
- Project management
- Processing FORM data from an HTTP POST
- Requirement gathering
- High and low level design
- Secure session management with HTTP
- Programming the Postgres C API (Application Programmer Interface)
- Development
- Active Shape Modelling (ASM) and Active Appearance Modelling (AAM)
- Testing
- Eye pupil tracking
- Deployment, Metrics, and Maintenance
- Drawing with OpenCV
- Delaunay triangles
- Predictive models
- Iterative models
- RAD
Assignments:
- Programming Project 1
- Programming Project 2
- Programming Project 3
- Programming Project 4
- Programming Project 5
- Programming Project 6
- Final Project Oral Presentation
- Final Project Report
Handouts:
- Creating a bootable Linux Mint flash drive
- How to update software on Linux Mint
- How to install and configure the Apache web server on Linux Mint
- How to install and configure the Postgres database server on Linux Mint
- How to build and install Openface on Linux Mint
Programs:
- db_menu
- example_mkdir
- example_fork_exec_pipe
- example_draw_opencv
- example_draw_delaunay_triangles
- example_process_get_form_data
- example_process_post_form_data
Other
