Chris Pollett >
Students >
Periyapatna
( Print
View )
[Bio]
[Deliverable 1 - Hello World Extension]
[Deliverable2 - Capture Events]
Hello World extension to Firefox
Description:
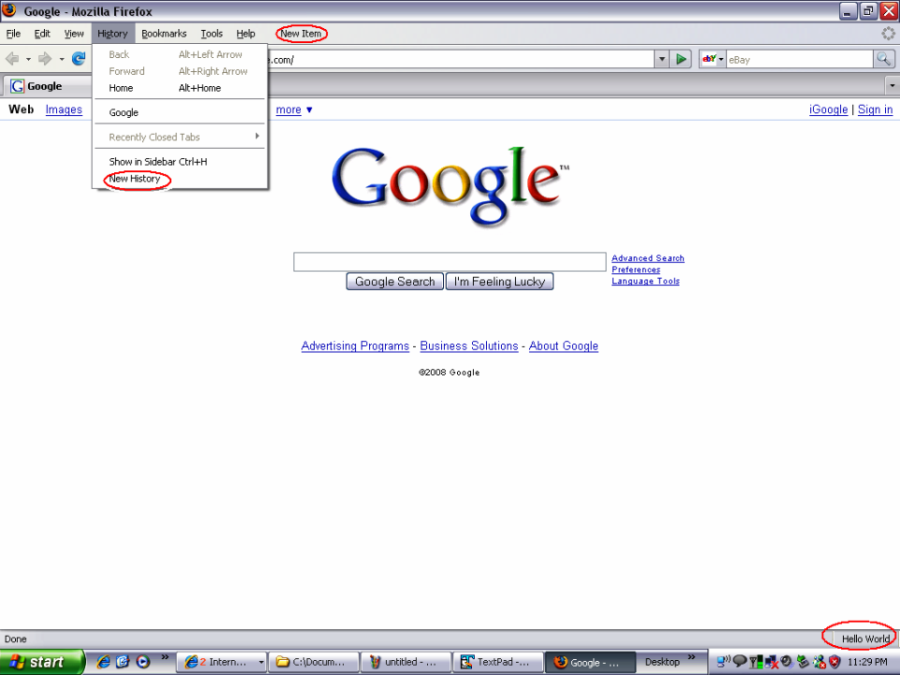
This program is a simple extension to Firefox.The following figure shows a menu item "New History" added to the History menu.
The menubar also has a new menu "New Item" added. Also the status bar panel has string "Hello World" displayed.
Following steps were done to create a sample firefox extension
1:Creating Directory Structure
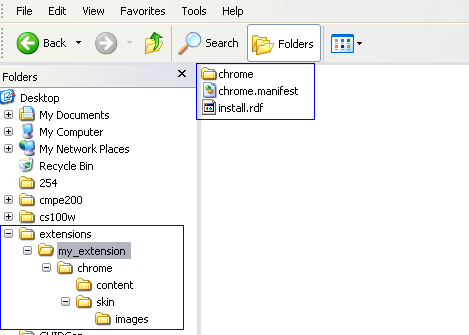
2:Creating install.rdf
Install.rdf is used to determine information about an extension as it is being installed. It contains metadata identifying the extension, providing information about who created it,version, etc. Following is the install.rdf file:
<?xml version="1.0"?>
<RDF xmlns="http://www.w3.org/1999/02/22-rdf-syntax-ns#"
     xmlns:em="http://www.mozilla.org/2004/em-rdf#">
    <Description about="urn:mozilla:install-manifest">
        <!-- Required Items -->
        <em:id>test@mail.com</em:id>
        <em:version>1.0</em:version>
        <em:targetApplication>
            <Description>
                <em:id>{ec8030f7-c20a-464f-9b0e-13a3a9e97384}</em:id>
                <em:minVersion>1.5</em:minVersion>
                <em:maxVersion>2.0.0.*</em:maxVersion>
            </Description>
        </em:targetApplication>
        <!-- Optional Items -->
        <em:creator>Tester</em:creator>
        <em:description>hello world extension.</em:description>
        <em:homepageURL>http://www.mozilla.org/</em:homepageURL>
    </Description>
</RDF>
3:Creating chrome.manifest
The chrome.manifest tells Firefox the location of the chrome packages files and overlays. Overlays attach other UI widgets to XUL documents at run time.
The chrome.manifest files also contains the location of the content directory which has the XUL and JavaScript files, Skin which has the images and CSS files and Locale which has the DTD and .properties files.
Following is the sample chrome.manifest file:
content sample chrome/content/
overlay chrome://browser/content/browser.xul chrome://sample/content/sample.xul
style chrome://global/content/customizeToolbar.xul chrome://sample/skin/test.css
skin sample classic/1.0 chrome/skin/
4:The XUL file
<?xml version="1.0"?>
<overlay id="sample" xmlns="http://www.mozilla.org/keymaster/gatekeeper/there.is.only.xul">

 <!--This displays the "hello world" string in the status bar panel-->
<statusbar id="status-bar">
<statusbarpanel id="my-panel" label="Hello World"/>
</statusbar>

<!--This creates the new menu "New Item"-->
<menubar id="main-menubar">
<menu id="new-menu">
 <menuitem label="New Item"/>
  <menupopup id = "new-item">
  <menuitem label="Add Item" />
  <menuitem label="Clip Item" />
  </menupopup>
  </menu>

<!--This creates the menu item "New History" under History menu -->
   <menupopup id="goPopup">
    <menuitem label = "New History"/>
   </menupopup>

</overlay>
5:Testing your extension
Create a text file and put the path of your extension folder.Save the file with the id of the extension given in your install.rdf file. Save the file in your Profile directory. Start Firefox.
�