As we go through the semester I will periodically try to fix the
terminology I use for things.
One pair of words which we will use a lot and that are often confused is simulator and emulator.
A simulator typically creates an environment via shared libraries that is like the environment
of the mobile phone but which is running the machine code of the desktop.
An emulator is a program which actual reads the machine code for the target device and executes
it in an environment on the desktop that looks like the device.
For iPhone development we use a simulator; for Android we use an emulator.
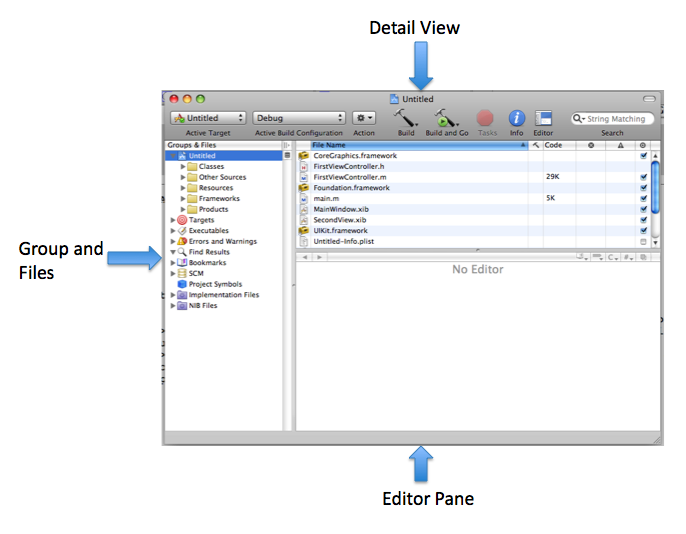
XCode Project Window
More on Each Part of IDE Window
Groups and Files -- organizes all of the resources and settings that make up your project.
Detail -- Gives detailed information about the selected item in the the Groups and Files Pane.
Editor -- If you select a single file in either of Groups and Files or Details, and XCode knows how to display the file then it appears in the editor pane. For source files you can edit them here.
Creating a Simple Project
With the iPhone SDK installed to create a simple new project, go to File > New Project.
Select View-Based Application and give it a name.
A bunch of resources will be automatically created for you in the Groups & Files Pane:
Classes -- this is where the code that you write will go (Objective-C).
Other Sources -- typically won't need to change. When we create a project as above it will contain
a .pch file (pre-compiled header) for your project and a main.m file.
Resources -- contains non-code that is part of your application. For example, icons, images, sounds, movies, text files, and property lists. Some important files that have been automatically generated when we created a new project are:
NameOfProjectController.xib -- contains information used by Interface Builder.
Info.plist -- the Application/Bundle Identifier property needs to match that of your certificate to put on a device, you can set the icon file here.
MainWindow.xib -- main Interface Builder file. For now, we won't modify this.
Frameworks -- libraries which may contain code as well as resources that could be used by our project. Most of the standard frameworks are included in our project by default, so for we don't have to add anything here.
Products -- contains the application that this project produces when it is compiled.
Quiz
Which of the following is true?
iPhones come with more than 1Gb of dynamic (not static) RAM.
Cocoa is a programming language.
Android uses its own custom virtual machine for Java.
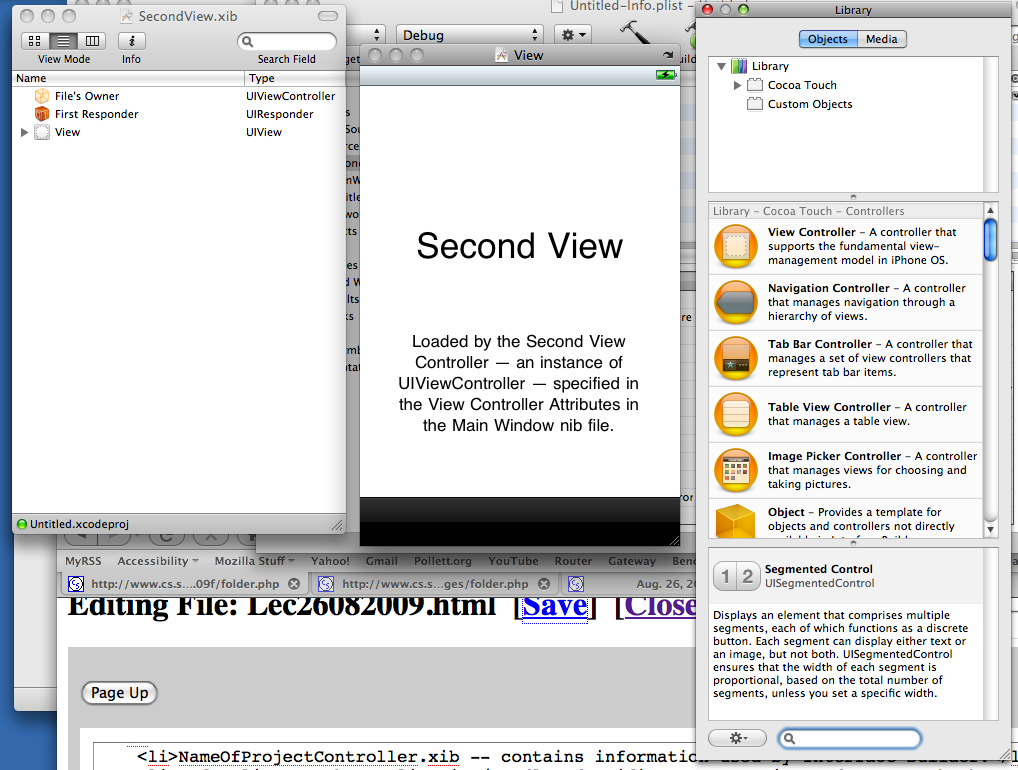
Interface Builder
To see Interface Builder we can go to our Resources group, and double-click on the NameOfProjectController.xib file.
More on Interface Builder
You can develop interfaces for the iPhone either directly in code, or using the Interface Builder.
For example, in code, you can generate a button by having a line like: UIButton *myButton = [[UIButton alloc] initWithFrame:aRect1]
In Interface Builder, you could select a button in the rightmost pane (Library), and drag it to where one wants on the middle pane (View). Clicking on the button you could then add text to it.
Interface builder has been around since the late 80s. Originally, the files edited by Interface Builder were called .nib files. Now Interface Builder supports .nib and .xib (XML-based) files; however, often people call both kinds of files "NIB" files.
The leftmost pane is the nib files main window. Here's what will have been created for us in this Window:
File's Owner -- the object that "owns" this copy of the NIB file. We'll say more about this later.
FirstResponder -- again a fuzzy concept for now -- the object with which the user is currently interacting.
Everything else in this window -- objects that will be created when the NIB file is created. In our case, we get an Icon View. This object is really a subclass of UIView. Clicking on this line will open up
what we have put on the View.
Setting Attributes of a UI Component
To make labels, buttons, etc more interesting, we often want to style them. i.e., we want to set a bunch of the attributes that are used when drawing them.
To do this we can single-click on the item in leftmost pane. Then select Tool > Inspector.
This will pop-up a window that will let us set these attributes.
Compiling Our Program
To compile our program we simply go back to XCode and click the Build and Go icon.
This will launch the iPhone simulator with our program running.
Changing the Application Icon
The icon used in iPhone Home Screen for your project is by default a white square.
To change this, we need to create an 57x 57 pixels .png file of our choice.
We then go to the Resources folder in the Groups & Files pane and add (either via right-clicking
on this folder and selecting to add or via dragging the image to this folder) the image to the folder.
Finally, we single-click on Info.plist and find the Icon File key and type in as a value the name of the file you just added.
Creating an Android Program
Assuming you have downloaded the SDK and installed the Eclipse Plug-in.
Go to File > New > Android Project
Fill-in a project name: Hello
You will be given the option to choose a project target: For now, choose Android 2.2.