A Graphical User Interface for the Stack Machine
Here's a simple GUI for our stack machine:

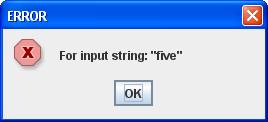
Type 10 in the text field, then click "push". Repeat for 20. Repeat for "five". The following error dialog appears:
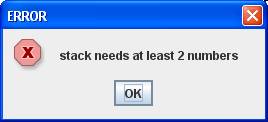
Now click "add". Note that 30 appears in the text field.

Click add again and the following error dialog appears:
Implementing the GUI
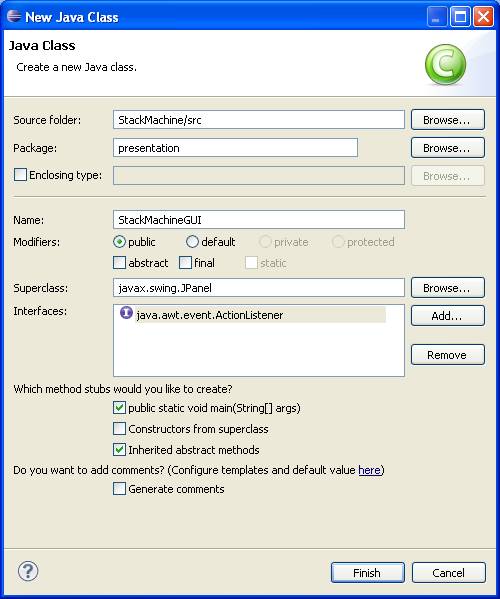
Add a class called StackMachineGUI to the presentation package.
This class should extend javax.swing.JPanel, implement the java.awt.event.ActionListener interface and have a main method.
All of this can be done using the New Java Class dialog:
Here's the code generated:
public class StackMachineGUI extends JPanel implements
ActionListener {
@Override
public
void actionPerformed(ActionEvent e) {
// TODO
Auto-generated method stub
}
/**
* @param args
*/
public
static void
main(String[] args) {
// TODO
Auto-generated method stub
}
}
Adding the Model
The GUI needs a stack machine to execute its commands:
public class StackMachineGUI extends JPanel implements
ActionListener {
private StackMachine sm = new
StackMachine();
In the Model-View-Controller architecture the GUI is the view, the model provides the logic and data (the stack machine in this case) and the listener plays the role of controller (also the GUI in our case).
Adding Controls
The GUI also needs to access the number in the text field displaying the top of the stack.
When the "push" button is clicked, the actionPeroformed method will need to extract the number entered in the text field. Therefore, we need to make this text field a field in the GUI class:
public class StackMachineGUI extends JPanel implements
ActionListener {
private
StackMachine sm = new StackMachine();
private
JTextField top = new
JTextField("empty", 5);
All of the other controls the JLabel and the JButtons, will be created in the constructor:
public
StackMachineGUI() {
add(new
JLabel("top"));
add(top);
JButton button = new JButton("push");
button.addActionListener(this);
add(button);
button = new
JButton("pop");
button.addActionListener(this);
add(button);
// etc,
}
Notice the pattern:
1. a button is created
2. the GUI is added to the button as an action listener
3. the button is added to the GUI as a child
#2 means that every time the button is clicked, the GUI's actionPerformed method will automatically be called.
#3 means that each time the GUI is drawn, the buttons will also be drawn.
Finish this constructor.
Listening to Controls
Each time a button is clicked in a Java GUI, an event object is created and passed to the actionPerformed method of all of the button's listeners.
If a listener listens to several buttons, it must first decide which button was clicked.
Here's a partial implementation:
public void actionPerformed(ActionEvent e) {
String cmmd = e.getActionCommand();
try
{
if
(cmmd.equals("push")) {
Double arg = new Double(top.getText());
sm.push(arg);
} else
if (cmmd.equals("pop")) {
sm.pop();
} else
if (cmmd.equals("add")) {
sm.add();
} else
if (cmmd.equals("mul")) {
//
???
} else
if (cmmd.equals("sub")) {
//
???
} else
if (cmmd.equals("div")) {
//
???
} else {
}
} catch(Exception
ex) {
JOptionPane.showMessageDialog(this, ex.getMessage(), "ERROR", JOptionPane.ERROR_MESSAGE);
}
// display "empty" or top
of stack in top field:
top.setText((sm.size() == 0)?"empty":("" + sm.peek()));
}
Note the usage of:
JOptionPane.showMessageDialog(...)
as a quick way to display a dialog
box containing a message.
Finish the implementation.
Displaying the GUI
Displaying a GUI happens in main. The code is complicated conceptually, but it is boilerplate code that doesn't need to be understood in detail:
public
static void
main(String[] args) {
JFrame viewer = new JFrame();
viewer.setTitle("Stack Machine Calculator");
viewer.setDefaultCloseOperation(JFrame.EXIT_ON_CLOSE);
StackMachineGUI gui = new StackMachineGUI();
viewer.add(gui);
viewer.pack();
viewer.setVisible(true);
}
A JPanel, like StackMachineGUI needs to be added to a desktop window before it can be displayed. The desktop window (an instance of JFrame) provides borders, menu bar, title bar, status bar, scroll bars, etc.
In our example we create a JFrame called viewer. We set the title (which is optional) and specify that the application should be terminated when the red close button in the title bar is clicked.
Next we crerate an instance of StackFrameGUI. This becomes the viewer's content pane in the next line. The call to pack sets the size of the viewer to the minimum size so that all controls will be displayed.
The last line starts a user interface thread that perpetually listens for button clicks. Note that main does not terminate until the close button is clicked.
Layout
Note that a JPanel uses a layout manager to determine where controls should be placed. The default is the flow layout manager. By nesting panels in panels, each with a different layout manager, we can achieve more professional-looking GUIs.
Some IDEs provide graphical (i.e. drag-n-drop) layout tools.