The Internet is a vast and useful source for information and communication. We visit websites to find information about our favorite celebrities. We send silly jokes to our friends through e-mail. We research our term papers through Google and the SJSU Library website. We even register for classes online. This sea of information is arranged in individual web pages, the basis for which lies in HTML. In addition, a special kind of Java program, the Java applet, can be combined with HTML to create a Java program that runs inside the web browser.
In this lab we will learn the basics of HTML and how to build a web page. At the end of this lab you will be asked to submit your own web page, which will include links, images and applets, so make sure to start your sense of creativity working now.
But before we start, there are some terms we need to define:
The http stands for Hyper Text Transfer Protocol. Web servers use this protocol to send pages to your computer.http://www.cs.sjsu.edu
Ok, now that we know all the terms, let’s get to work. If at any point during the lab you encounter a term you’re not familiar with, try to see if it’s defined above.
When surfing the World Wide Web we find web pages that belong to all sorts of entities. Companies have web pages (usually with a .com suffix), colleges, universities and other educational bodies have web pages (usually with a .edu suffix) and government agencies have web pages (with a .gov suffix). In addition, many people have their own personal web pages, where they share their family photos, life stories, hobbies and more. Though there are tools and programs one can use to build a web page without knowing HTML, building a web page “from scratch” using nothing but HTML has its advantages. Not only do you have more control and a wider range of possibilities in designing your web page (you are not limited to the software’s capabilities) but it also sounds so much more impressive when you say “I built my web page by coding HTML.” If, however, you find a better line to impress others, stick with it.
HTML is also not very hard to learn. In fact, let’s see just how easy it is. Open your favorite text editor (WORD, Notepad, TextPad or any other text editor) and input the following text:
<HTML>
<BODY>
This is soooo easy!!!
</BODY>
</HTML>
Save your file under the name first.html in your working directory. Now look at the content of this directory, find that HTML file and double-click on it (it should open using your web browser). Doesn’t look like a very impressive web page, but we’ll fix that soon enough.
HTML consists of tags - reserved words between the ‘<’ and the ‘>’ characters. Each tag declares the beginning of some action. For example, the <HTML> tag declares the beginning of the HTML document, and the <BODY> tag declares the beginning of the body of the document (as opposed to other parts of the document, explanation to follow). Each action will continue from the moment the tag appears in the text until the matching closing tag appears. A closing tag is just like its matching opening tag, only it has a ‘/’ character in it. For example, the </HTML> tag declares the end of the HTML document. By the way, the convention is to use upper-case letters for the HTML tags, but this is not an HTML requirement. That is, HTML is not case-sensitive.
When you open your HTML file using a text editor, the tags are interpreted as regular text. However, when you open the exact same file using a web browser, the tags are interpreted, the action they define is performed and the tags themselves are not shown as part of the file’s text. But keep in mind, the contents of the file is exactly the same in both cases; the difference is in how each software interprets and displays the contents of the file.
Many tags have attributes, a kind of variables whose value can be changed. For example, the <BODY> tag has the BGCOLOR attribute, which controls the color of the background. It can be assigned any number of values, such as RED, LIGHTBLUE etc. Go back to your first.html file and change the second line to
<BODY BGCOLOR=RED>
Now reload your file. Is the background red? Take a few minutes and experiment with other colors until you find the one you like best.
Ok, let’s go one step further. In order to make our web page a bit more interesting we need to look at some more basic tags (at the end of this lab you will find an index of some basic HTML tags with their more important attributes). Create an HTML file called quotes.html with the following content:
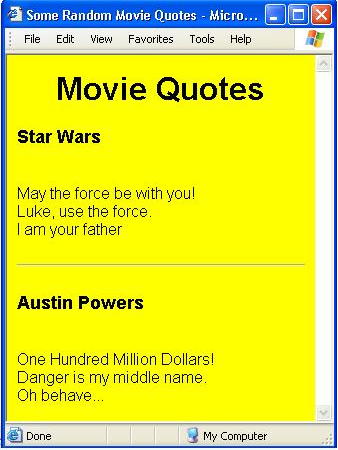
<HTML>
<HEAD>
<TITLE>Some Random Movie Quotes</TITLE>
</HEAD>

<BODY BGCOLOR=YELLOW>
<H1 ALIGN=CENTER>Movie Quotes</H1>

<P><H3>Star Wars</H3>
<BR>May the force be with you!
<BR>Luke, use the force.
<BR>I am your father

<P>
<HR>

<P><H3>Austin Powers</H3>
<BR>One Hundred Million Dollars!
<BR>Danger is my middle name.
<BR>Oh behave...

</BODY>
</HTML>
Now load the HTML file using your web browser. You should see the following (there may be some slight differences, depending on the browser you use):
Now let’s compare our text version with the web page and try to see what each tag does. We already know what the <HTML> and <BODY> tags do. The <HEAD> tag defines the document’s header, as opposed to the document’s body. Anything between this tag and it’s corresponding closing tag would be part of the file’s header.
Problem 1: (0.5 points) What does the <TITLE> tag do? Find the place in your web page where the <TITLE> tag affects the display of the file. Write your answer in a file called title.txt and save it.
Once we are inside the document’s body we find two similar tags - <H1> and <H3>. These are heading tags and there are six of them (<H1> through <H6>). Note the differences in size between the text in the <H1> tag and the one in the <H3> tag. The header tags can be used with the ALIGN attribute. By stating <H1 ALIGN=CENTER> we tell the web browser to put the text between the opening and closing header tags in the center of the line in the browser’s window. We could also give the ALIGN attribute the values LEFT and RIGHT. If no value is stated, as in our <H3> tag a few lines below, the default value LEFT is assigned. It is very important not to forget the closing tag for the header tags. If we forget, for example, to close the <H1> tag our entire document would be in large fonts and centered.
Let’s do an experiment. Go back to your quotes.html file and remove the closing tag </H1>. Now reload your file. A bit of a mess, right? Change it back. By the way, we encourage you to experiment with deliberately omitting closing tags, just to see what happens. It’s by far the best way to learn the function and importance of the various HTML tags. Go wild.
The <P> tag declares the beginning of a new paragraph. That means your browser will make sure to leave one or two blank lines before continuing. The closing tag, </P>, can be used to denote the end of a paragraph. However, you can completely ignore this closing tag, since declaring a new paragraph with the <P> tag means that the previous paragraph has ended.
Problem 2: (0.5 points) Here’s a pop quiz for you. What do the <BR> and the <HR> tags do? Write your answer in a file called pop_quiz.txt and save it.
Problem 3: (1 point) Make a web page of your favorite movie quotes of all times, including the name of the movies they are taken from.. Feel free to use the file quotes.html as a template if you want. Make sure to choose a cool color for the background and try to make the page look as interesting as you can. Save your file under the name movieQuotes.html.
Like Java, HTML ignores white space. We can have our file formatted in a certain way when viewed in our text editor. However, since line breaks and new paragraphs are determined by the web browser according to the proper HTML tags our file can be written all in one paragraph, without return characters:
<HTML><HEAD><TITLE>Some Random Movie Quotes</TITLE></HEAD><BODY BGCOLOR=YELLOW><H1 ALIGN=CENTER>Movie Quotes</H1><P><H3>Star Wars</H3><BR>May the force be with you!<BR>Luke, use the force.<BR>I am you father<P><HR><P><H3>Austin Powers</H3><BR>One Hundred Million Dollars!<BR>Danger is my middle name.<BR>Oh behave...</BODY></HTML>
Though the web browser will display the exact same output, for the sake of readability you should follow a more readable pattern.
While on the subject of readability, you may want to comment your HTML code. For example, if you are using tags that are not very popular and familiar, or if you are imbedding Java applets or JavaScript commands into your web page, you may want to enter some comments to explain your code, just like you do in your Java programs. To enter a comment in your HTML file use the following format:
... <!-- This is a comment, you can look as hard as you want, you will not find it in the web page. --> ...
Here are some useful tags for layout control: <CITE>, <BLOCKQUOTE>, <STRONG>, <EM>, <B>, <U> and <I>. All these tags come to make some text stand out from the rest of the text, usually since it is a quote or simply for emphasis. The first four tags are browser dependant. That is, each browser may display a citation or a block-quote in a slightly different way - bold font, italic, centered etc. The last three tags will always result in the exact same thing - <B> for bold face font, <U> for underlined text and <I> for italicized text. Also, the <FONT> tag enables us to control the size, style and color of fonts using the attributes SIZE, FACE and COLOR.
Let’s look at an example. Look at the following HTML code and the resulting web page and try to see exactly what each tag does:
<HTML>
<HEAD>
<TITLE>Some Thoughts about Harry Potter</TITLE>
</HEAD>

<BODY BGCOLOR=LIGHTBLUE>
<H1 ALIGN=CENTER><FONT COLOR=DARKRED SIZE=5>Some Thoughts About
Harry Potter</FONT></H1>

<P>
<FONT COLOR=DARKGREEN>
Did you know that in the book <CITE>Harry Potter and the Sorcerer's
Stone</CITE> there is more than one <I>Quidditch</I> game?
In the movie with the same name there is only <EM>one</EM> such
game.

<P>
<FONT COLOR=ORANGERED>
Have you <STRONG>ever</STRONG> played Quidditch? In an interview
with Oliver Wood, the captain of the Griffindor Quidditch team, Wood said:

<BLOCKQUOTE><FONT COLOR=PURPLE>I don't think Quidditch is a very
dangerous sport. It's true that every once in a while one of the players will
totally vanish, but usually they are found a month or two later in some remote
province in Romania, usually in a dragon's nest.</FONT></BLOCKQUOTE>

I Don't know, sounds pretty dangerous to me, so if you play Quidditch <U>make
sure to wear a helmet</U> and maybe take some <B>Anti-Dragon</B>
spray with you.

</BODY>
</HTML>
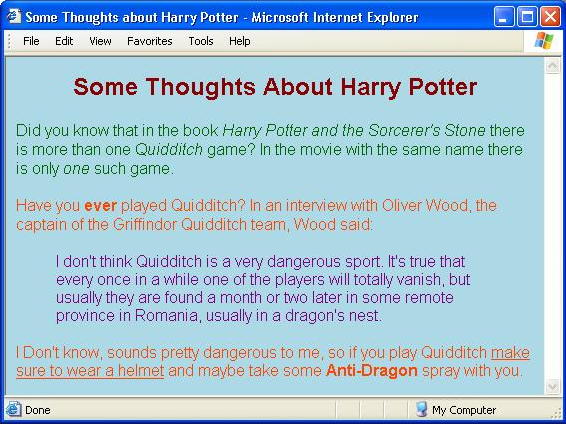
Note that inside both the <H1> and the <BLOCKQUOTE> tags we have a <FONT> tag. Nested tags are allowed and thus we have even more control over the design of our web page.
Problem 4: (1 point) build a web page using the various tags introduced in this section. The title of your page should be “My favorite food of all times.” Again, make sure to make your page interesting and visually appealing. Save your web page as yummyFood.html.
What if you wanted to build a web page that presents some Java code? Since HTML ignores white space, you would have to insert many <BR> tags and tab characters (   inserts three non-breaking white spaces). That would make life kinda hard:
<HTML> <HEAD> <TITLE>Hello World</TITLE> </HEAD> <BODY> <FONT FACE=COURIER NEW> <P> public class Hello <BR>{ <BR>  public static void main(String[] args) <BR>  { <BR>    System.out.println("Hello World"); <BR>  } <BR>} </BODY> </HTML>
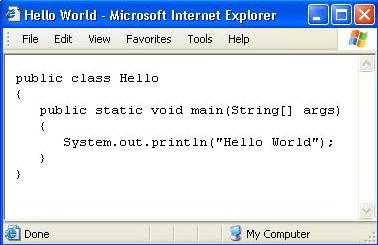
It is a lot easier to use the <PRE> tag, which makes sure to leave the text in the exact same format it is in the text editor. This way you just enter the text the way you want it to be presented:
<HTML>
<HEAD>
<TITLE>Hello World</TITLE>
</HEAD>

<BODY>
<FONT FACE=COURIER NEW>

<P>
<PRE>
public class Hello
{
   public static void main(String[] args)
   {
      System.out.println("Hello World");
   }
}
</PRE>

</BODY>
</HTML>
In both cases the result is exactly the same:
Problem 5: (1 point) Build a web page displaying the above “Hello World” program. Make sure you are using a mono-space font, like COURIER NEW. Also, make sure the words are displayed in color, just like in TextPad - blue for reserved words, red for parenthesis, braces and brackets, darkblue for the words String and System and Teal for the string itself. Save your file as hello.html.
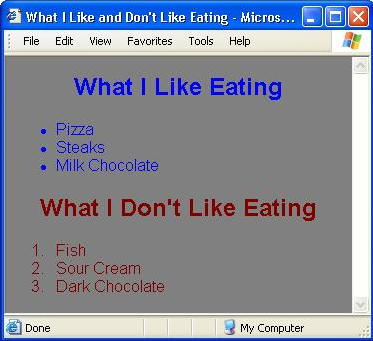
The <UL> and <OL> tags are used to create unordered and ordered list, respectively, using the <LI> tag for the actual bullets:
<HTML>
<HEAD>
<TITLE>What I Like and Don't Like Eating</TITLE>
</HEAD>

<BODY BGCOLOR=GRAY>
<FONT COLOR=BLUE>
<H2 ALIGN=CENTER>What I Like Eating</H2>

<P>
<UL>
   <LI>Pizza
   <LI>Steaks
   <LI>Milk Chocolate
</UL>
</FONT>

<P>
<FONT COLOR=MAROON>
<H2 ALIGN=CENTER>What I Don't Like Eating</H2>
<OL>
   <LI>Fish
   <LI>Sour Cream
   <LI>Dark Chocolate
</OL>
</FONT>

</BODY>
</HTML>
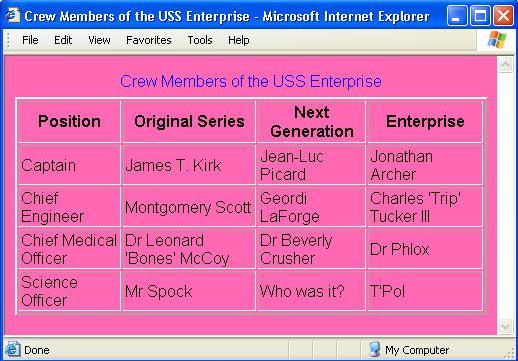
To create tables we use the following tags: <TABLE> to declare the beginning and end of a table, <TR> to declare the beginning and end of a table row, <TH> for the table column headers and <TD> for the data in the column:
<HTML>
<HEAD>
<TITLE>Crew Members of the USS Enterprise</TITLE>
</HEAD>

<BODY BGCOLOR=HOTPINK>
<TABLE BORDER=2 ALIGN=CENTER>
<CAPTION><FONT COLOR=BLUE>Crew Members of the USS
Enterprise</FONT></CAPTION>
   <TR>
      <TH>Position</TH>
      <TH>Original Series</TH>
      <TH>Next Generation</TH>
      <TH>Enterprise</TH>
   </TR>
   <TR>
      <TD>Captain</TD>
      <TD>James T. Kirk</TD>
      <TD>Jean-Luc Picard</TD>
      <TD>Jonathan Archer</TD>
   </TR>
   <TR>
      <TD>Chief Engineer</TD>
      <TD>Montgomery Scott</TD>
      <TD>Geordi LaForge</TD>
      <TD>Charles 'Trip' Tucker III</TD>
   </TR>
   <TR>
      <TD>Chief Medical Officer</TD>
      <TD>Dr Leonard 'Bones' McCoy</TD>
      <TD>Dr Beverly Crusher</TD>
      <TD>Dr Phlox</TD>
   </TR>
   <TR>
      <TD>Science Officer</TD>
      <TD>Mr. Spock</TD>
      <TD>Who was it?</TD>
      <TD>T'Pol</TD>
   </TR>
</TABLE>

</BODY>
</HTML>
Problem 6: (1.5 point) Build a web page that contains an unordered list of your 5 favorite songs of all times, an ordered list of your 5 favorite movies of all times and a table showing all the classes you are taking this semester, and what you plan to take in the following two semesters. Save the file under the name favorites.html.
Now comes the fun part. So far our web pages had only textual elements. Informative, but a bit boring. The <IMAGE> tag helps us make our web pages a bit more alive and interesting by adding images of type .gif or .jpg (or .jpeg) to our documents. Using the various attributes of the <IMAGE> tag we control the image. The SRC attribute gives the complete or relative address (or URL) of the image file, ALT provides text that would appear if the image does not load (in case of error or if the browser is set to not load images). The HEIGHT and WIDTH attributes control the size and receive numerical values. It is possible to use the WIDTH attribute with a percentage, thus setting WIDTH to be, for example, 80% would stretch the image to be 80% of the browser window’s width, while keeping the image’s height in proper ratio to its width.
It is important to use the SRC attribute wisely, and we highly recommand using reltive addresses. Let's look at a common problem with the SRC attribute. Let's assume that you are now at your working directory:
and let's say that you have an image called answersToFinalExam.jpg in a subdirectory:J:\myDirectory
One way to include that image in your HTML document is using the complete address of the image:J:\myDirectory\images\answersToFinalExam.jpg
Now, when you finish working on your HTML document and you want to submit it to your lab instructor, you copy all your files to a floppy. Now your floppy contains your HTML document, a sub directory called images and in it the image answersToFinalExam.jpg in that subdirectory. But now, when your lab instructor opens your HTML document (probably on his computer, not on yours) the image will not load. Why?<IMG SRC="J:\myDirectory\images\answersToFinalExam.jpg" WIDTH=50% BORDER=2>
but your HTML file is now used on a different computer where there may not be a J drive, and so the browser cannot find the specified image in that location. The solution is to provide the relative address in the SRC attribute. Since your floppy does contain a subdirectory with the correct image in it, simply do the following:J:\myDirectory\images\answersToFinalExam.jpg
This way, the browser searches for the subdirectory images in the working directory (which is where your HTML document is placed).<IMG SRC="images\answersToFinalExam.jpg" WIDTH=50% BORDER=2>
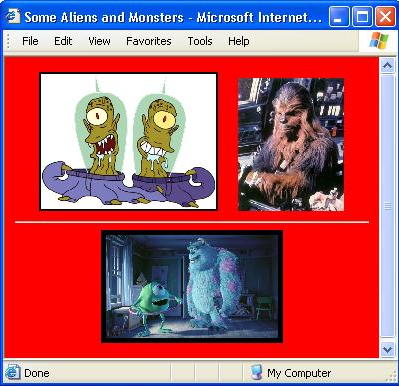
Look at the following code and output and try to find out what the BORDER attribute and the <CENTER> tag do:
<HTML>
<HEAD>
<TITLE>Some Aliens and Monsters</TITLE>
</HEAD>

<BODY BGCOLOR=RED>
<CENTER>
<IMG SRC="kangkodos.gif" WIDTH=50% BORDER=2>

<IMG SRC="chewie.jpg" WIDTH=30% BORDER=0>
<HR>
<IMG SRC="MonstersInc.jpg" WIDTH=50% BORDER=5>
</CENTER>

</BODY>
</HTML>
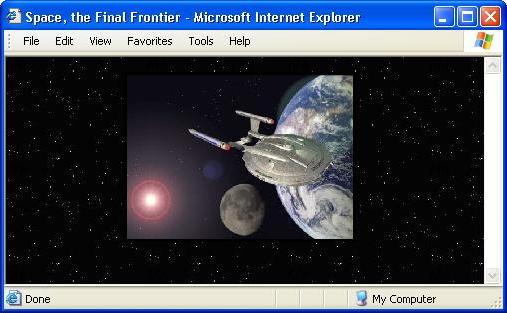
While on the topic of images, we can use them for the document’s background. The <BODY> tag has the BACKGROUND attribute, which can be set to point to an image, thus setting it to be the background. For example, we have a file called Space.jpg. When we double click it this is what we see:

Now let’s set this file to be our background:
<HTML>
<HEAD>
<TITLE>Space, the Final Frontier</TITLE>
</HEAD>

<BODY BACKGROUND="Space.jpg">
<CENTER>
<IMG SRC="enterprise.jpg" WIDTH=50% BORDER=3>
</CENTER>

</BODY>
</HTML>
Problem 7: (1.5 point) It is possible to “borrow” images from other web pages. Since these images may be copyright material we may not use them for any commercial purposes, but we can use them for personal purposes. We can right-click on an image and choose the Save Picture As option (or Save Background As if it’s the background we’re interested in). Surf the web and find some images of your hometown or home country. Using the <IMAGE> tag and other elements build a web page that introduces and describes your hometown or home country. Save your file as home.html.
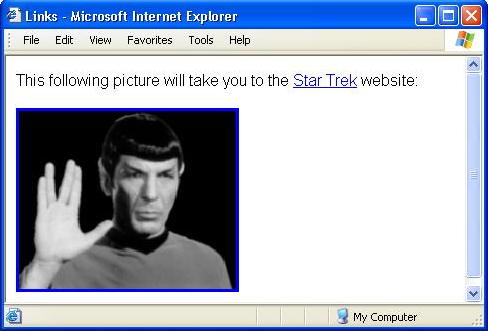
When we defined a web page way back in the beginning of this lab, we claimed it contains links to other documents. This is done using the <A> tag with its HREF attribute. We can use both text and images as links, as shown in the next example:
<HTML>
<HEAD>
<TITLE>Links</TITLE>
</HEAD>

<BODY>
This following picture will take you to the
<A HREF="http://www.startrek.com">Star Trek</A> website:
<p>
<A HREF="http://www.startrek.com"><IMG SRC="spock.jpg" WIDTH=50% BORDER=3></A>

</BODY>
</HTML>
If you want to add a link that would automatically send e-mail to a specific address you need to follow this pattern, exchanging email@sjsu.edu with the correct address you need.
<A HREF=”mailto:email@sjsu.edu”>email@sjsu.edu</A>
Problem 8: (2 points) Using all the tools you know by now, link all your pages together. Build a web page called index.html from which you will use text and/or images as links to the previous pages you built - movieQuotes.html, yummyFood.html, hello.html, favorites.html and home.html. Make sure to use descriptive text and proper images for your links. Also, add your name and your e-mail address (using mailto) at the bottom of the index.html page.
And here is where all this connects to Java.
A Java applet is a Java program that runs when you view a web page that has an
<APPLET> or
<OBJECT> tag embedded in the page. This is very useful,
since we can put Java programs on the web and create some fun interactive graphics. The <APPLET> tag allows us to specify the location
of the .class file we want to run and the height and width of our applet inside
the page. In addition, we can specify the values of various parameters (such as a String we would like the applet to print, see example below) we have inside our applet and give alternate
HTML code, in case the browser does not support applets.
Let’s look at a simple example. First, here is the HTML code:
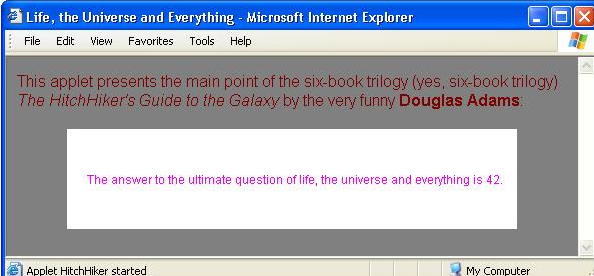
<HTML>
<HEAD>
<TITLE>Life, the Universe and Everything</TITLE>
</HEAD>

<BODY BGCOLOR=GRAY>
<FONT COLOR=MAROON>
This applet presents the main point of the six-book trilogy
(yes, six-book trilogy) <CITE>The HitchHiker's Guide
to the Galaxy</CITE> by the very funny <STRONG>Douglas
Adams </STRONG>:
</FONT>
<CENTER>

<P>
<APPLET CODE="HitchHiker.class" WIDTH=450 HEIGHT=100>
   <PARAM NAME="ANSWER" VALUE="The answer to the ultimate
     question of life, the universe and everything is 42.">
   Oops, your browser does not support applets.
</APPLET>
</CENTER>

</BODY>
</HTML>
Now here’s the .java file:
/**
   This class defines an applet.
   @author  Zaphod Beeblebrox
   @version 1.0
*/

import java.applet.Applet;
import java.awt.Color;
import java.awt.Graphics;

public class HitchHiker extends Applet
{
   public void start()
   {
	answer = getParameter("ANSWER");
	showStatus(answer);
   }

   public void paint(Graphics g)
   {
	g.setColor(Color.RED);
	g.drawString(answer, 20, 55);
   }

   // instance fields:
   private String answer;
}
Once you compile the .java file and you have both a .class file and an HTML file referencing this .class file you can run the applet. If you are using TextPad you can choose the Run Java Applet (CTRL+3) from the Tools menu. Either way, you can simply double-click the HTML file and view your applet. And here is the result you should get:
Problem 9: (1 point) Create an applet of your choice. Feel free to use the above example as a template. Save the applet in the files CoolApplet.java and coolApplet.html, and make sure to add a link from your index.html page to the coolApplet.html page.
Submit the following files to the instructor. (Follow your instructor's guidelines to submit the files.)