Description: In this deliverable I will explain how to Install and work with the Wiki system in MediaWiki
MediaWiki is an open source software developed by the Wikimedia Foundation. Currently, MediaWiki powers thousands of websites, Including the Wikipedia website. It was first developed to serve the needs of Wikipedia.
First step to Install MediaWiki is to look at the requirements. MediaWiki requires a web-server that can process PHP server side scripts and a Relational Database like MySQL.
My current hosting setup is like below :
Server: LAMP (Linux, Apache, MySQL, PHP)
SSH Client : iTerm on Mac OSX
Server Control Panel Interface: Cpanel
First we can download MediaWiki from its official source.
$ wget http://releases.wikimedia.org/mediawiki/1.22/mediawiki-1.22.3.tar.gz
Untar the gzip archive
$ tar zxvf mediawiki-1.22.3.tar.gz
Rename extracted folder and change directory.
$ mv mediawiki-1.22.3 mediawiki && cd mediawiki
Chmod all files to 644 and all directories to 755
$ find . -type f -print0 | xargs -0 chmod 0644
$ find . -type d -print0 | xargs -0 chmod 0755
A subdomain "mediawiki.pinapala.com" is already setup to point to the directory MediaWiki. So we can now point the web browser to mediawiki.pinapala.com. MediaWiki will now guide us through a guided, web-based installation.
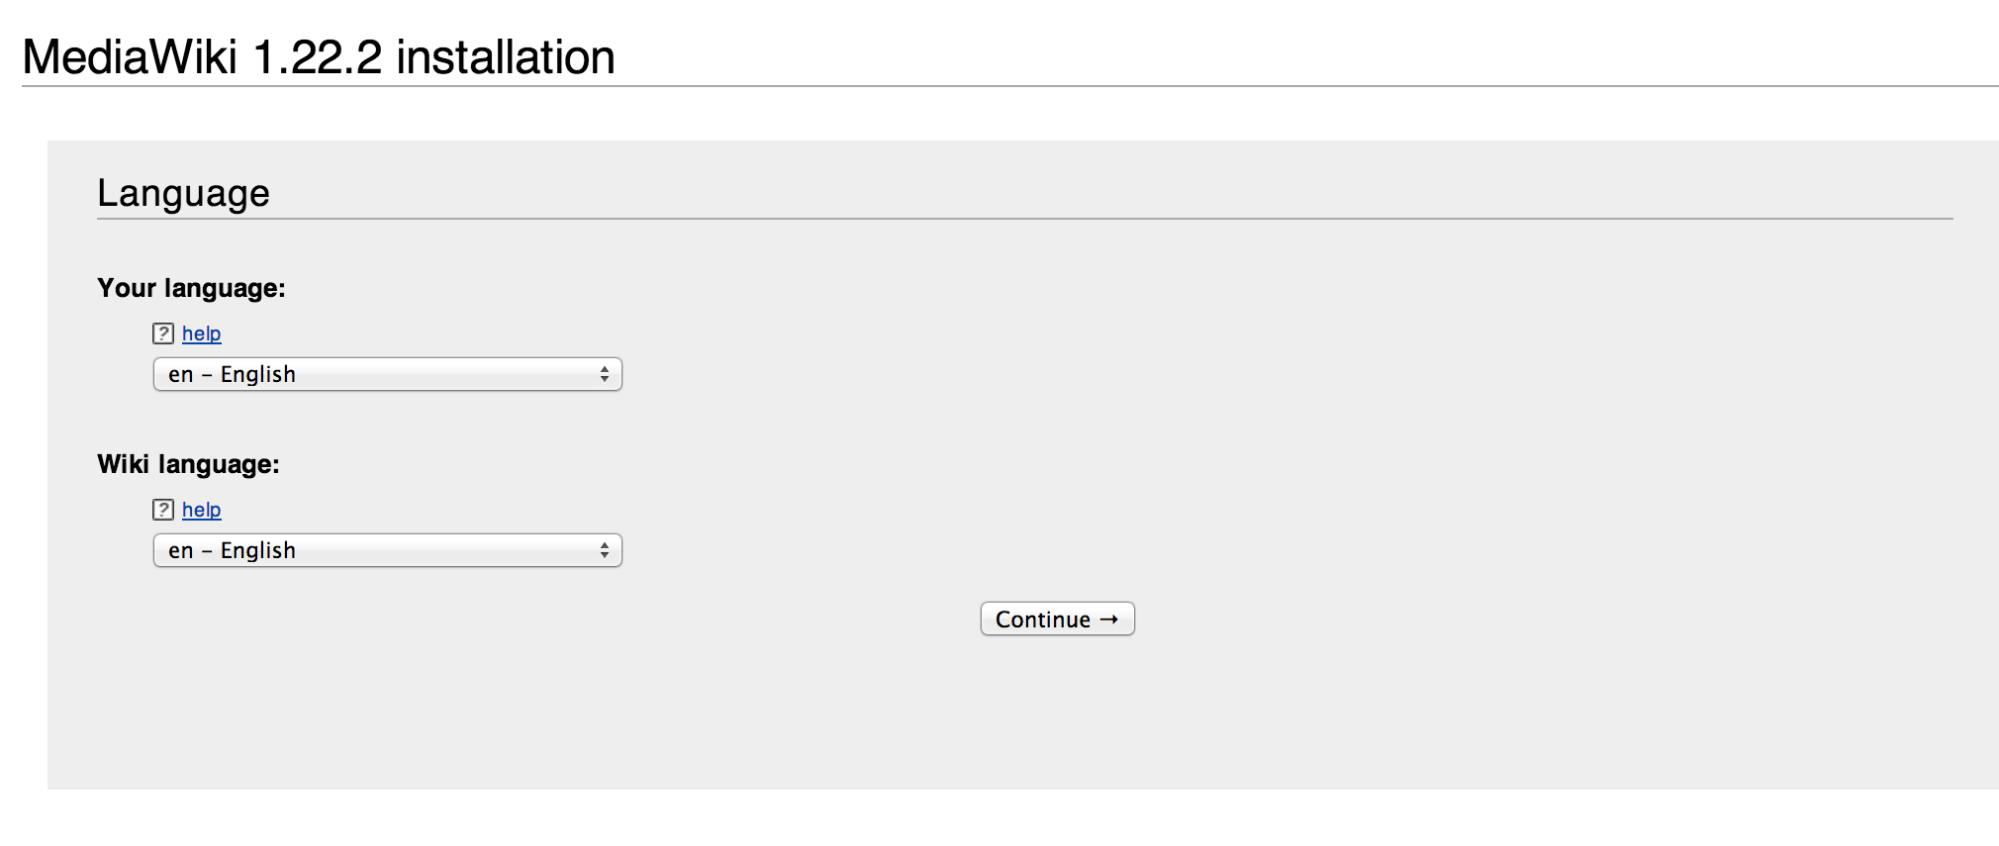
First step is to select the language for the wiki installation.
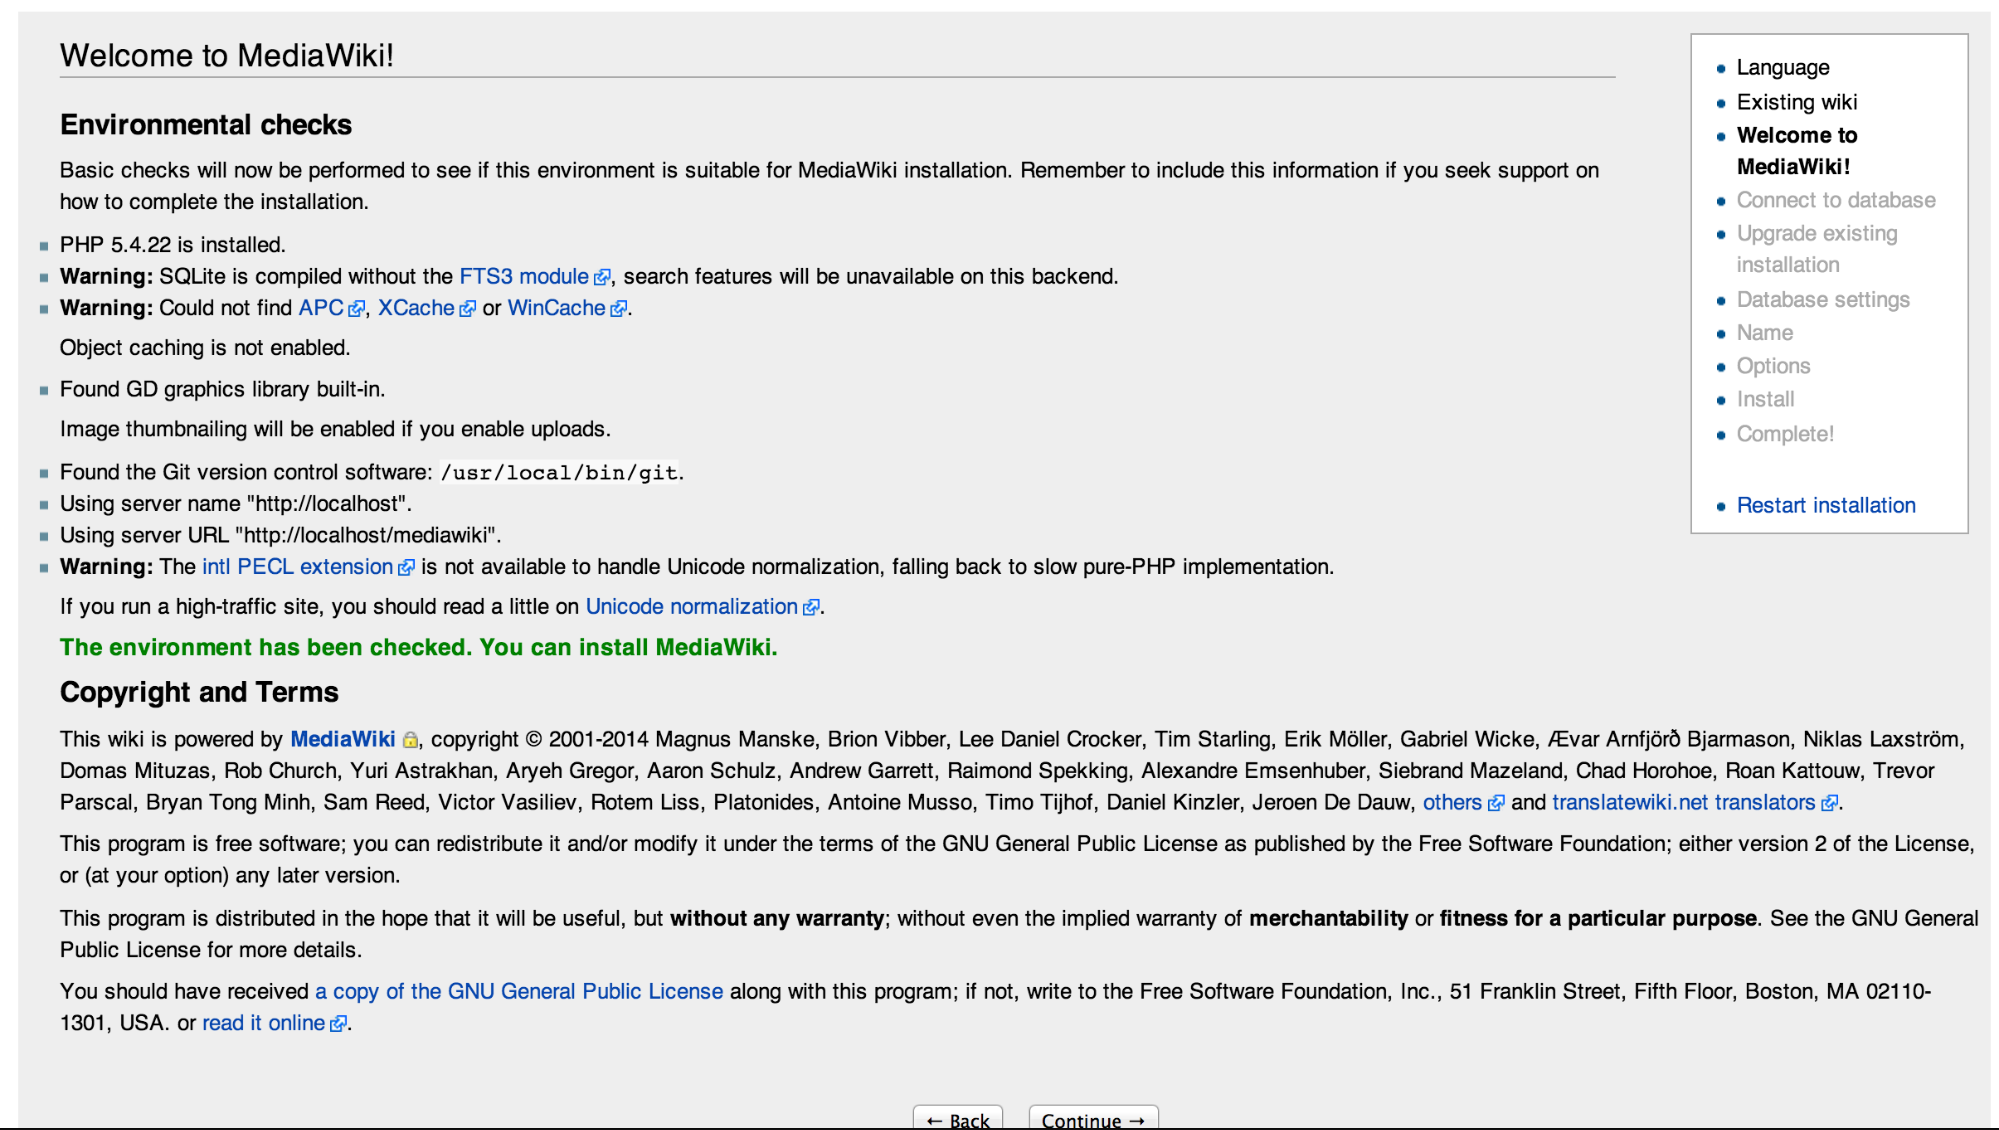
After selecting the language, MediaWiki performs environmental checks and displays a summary of the environment status.
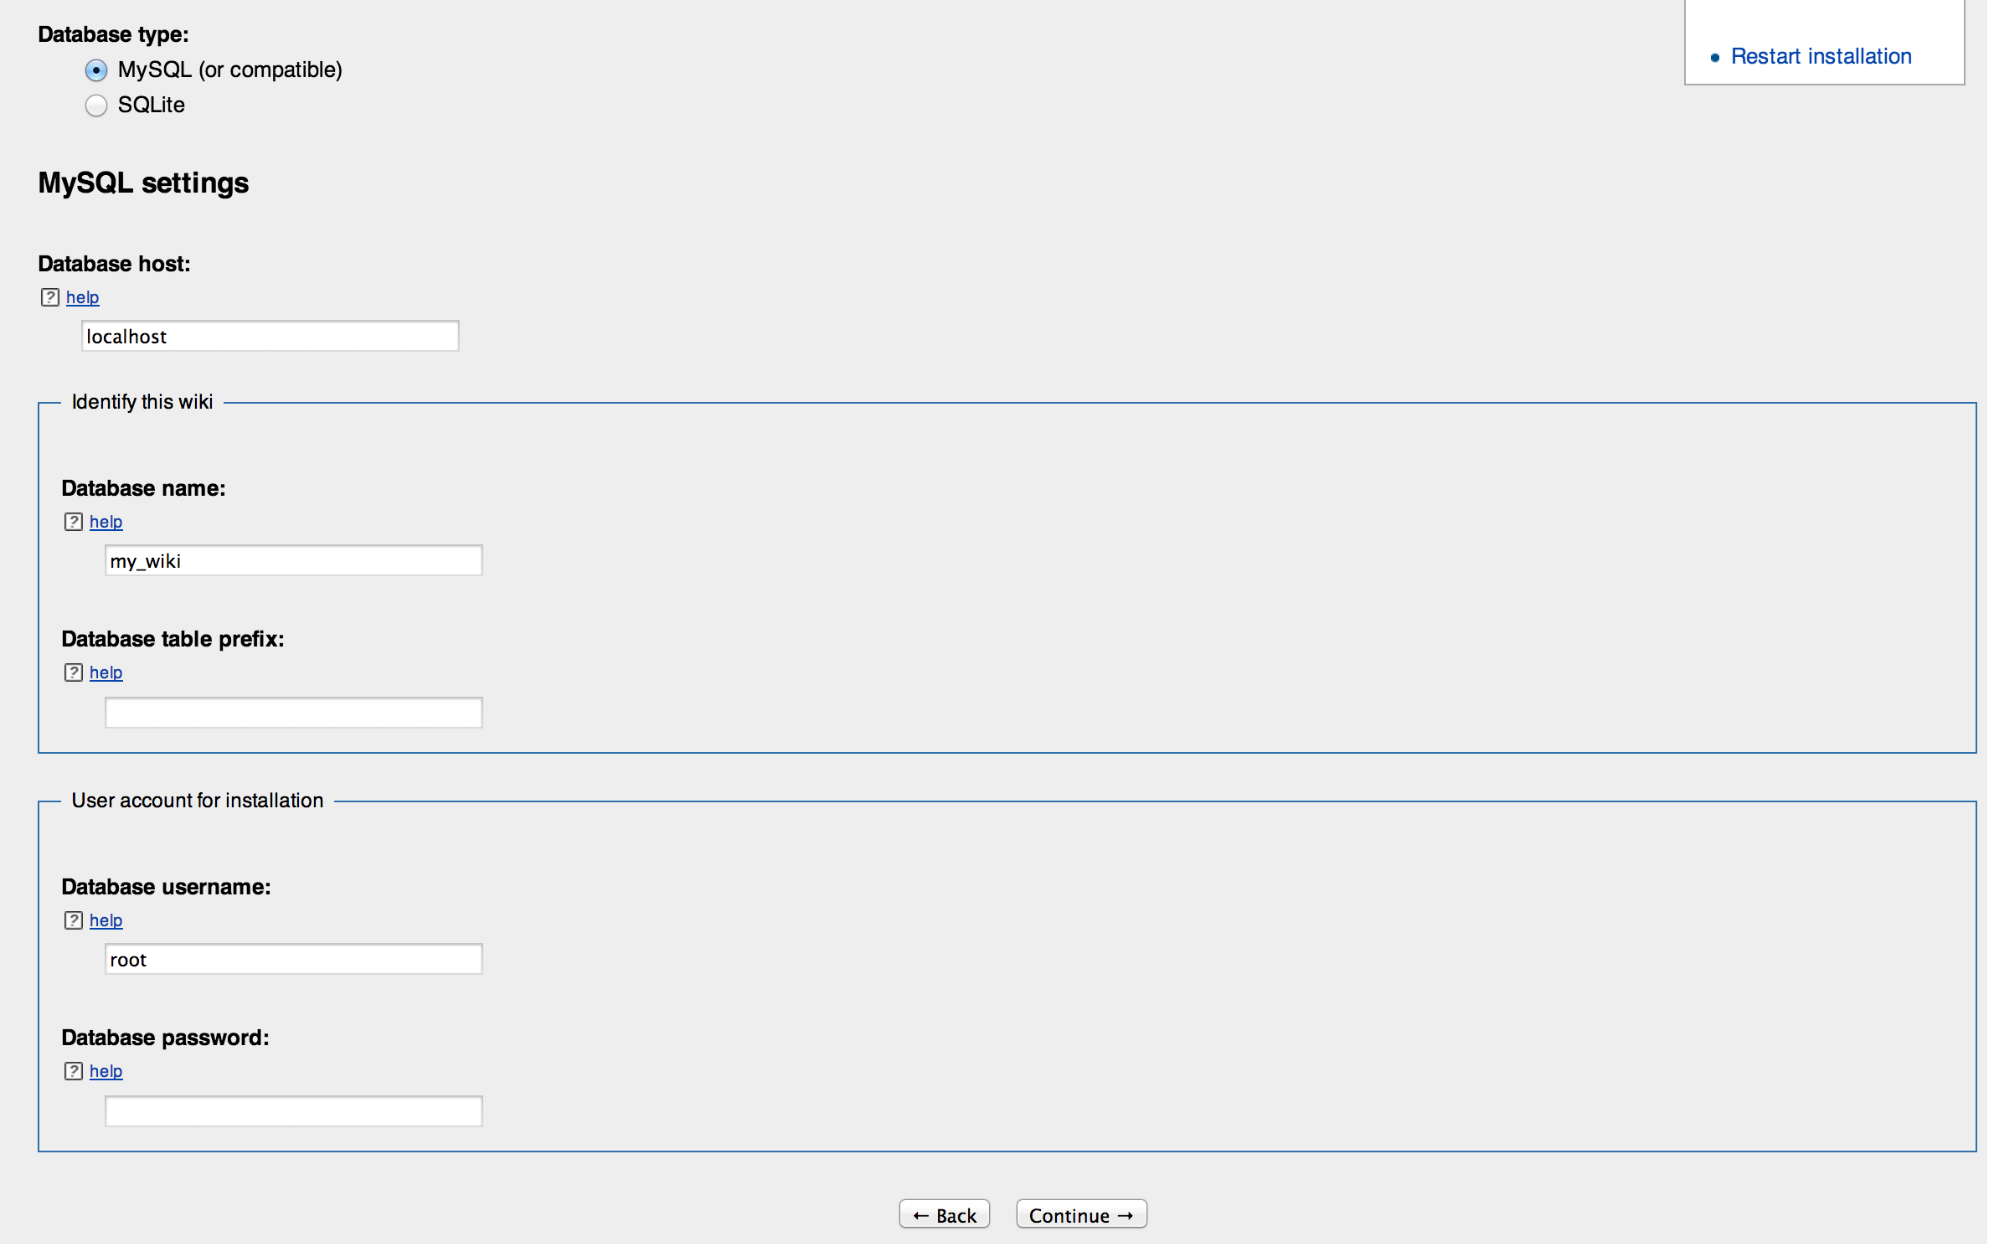
MediaWiki supports SQLite and MySQL. In the next step MediaWiki presents an interface to
enter the Database information.
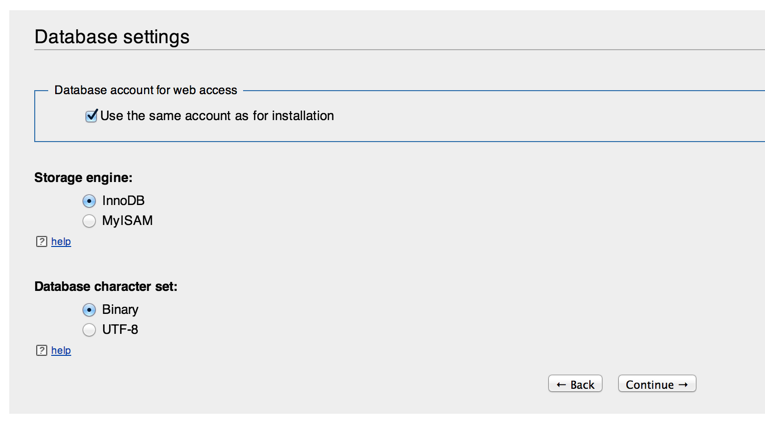
The next step where we can select the storage engine. We can chose between MyISAM or InnoDB for MySQL.
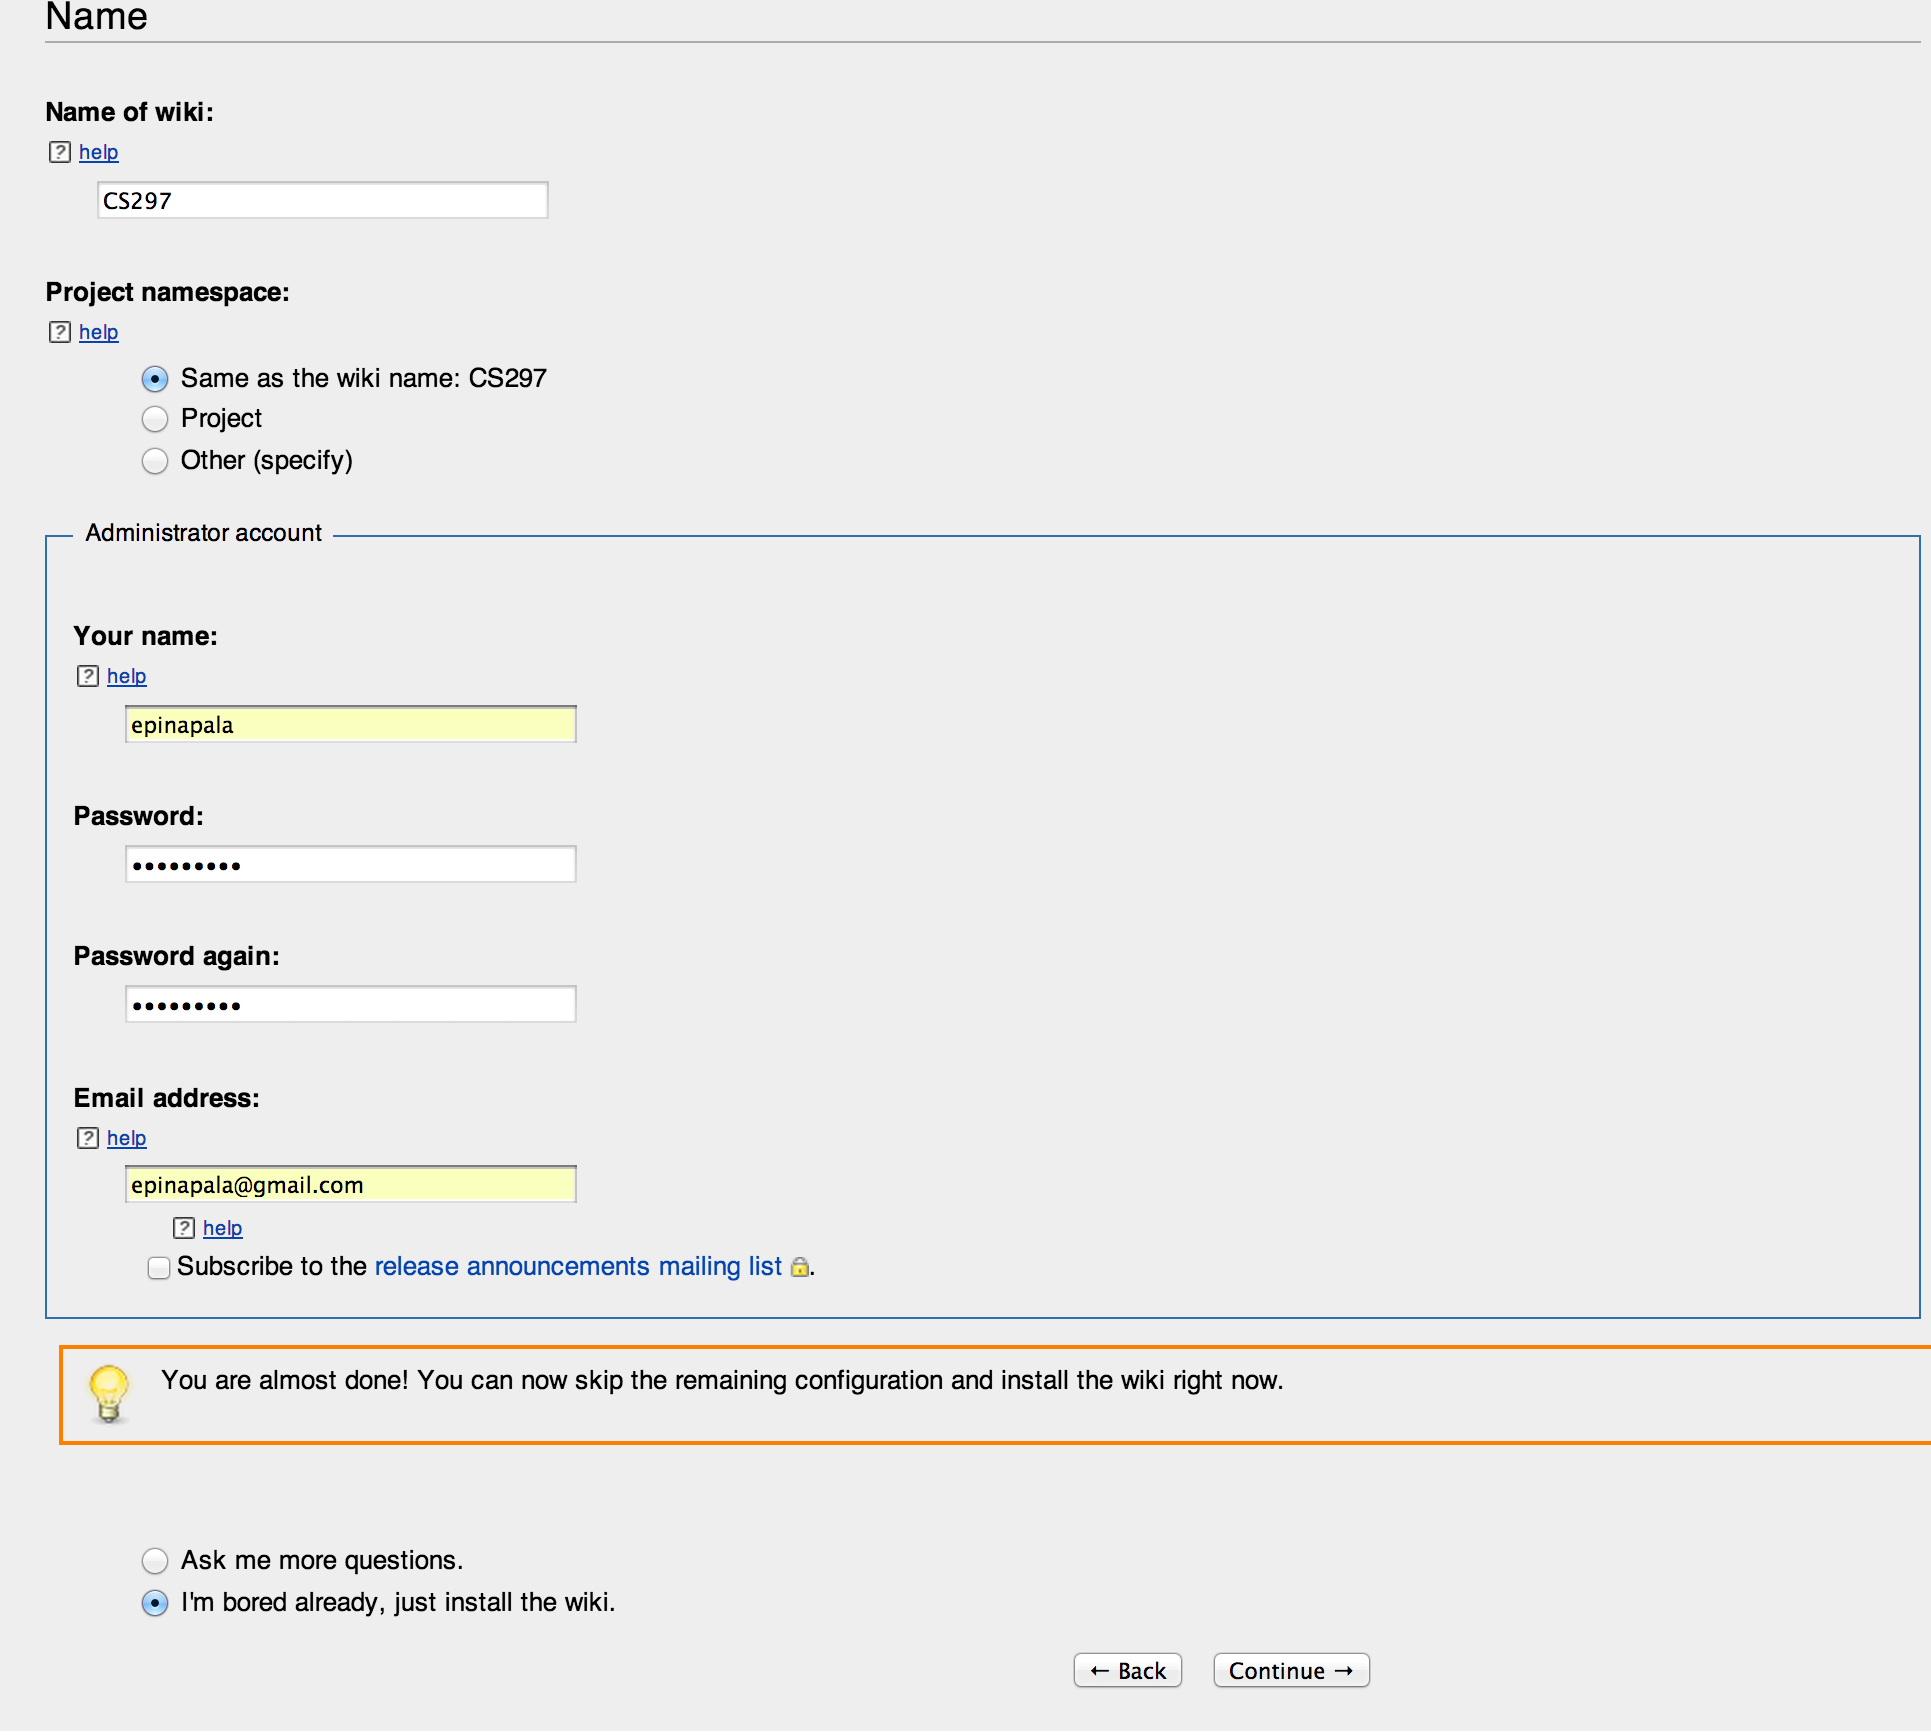
The Last step is to enter the administrator details to logon to MediaWiki by default.
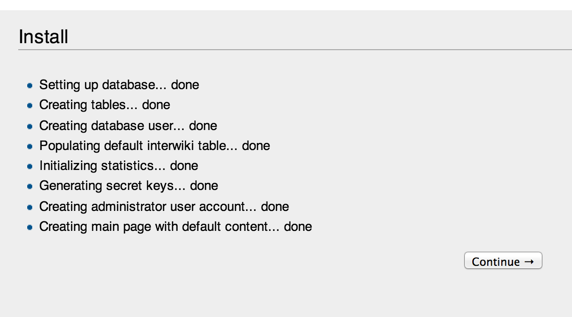
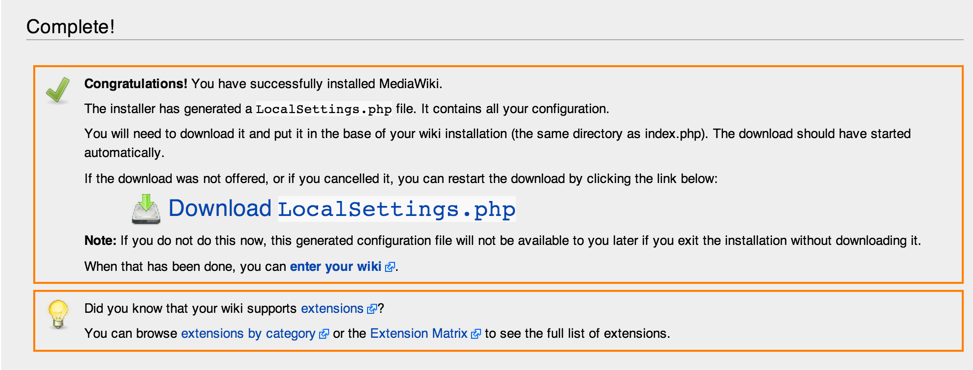
The final step is to download the LocalSettings.php file and place it in the root directory of the MediaWiki installation. This file contains all the settings configured during the installation.
Creating Wiki Pages in MediaWiki is the same way as accessing the Wiki Pages. Every wiki page in MediaWiki has a title that serves as the page's unique identifier.
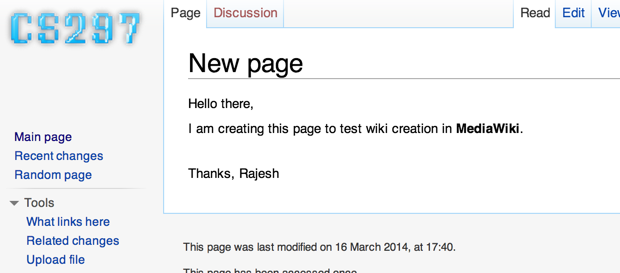
First of all let's create a new page. To do this, We can just search for the new page name, If it doesn't, we will see the page below,
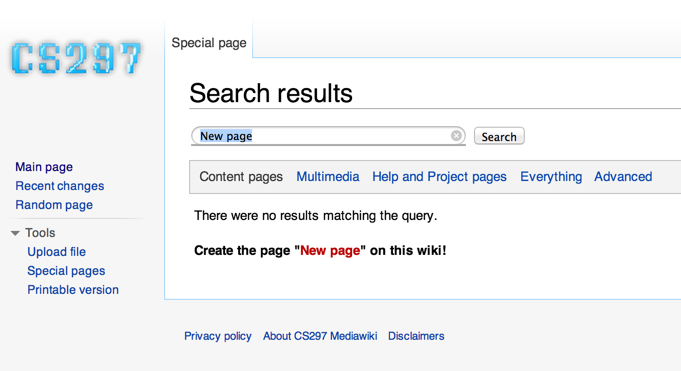
As the page with the title - "New Page" does not exist, Mediawiki will prompt us to create this new page. Clicking on the Create the page "New page" will take us to the Wiki editor to add contents to a new page.
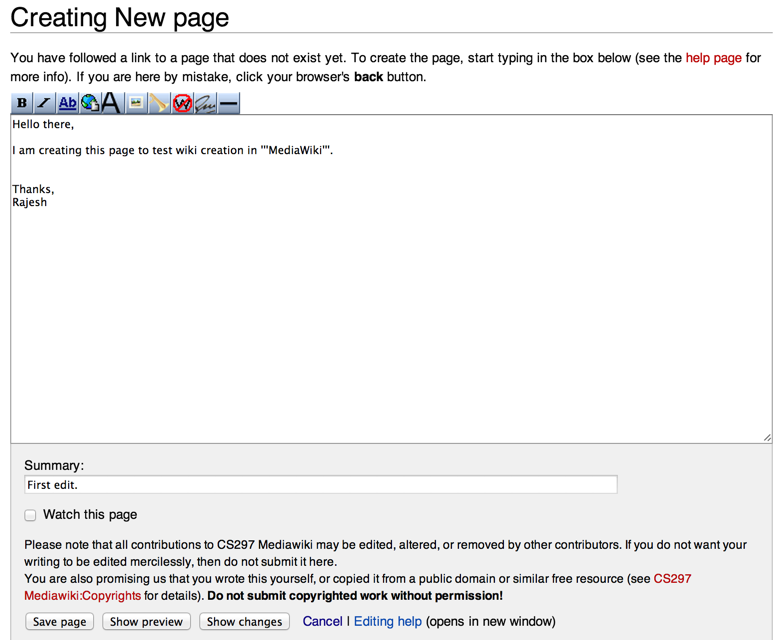
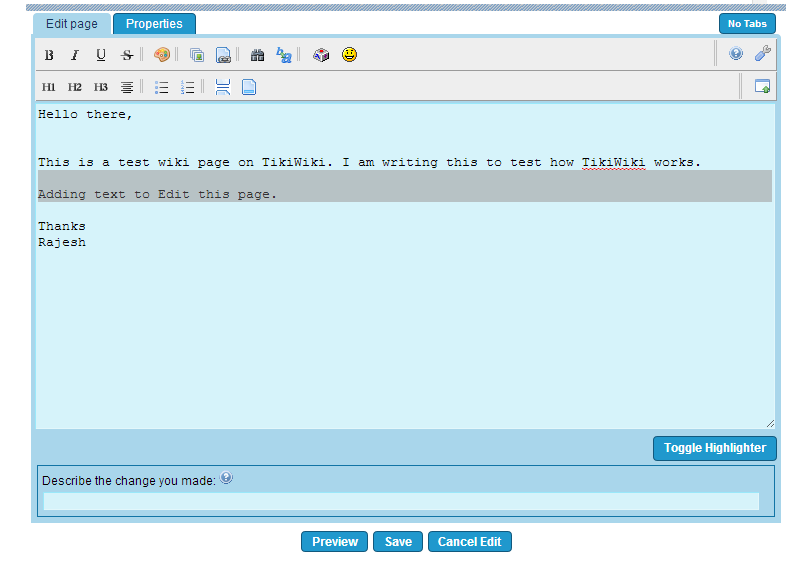
We can also add a summary that describes this edit and click on the save button. This will create a new wiki page
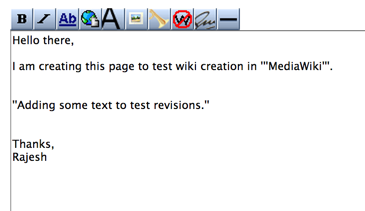
Now we have added some text to the same page by clicking on "Edit" on the top right. We can also add some text and click on save, to save the changes. I will explain how the revisions happen in MediaWiki, in the next section.
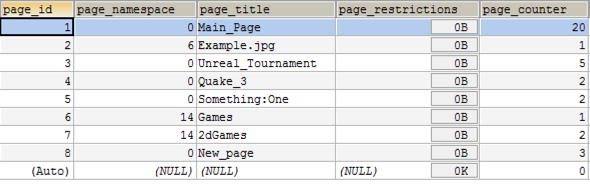
All the pages in MediaWiki are stored in the page table.

Here is an example of how the records in the page table looks like.
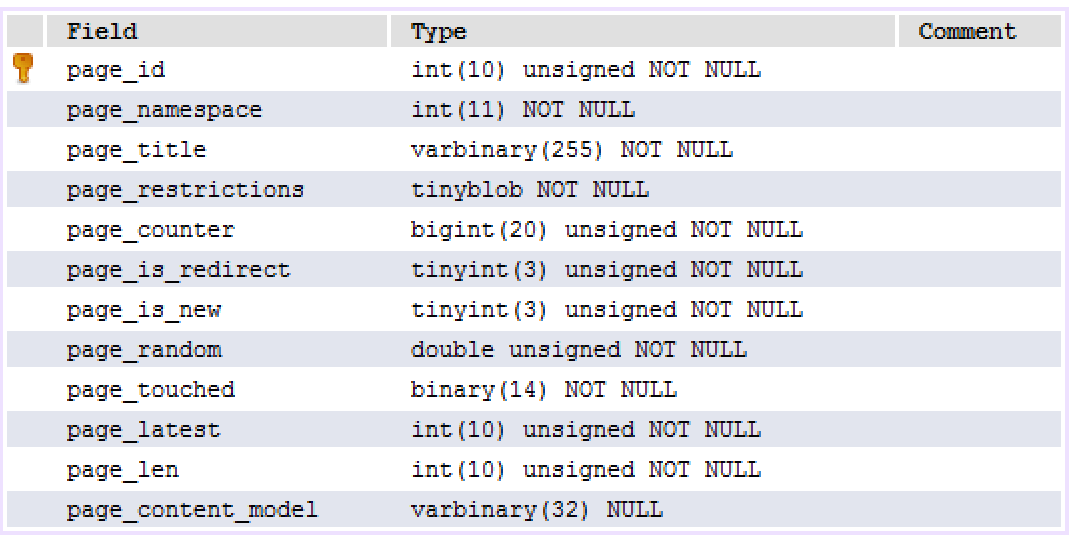
All the revisions for wiki pages are stored in a table called revision. You can find the schema of the table revision in the image below.
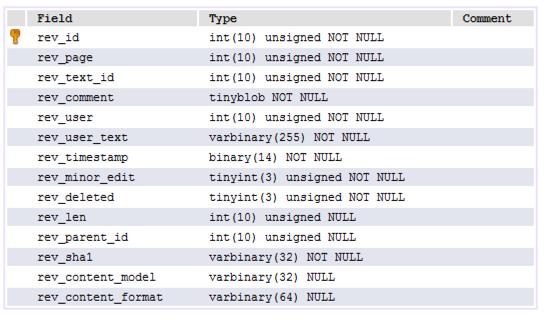

Every time a page is edited, a new record is inserted into the revision table, which consists of information such as the user who created the edit, timestamp of the edit and a reference to the "old_text" column in the text table.
You can find the schema for the old_text table below,
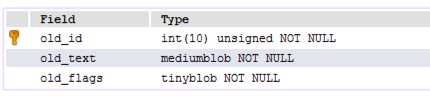

This record in the revision table holds information about two things mainly, edit operation and a new wiki text originated from the result of the edit operation. A new record in the revision table always points to the current version of the wiki text.
The entire new wiki content after the edit will be stored as a data blob in the data field. Again this is similar to other wiki engines where the entire contents of the edited page are stored instead of diff meta data. Provided that they save entire Wiki text page, it is understandable that they are stored as data blobs to conserve space.
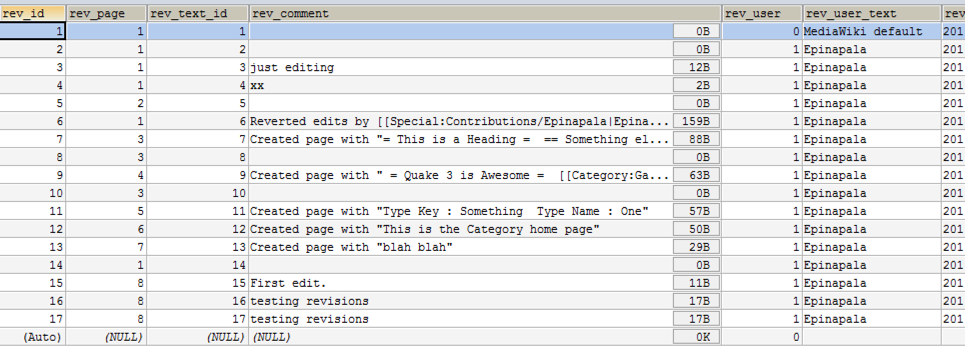
Here is an example of how the records are stored in the revision and text tables,

Single quotes are used to mark text as Bold and Italic.
Example:
''Two single quotes are italics'',
'''three single quotes are bold''',
'''''five single quotes are bold and italic.'''''
looks like:
Two single quotes are italics,
three single quotes are bold,
five single quotes are bold and italic.
HTML tags like <b> and <i> tags can also be used.
Example:
<b> bold </b>,
<i> italic </i>,
<b> <i> bold+italic </i> </b>.
MediaWiki parses the text line by line, So it is important to note that tags (for example <b> .. </b>) should be used for each line. Unclosed/invalid tags are removed and ignored by MediaWiki.
Heading uses "=" as a delimiter. The number of "=" range from 1 to 6 depending upon the Heading size.
For example, Heading 1 has one "=" and so on.
More examples:
= Headline size 1 =
== Headline size 2 ==
=== Headline size 3 ===
==== Headline size 4 ====
===== Headline size 5 =====
====== Headline size 6 ======
looks like:
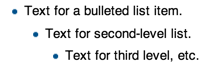
Simple lists:
* Text for a bulleted list item.
** Text for second-level list.
*** Text for third level, etc.
Looks like:
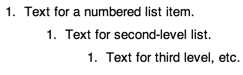
Numbered lists:
# Text for a numbered list item.
## Text for second-level list.
### Text for third level, etc.
Looks like:
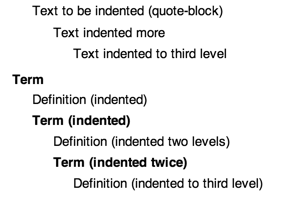
: Text to be indented (quote-block)
:: Text indented more
::: Text indented to third level
;Term:Definition (indented)
:;Term (indented):Definition (indented two levels)
::;Term (indented twice):Definition (indented to third level)
Looks like
Pre tags can be used to show text as preformatted text. Once preformatted, the text appears in a gray background with a dashed blue border.
<pre>
This is a pre-formatted text.
</pre>
Looks like :

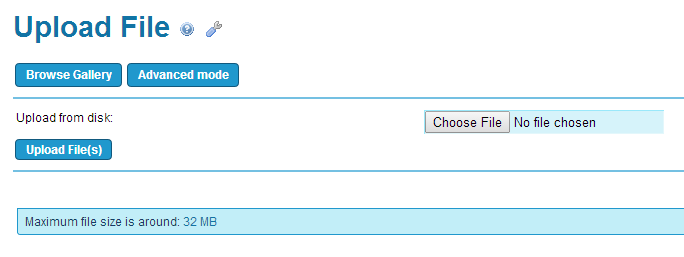
The full syntax for displaying an image is:
[[File:filename.extension|options|caption]]
The Images uploaded to Mediawiki can be rendered using their respective filenames in MediaWiki.
<>Description: In this deliverable I will explain how to Install and work with the Wiki system in TikiWiki
Tikiwiki is not just a Wiki system; its actual name is "TikiWiki CMS/Groupware". Tiki is a CMS, Wiki system, Blog engine and a webmail system. The real advantage of TikiWiki is that how different systems are tightly integrated with each other. For example, a CMS that is tightly coupled with Wiki could be a life saviour for community supported help systems. It has a huge code base compared to other CMS/Wiki engines.
One of the most popular Live sites leveraging TikiWiki is the Mozilla support Site at http://support.mozilla.org/en-US/home .
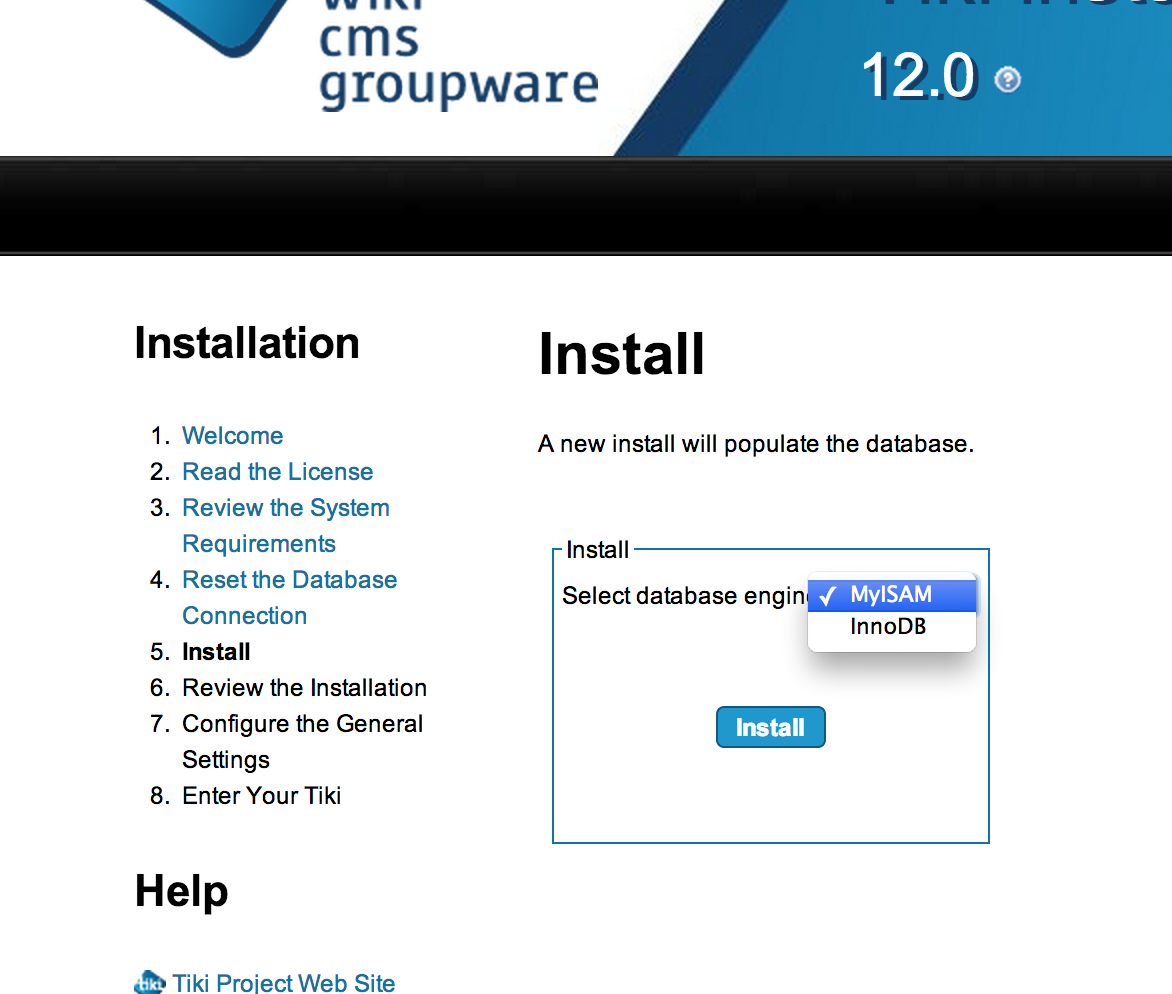
First step to Install TikiWiki is to look at the requirements. TikiWiki requires a web-server that can process PHP server side scripts and a Relational Database like MySQL.
My current hosting setup is like below :
Server: LAMP (Linux, Apache, MySQL, PHP)
SSH Client : iTerm on Mac OSX
Server Control Panel Interface: Cpanel
First of all I downloaded the TikiWiki package from the official site :
$ wget http://downloads.sourceforge.net/project/tikiwiki/Tiki_12.x_Altair/12.0/tiki-12.0.zip
Untar the gzip archive
$ tar zxvf tiki-12.0.tar.gz
Rename extracted folder & change directory.
$ mv tiki-12.0 tikiwiki && cd tikiwiki
Chmod all files to 644 and all directories to 755
$ find . -type f -print0 | xargs -0 chmod 0644
$ find . -type d -print0 | xargs -0 chmod 0755
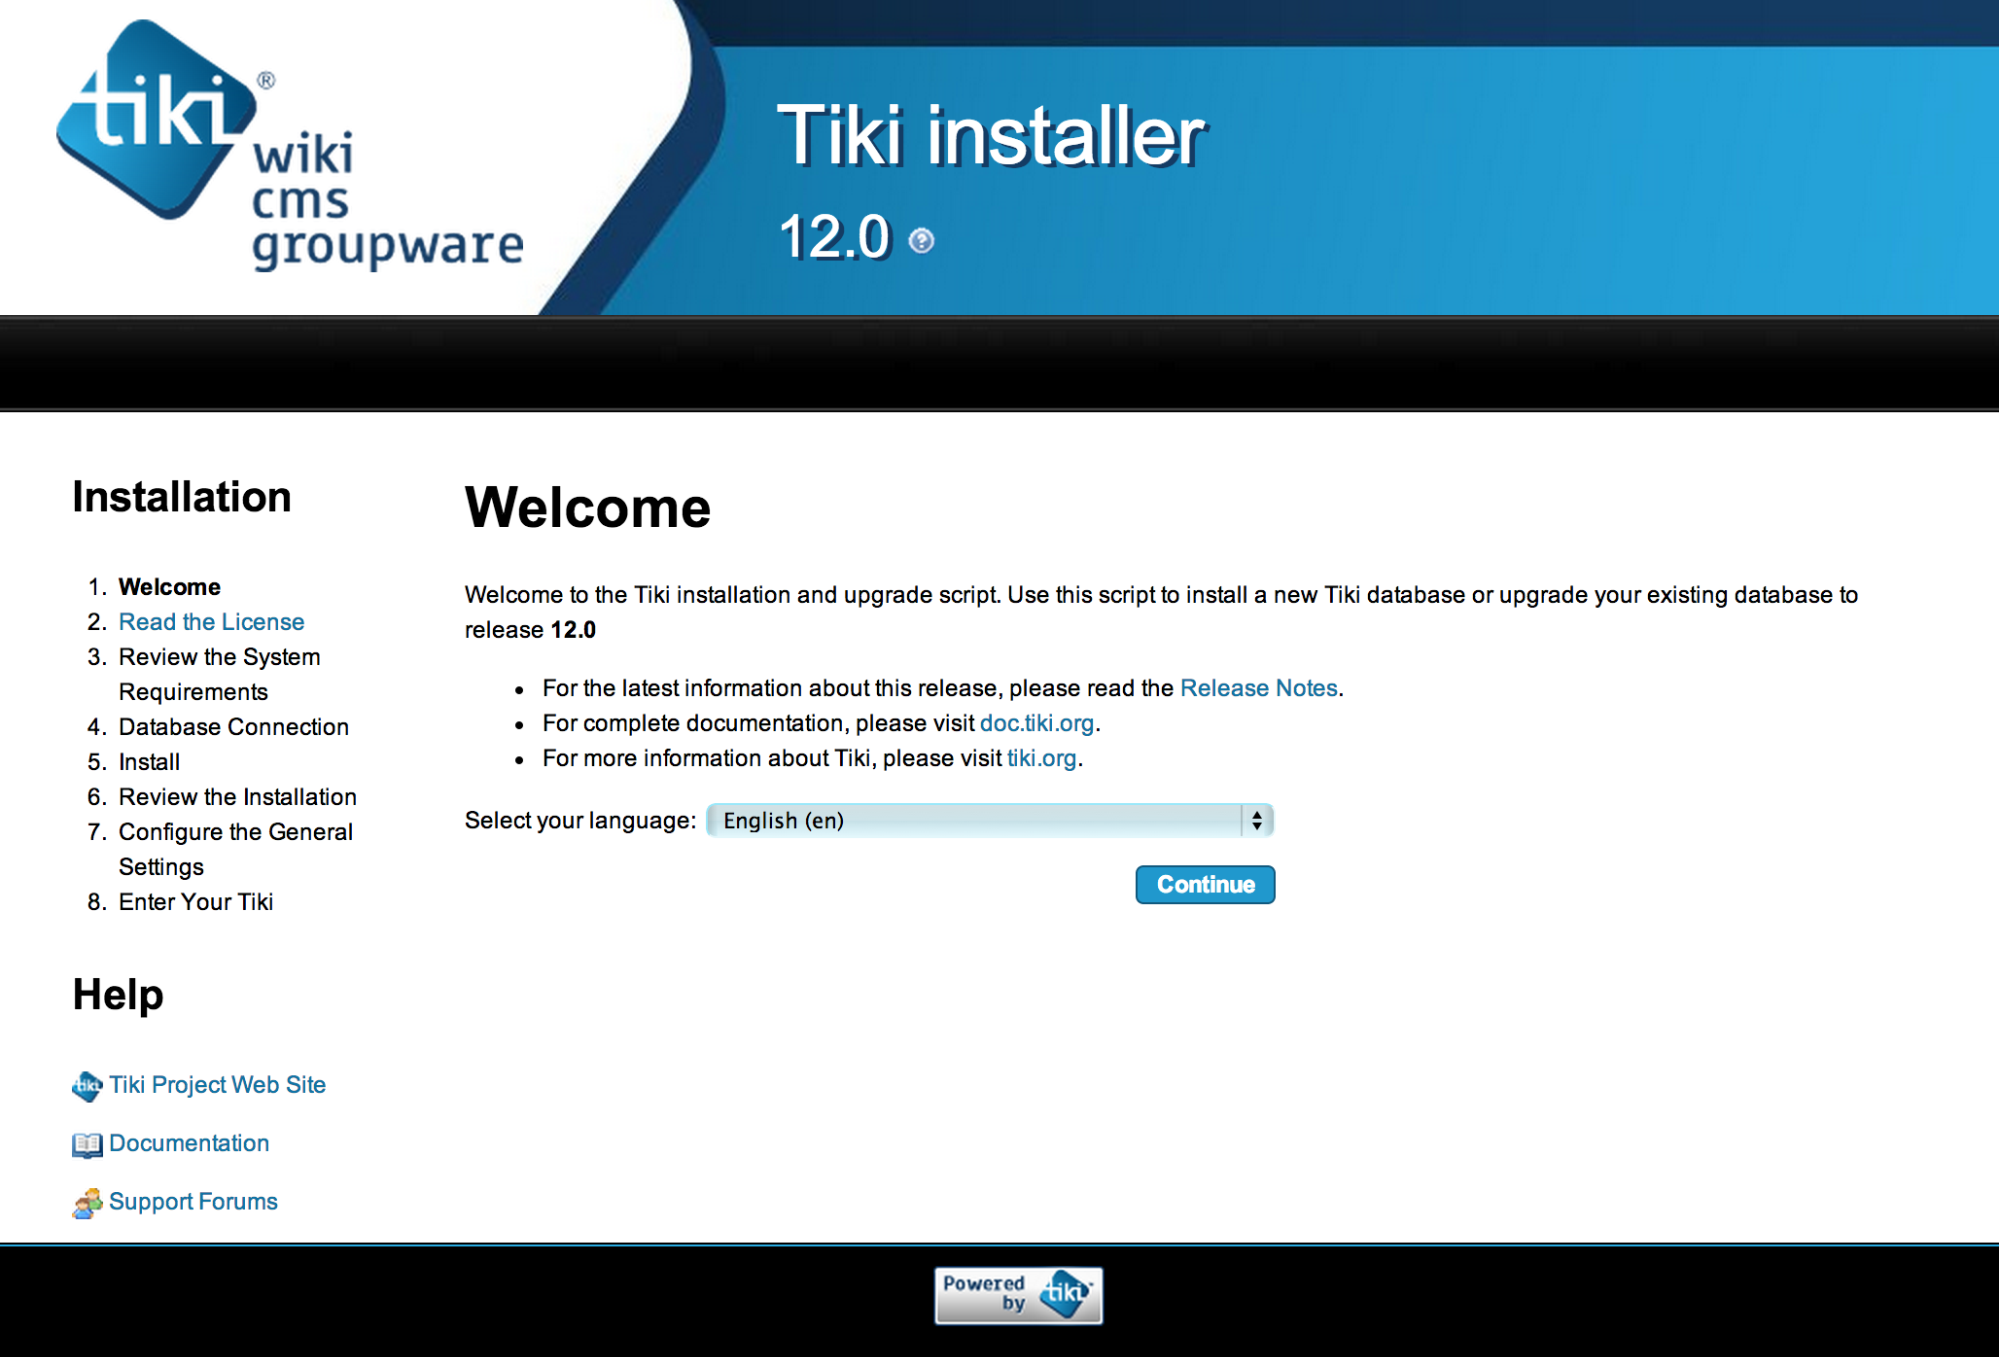
A subdomain "tikiwki.pinapala.com" is already setup to point to the directory TikiWiki. So we can now point the web browser to tikiwiki.pinapala.com. Tikiwiki will now guide us through a guided, web-based installation.
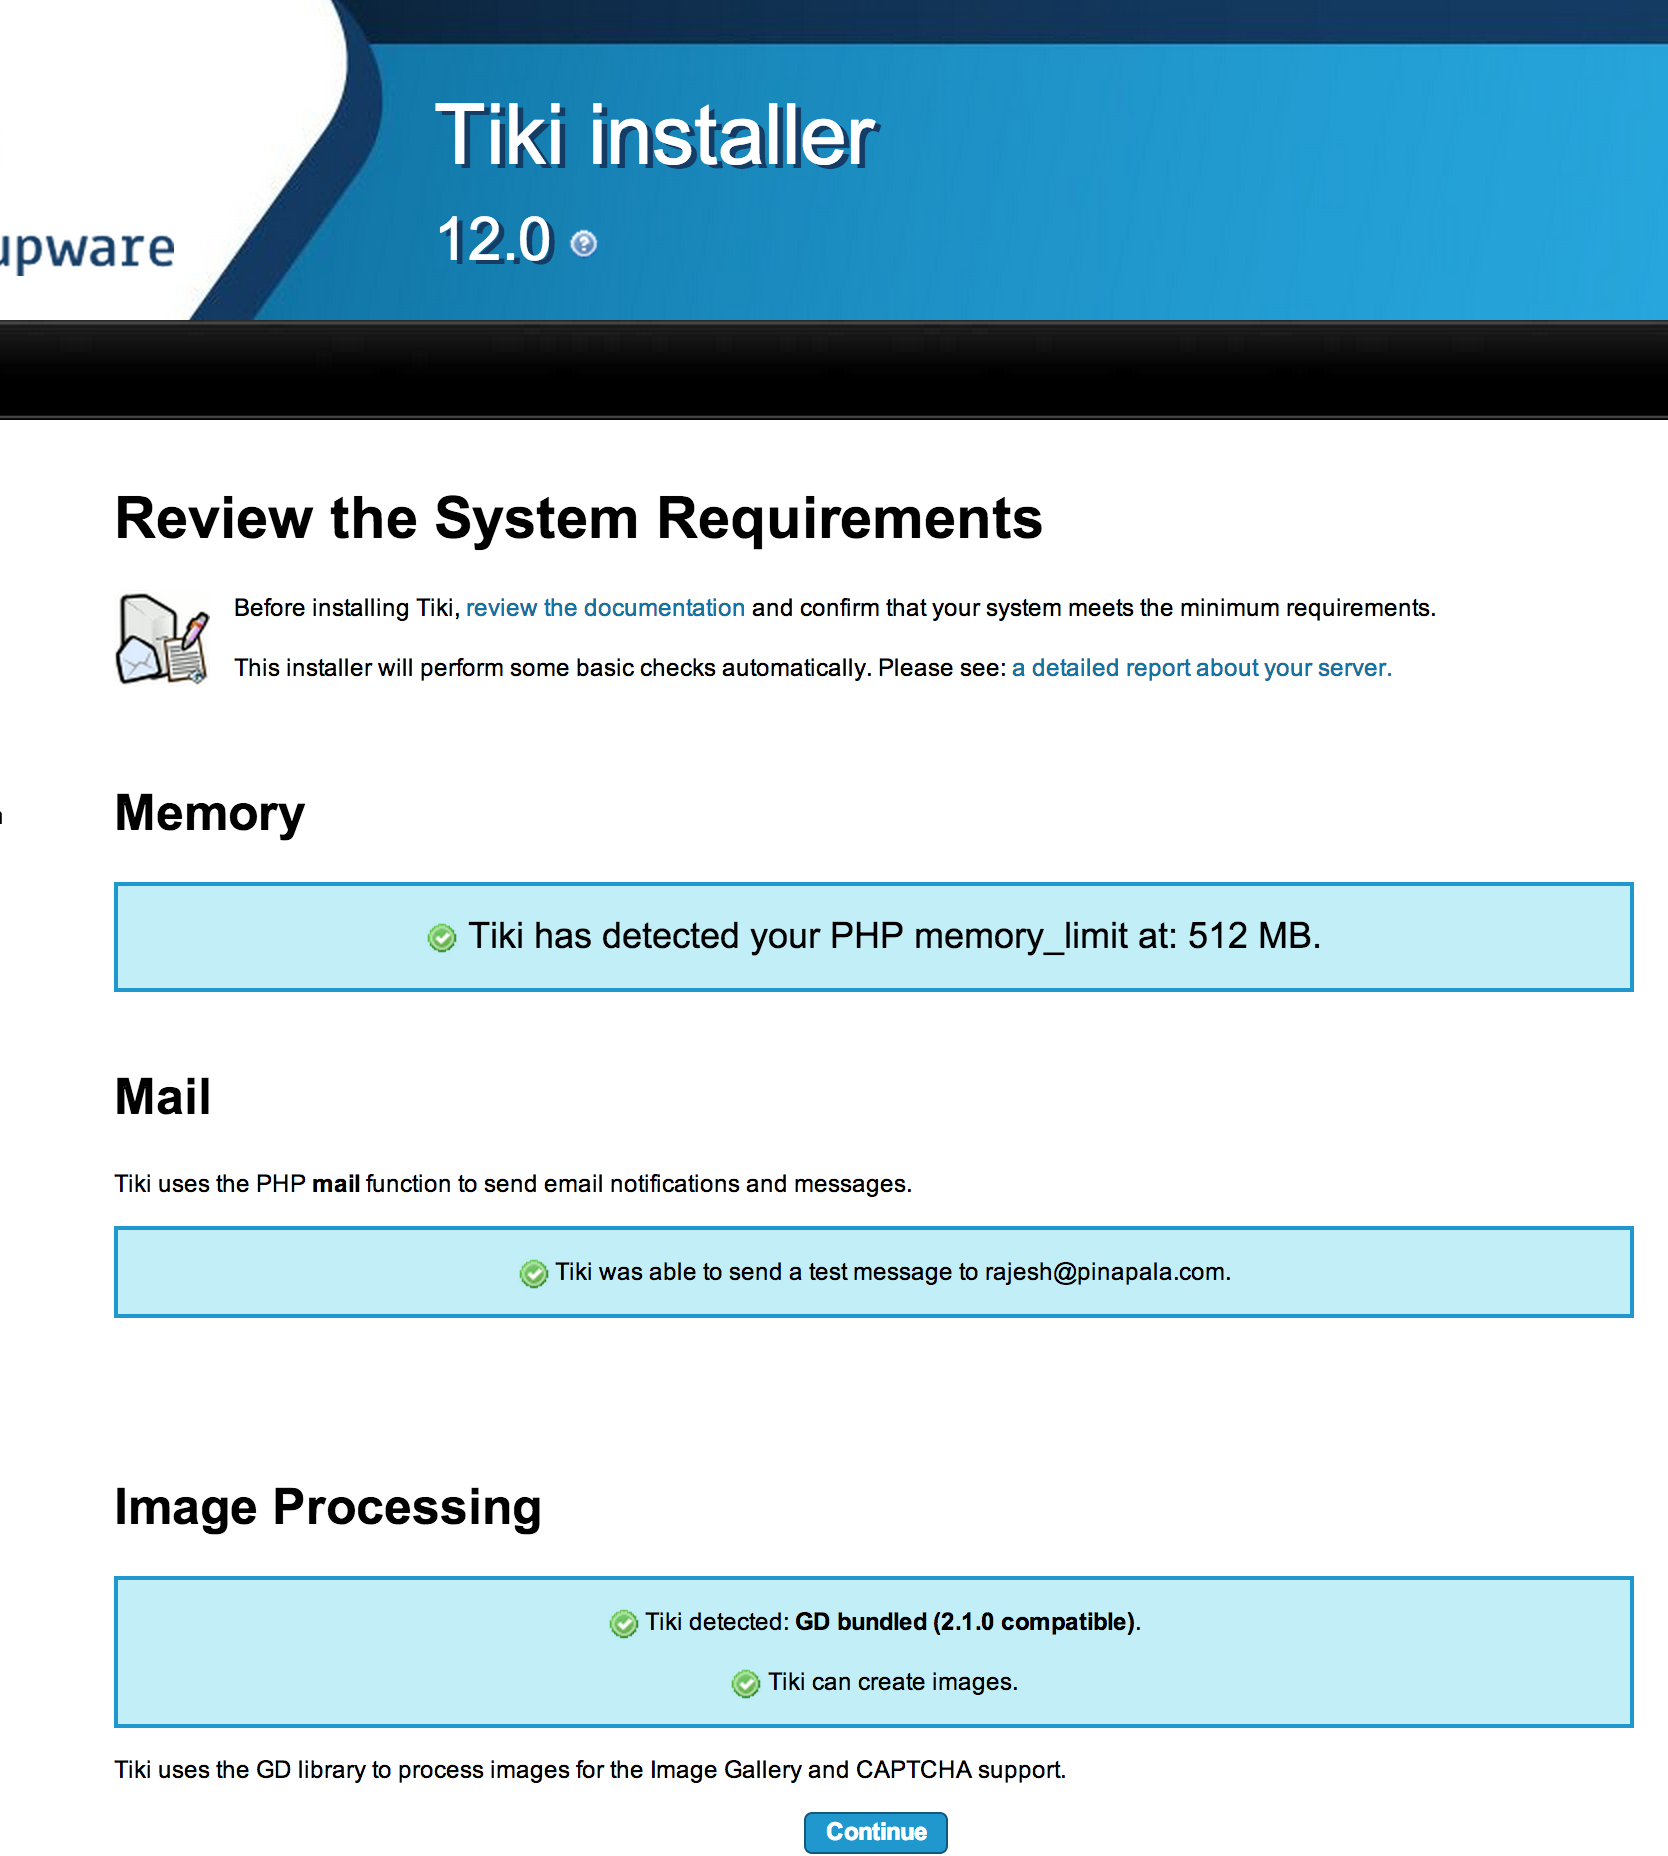
After selecting the language, TikiWiki reviews System requirements and displays a summary of the requirements status.
In the next page, we can enter the DBMS settings. I have provided the information of my Database hostname, username, password and the database name to use.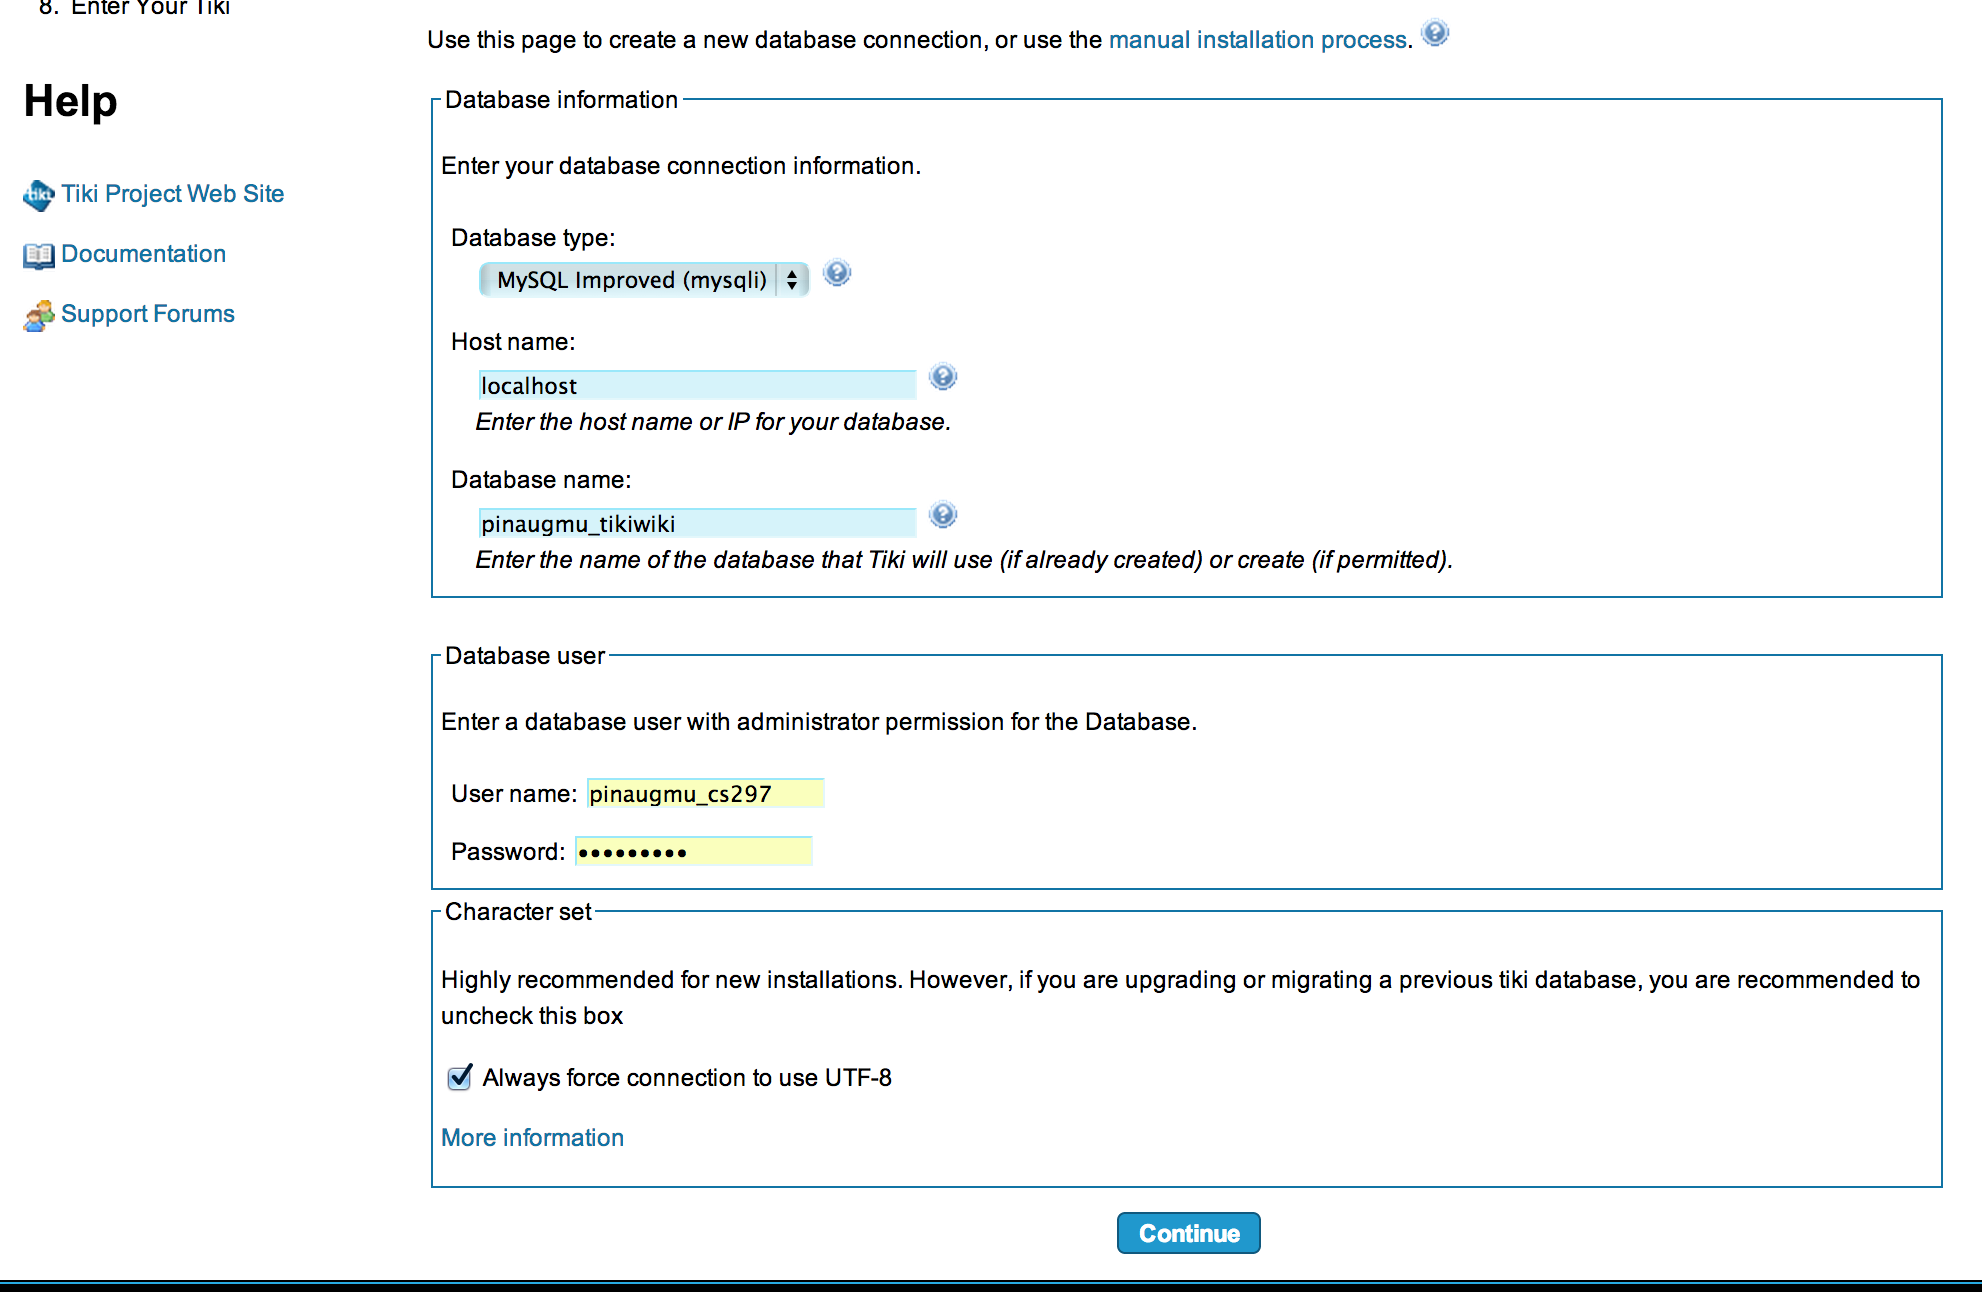
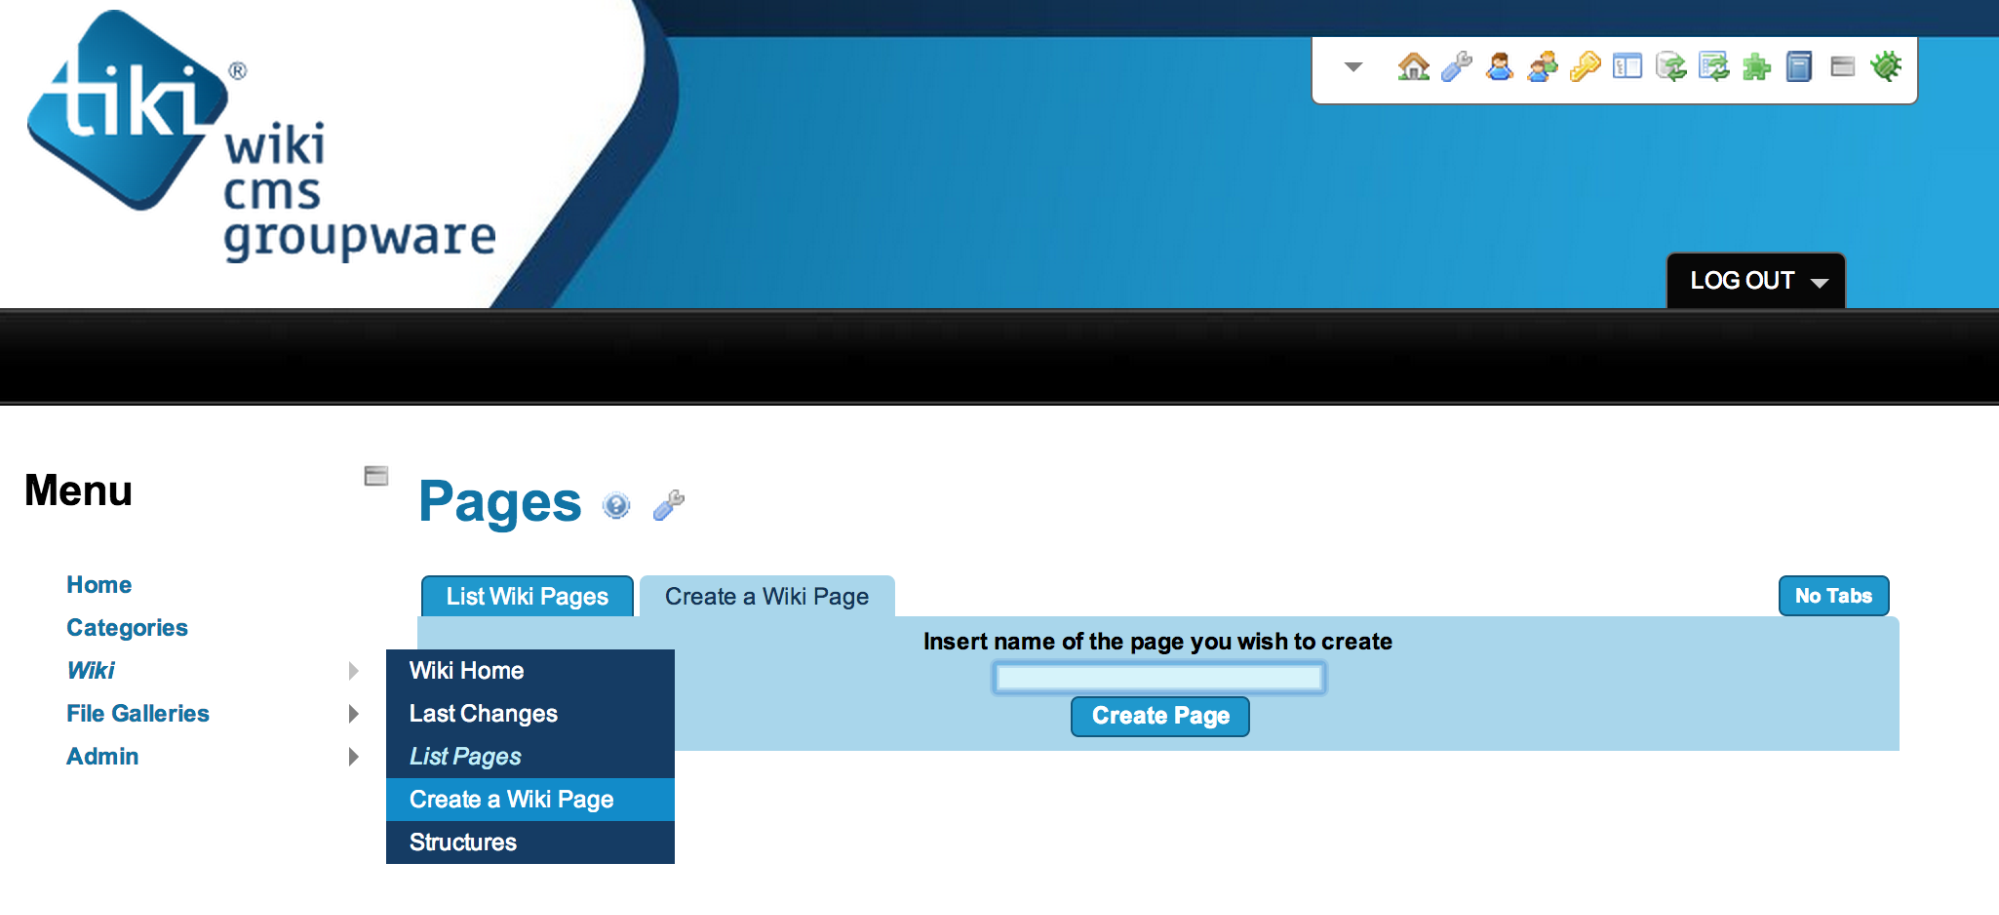
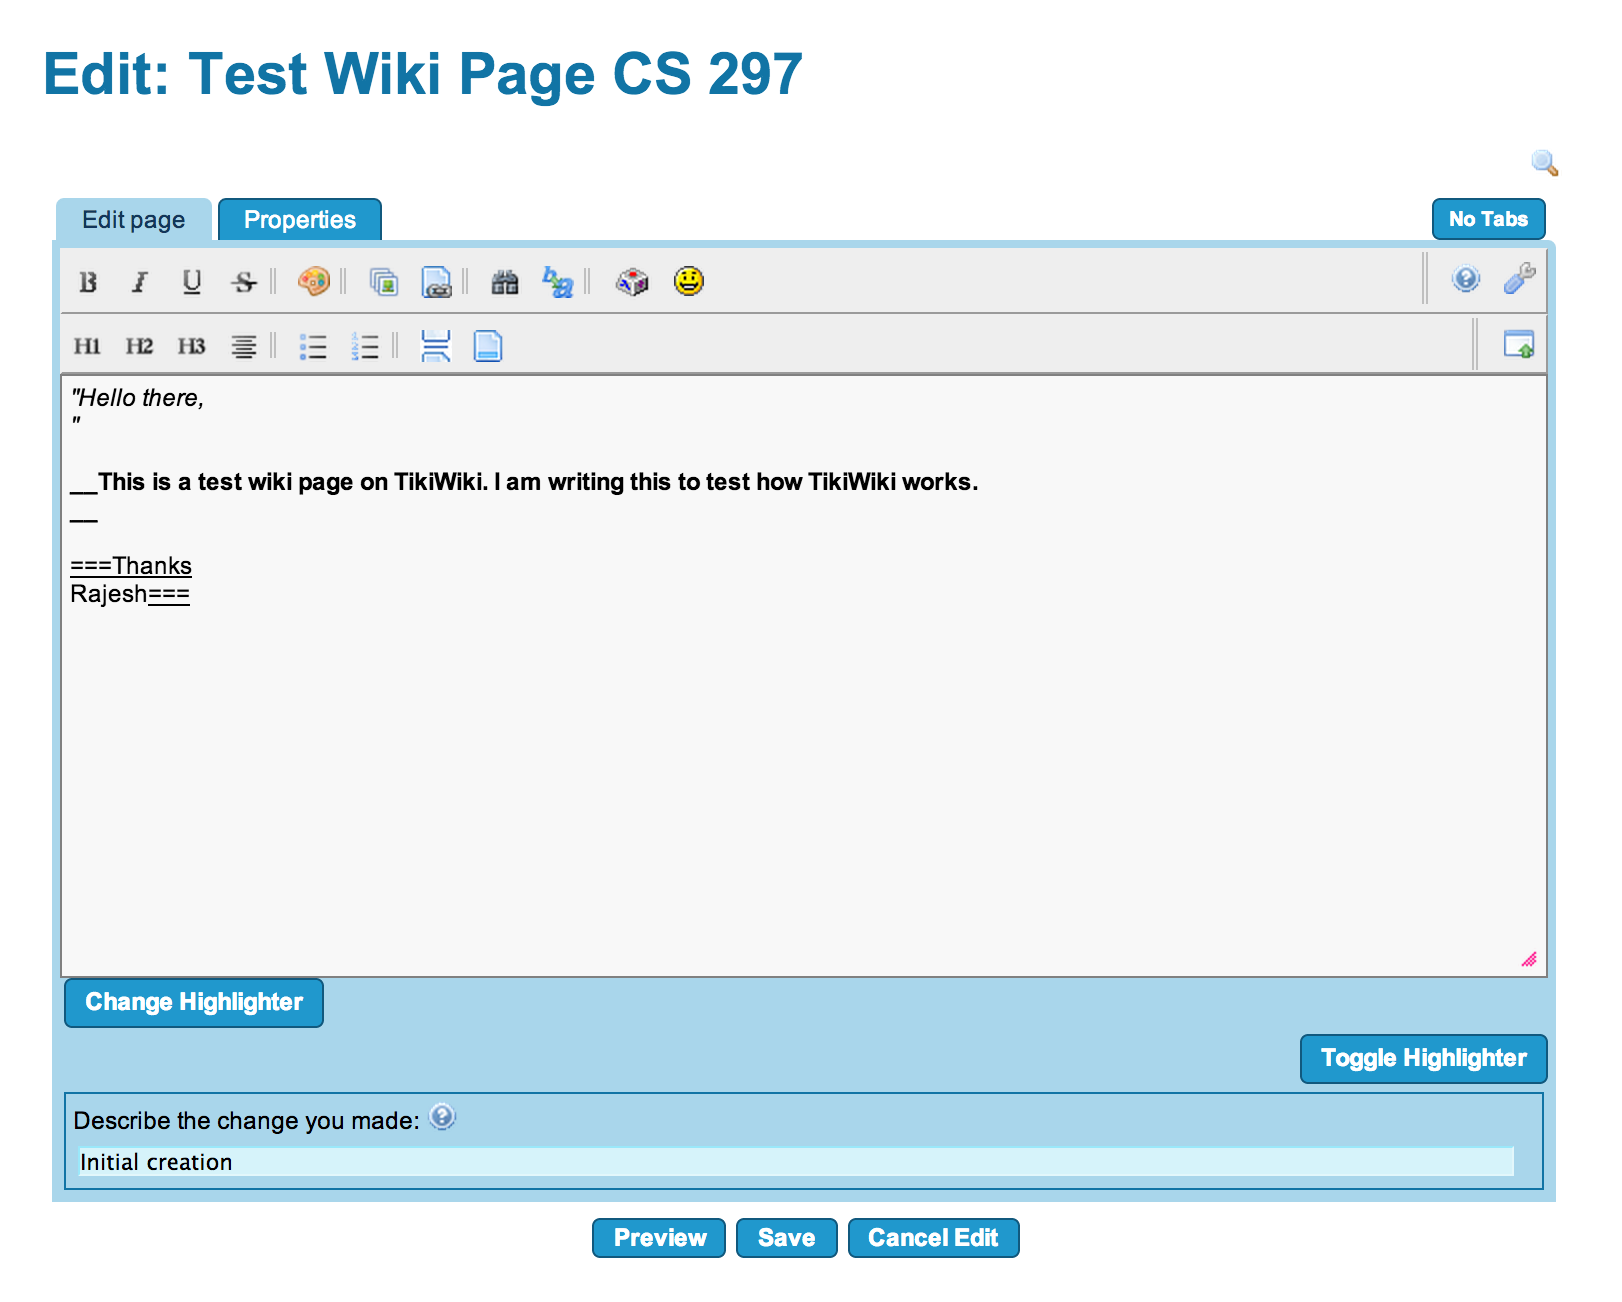
Tiki Wiki home page is a default wiki page which we can edit. However, we can create a new wiki page altogether and edit it. We can click on Wiki on the left side bar, that pulls up a menu to create a new wiki page. This pulls up a Wiki editor.
There are two main tables in the TikiWiki database to store wiki pages.
|
Table |
Fields |
|
tiki_pages |
page_id pageName version data |
|
tiki_history |
historyId pageName version data |
Tiki stores all the wiki pages content in the tiki_pages table. However it keeps track of version history in a table called tiki_history. When an edit happens to a Wiki page, a new record will be inserted into the tiki_history table with a version number(version) . The entire new wiki content after the edit will be stored as a data blob in the data field. Again this is similar to other wiki engines where the entire contents of the edited page are stored instead of diff meta data. Provided that they save entire Wiki text page, it is understandable that they are stored as data blobs to conserve space.
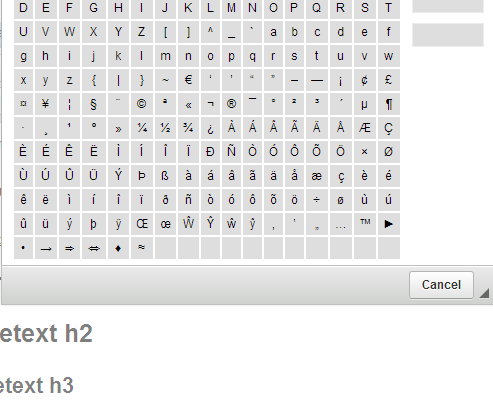
TikiWiki comes with it's own wiki syntax for formatting the content of the wiki pages. This section of the deliverable will throw some light on the options available to use in the TikiWiki WYSIWYG editor, and how to format our text consisting of: headlines, bold, internal/external links, and unordered lists. The Image above shows how the wiki editor looks like.
The following table briefly explains what each editing feature does and the code it uses.
|
TikiWiki editing options |
|
|
Bold |
Bolds the text. __bold text__ |
|
Italic |
Italicizes text. ''italic text'' |
|
Underline |
Underlines text. ===underline text=== |
|
Strike through |
Strikes through text to show as deleted. --text-- |
|
Foreground Color |
Changes the foreground color. ~~#660:text~~ |
|
Image Choose or upload images |
Uploading an image assigns a field id to the images. The id is used in the wiki text to display the images. {img fileId="1" thumb="y" rel="box[g]"} {img fileId="2" thumb="y" rel="box[g]"}
|
|
Wiki link |
Links to existing pages on the wiki. ((Show this Text | Link to this Page Name)) |
|
External link |
Creates a link to an external source. [http://link.tld | Link Text | Relation text] |
|
Find text Text Replace |
Text can be searched with the find and replace function that is built into the editor. |
|
Special Characters |
Creates special HTML entity characters that can be inserted into the page. |
|
Smileys |
Inserts smileys in the article. |
|
H1 H2 H3 |
Sets headers to HTML h1, h2,or h3 format. !sometext formatted as h1 !!sometext formatted as h2 !!!sometext formatted as h3 |
|
Align Center |
Aligns the text center. ::This text will be aligned center:: |
|
Ordered Unordered list |
Creates lists that are numbered or bulleted. *unordered list #ordered list |
|
Page Break Horizontal rule |
....end of page... The above is the page break code. --- The above is the code to insert a horizontal line. |
|
Non-parsed (Wiki syntax does not apply) |
Escapes the Wiki code to allow Wiki code characters to display. ~np~no wiki formatted text~/np~ |
Description: In this deliverable I will explain how to Install and work with the Wiki system in Fossil SCM
Fossil is a software configuration management(SCM) tool with built in support for Bug tracking, Wiki system, and a CGI enabled web interface. The greatest advantage of Fossil apart from being open-sourced is that, It is a self-contained single binary file, that has everything to serve the SCM needs. With inherent support for revision control and web interface, Fossil can easily implement the features of a Wiki system effectively.
For this deliverable, I will be using a precompiled binary of fossil to perform test tasks.
Downloaded the binary from : https://www.fossil-scm.org/index.php/doc/tip/www/quickstart.wiki
Now I have added the fossil binary to the $PATH, So that I can access the executable from anywhere.
$ fossil
Usage: fossil COMMAND ...
or: fossil help -- for a list of common commands
or: fossil help COMMAND -- for help with the named command
Commands and filenames may be passed on to fossil from a file
by using:
fossil --args FILENAME ...
Each line of the file is assumed to be a filename unless it starts
with '-' and contains a space, in which case it is assumed to be
another flag and is treated as such. --args FILENAME may be used
in conjunction with any other flags.
The next step is to initialize the fossil repository in a target directory. I have created a directory named fossiltest and initialized a repository named cs297.
$ fossil init cs297
project-id: 16d043d2b0d10b7878b2a4f496e53a1dd675b324
server-id: 8bf125a364d73efd8bedc9e2b0e1c9a75e53f964
admin-user: rajesh (initial password is "2f2a6f")
I can give the open command any time to have a deep look into the repository details.
$ fossil open cs297
project-name: <unnamed>
repository: /Users/rajesh/Developer/fossiltest/cs297
local-root: /Users/rajesh/Developer/fossiltest/
config-db: /Users/rajesh/.fossil
project-code: 16d043d2b0d10b7878b2a4f496e53a1dd675b324
checkout: 22ff1e7a71be80135152d7245a79bbb3a284adbe 2014-03-18 20:17:18 UTC
tags: trunk
comment: initial empty check-in (user: rajesh)
checkins: 1
We can now add test files and add them to the stage. Once added to the stage, the files are ready to be committed.
$ touch test.file
$ fossil add .
ADDED test.file
$ fossil commit -m "Added stuff"
New_Version: 7eaa571f995196a5c366644804294496f0132e11
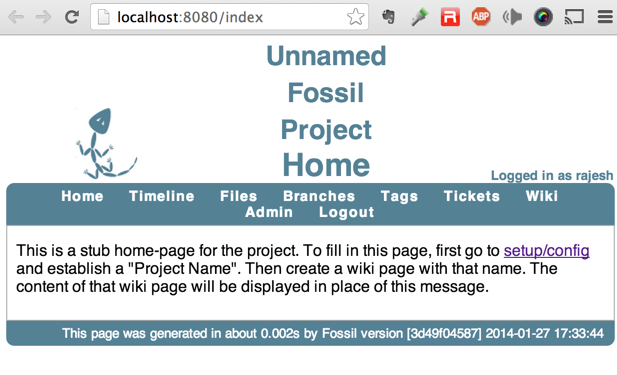
Fossil has a built in web interface to work with the repository configuration, access & edit Wiki pages etc. We can invoke the Fossil web UI by giving the command ui followed by the repository name.
$ fossil ui cs297
This will open up fossil we interface in the default web browser on the operating system.
On a higher level there are two states for any fossil repository. A global state and a local state. Any fossil repositorys global state consists of an unordered set of artifacts. An artifact can be a text file , a binary file, a source code or a meta artifact that contains information or relationship between other artifacts. Hence Fossil artifacts are usually individual files on the file system.
A local state for a Fossil repository, on the other hand, consists of user preferences, user access details, ticket meta data etc. The local state is usually specific to the repository where are global state is common to all repositories in a project. The local state does not contain artifacts. Wiki pages are a type of artifact in Fossil. Each revision of a wiki page is saved as a fossil artifact.
Fossil uses wiki markup to let users create stand alone wiki pages, use in check-in comments, bug reports and bug report comments.
Every wiki page in fossil consists of the following meta data,
* Artifactid
* D time-and-date-stamp - Date and time at which the wiki page was edited.
* L wiki-title - Title of the wiki page.
* N mimetype - Wiki text mime type, default mime type is text/x-fossil.
* P parent-artifact-id - Parent wiki page information
* U user-name - User name of the user who edited the wiki page.
* W size \n text \n - W is the actual wiki text for the edit, preceeded by the size of the wiki text.
| Output Style | Wiki formatting |
|
Paragraphs |
Blocks of text separated by blank lines for multiple paragraphs. Centered , right justified or other styles paragraphs are not supported by wiki markup but HTML can be used to render the same. |
|
Bullet Lists |
A * surrounded by spaces renders as a bullet. Nested lists are not supported out of the box and HTML needs to be used. |
|
Enumeration Lists |
A # surrounded by spaces renders as an Enumeration Item. Enumeration lists at a single level are only supported at this time. Nested lists are not supported out of the box and HTML needs to be used. |
|
Hyperlinks |
Text specified in between square brackets [...] will be rendered as a hyperlink. Fossil wiki markup supports the usage of a wiki page name , artifactID or a name of an image as a hyperlink target , in addition to an actual hyperlink itself. External links are formatted as [target] for example [http://cs.sjsu.edu] or [target|name] for example [http://cs.sjsu.edu|CS SJSU]. |
|
HTML elements supported |
<a>, <address>, <article>, <aside>, <b>, <big>, <blockquote>, <br>, <center>, <cite>, <code> <col> <colgroup> <dd> <dfn> <div> <dl> <dt> <em> <font> <footer> <h1> <h2> <h3> <h4> <h5> <h6> <header> <hr> <i> <img> <kbd> <li> <nav> <nobr> <nowiki> <ol> <p> <pre> <s> <samp> <section> <small> <span> <strike> <strong> <sub> <sup> <table> <tbody> <td> <tfoot> <th> <thead> <title> <tr> <tt> <u> <ul> <var> <verbatim> Only the above elements are supported. |
|
HTML special elements |
Any text entered in between the <nowiki> tags will be ignored by Wiki mark up. Any text entered in <verbatim> tags will be rendered as plain text, i.e. wiki markup and HTML markup will be ignored. |