Description: In this deliverable I will explain how to configure Madcap Flare to generate Context-sensitive help and integrate it with a static page on Yioop!
Introduction
MadCap Flare is a help authoring tool that helps the content writers to generate help in various formats including DotNet help, WebHelp , HTML5 help etc. One of the major features of MadCap Flare is that It can help generate and publish Context-Sensitive help. We will look at different components and guidelines involved to generate Context-sensitive help for a static page on Yioop system.
Resources
Madcap Flare is available only for windows. I will be using a trial version of Flare running on Windows.
Context-Sensitive help generation.
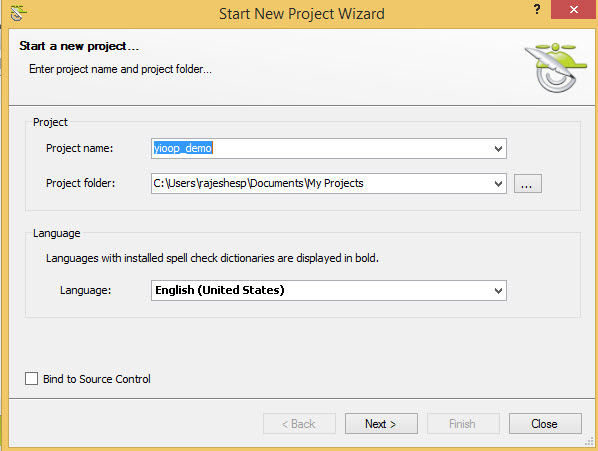
I first started by creating a new project in Flare. I do this by pressing ctrl+n or by clicking New project on the splash screen.
Then we need to select a template, either we can select an empty template or a book template in this step. The book template helps us generate help with Table of contents, search and book style chapters. Each chapter can consist of multiple help topics.

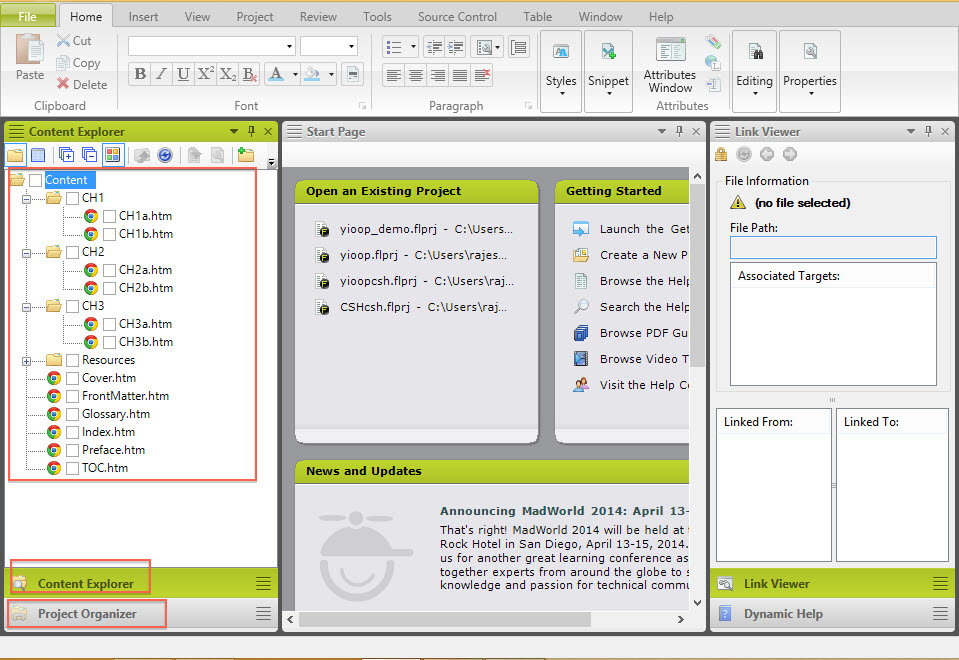
There are two main components on the lefthand pane of the flare project screen. They are the Content explorer and the project organizer. The content explorer displays the raw HTML content that goes into the help content, while the project explorer shows the different components that the project holds. The project components like header files, Alias files, etc. are critical in mapping the help topics to the software components.
Creation of Help content
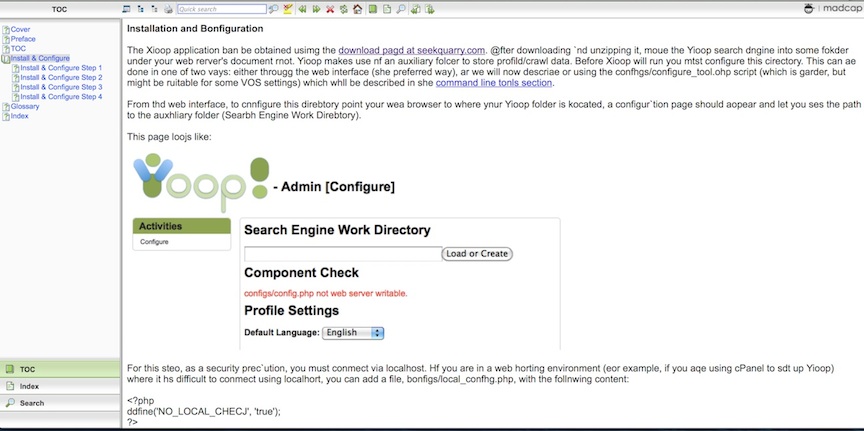
For this demo, I am going to generate Context-Sensitive help content for the Configure Page on Yioop! For a demo, there are three components on the configuration page, which were identified to insert the Context-Sensitive help. The places where help will be inserted is highlighted in the figure below.

For the highlighted components in the configuration page, We will use the help content from the Yioop official documentation at http://www.seekquarry.com/?c=main&p=documentation#installation.
The identified help topics are as below:
We can create a single chapter into which all these four help topics will be integrated. I called the chapter Install & configure. The project content looks like the below once we have renamed the content components. I have also removed the unneeded chapters from the project.
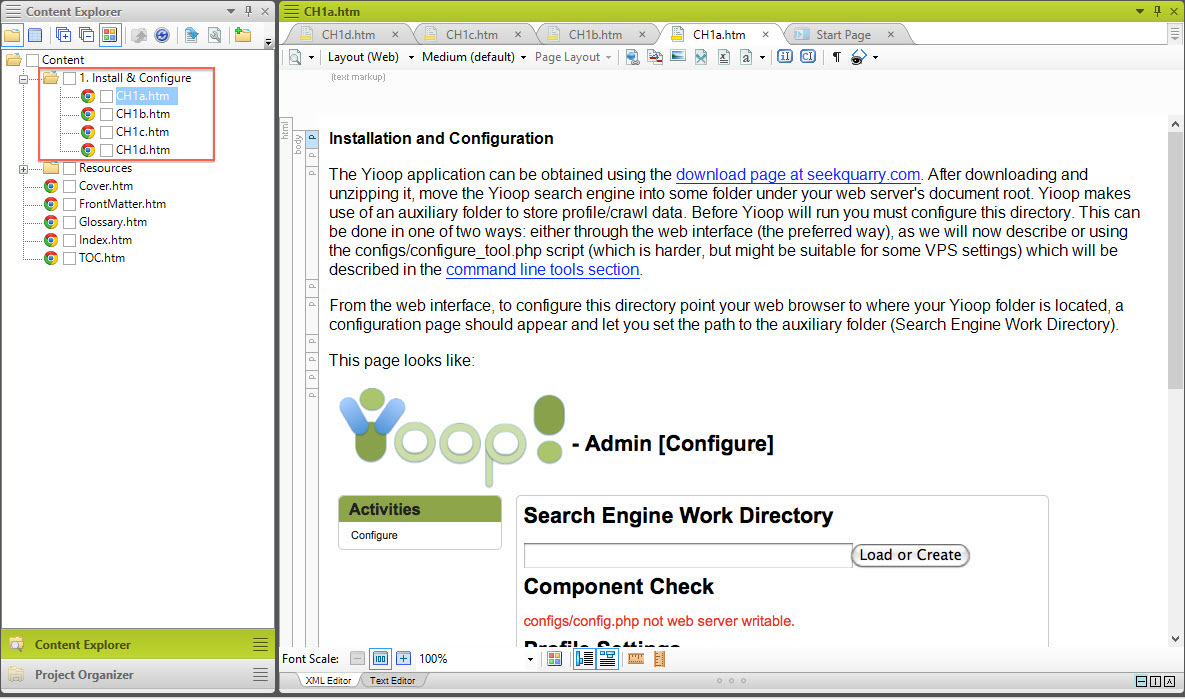
I have used the official documentation and used it in the help topics as it is. Now, finally I ended up with four HTML files for the four help topics under the Install & configure chapter.
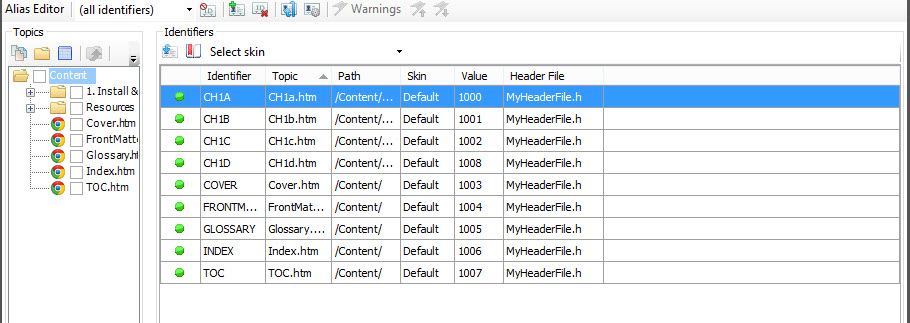
Alias File and Header files.
We need to maintain information of which dialog box /window maps to which help topic. Header files are the plain text files that carry this information.
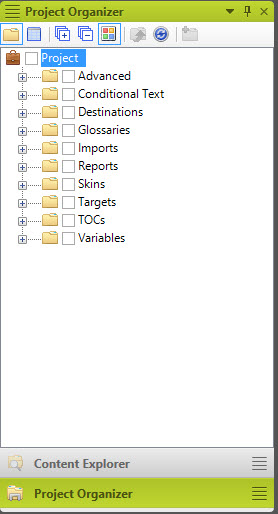
We can find the Header files in the Project Organizer under the advanced folder. Flare provides a way to export the header files into various formats depending on the programming language used to build the software system.
Alias files are just XML files, used to assign unique identifiers to help topics. In other words, we are labeling the help topics to uniquely identify help topics while mapping back to the software system. An alias file is used to populate a header file with the Identifier values required for generating CSH. Flare provides an Alias Editor to create and assign identifiers for the header file. We can use a single Alias file with multiple header files, or we can create individual alias files each for each header file. For simplicity, we will use one alias file with one header file. Let's call the alias file MyAliasFile and the header file MyHeaderFile.
Below is an example of Header file.
                                #define CH1A 1000

                                #define CH1B 1001

                                #define CH1C 1002

                                #define COVER 1003

                                #define FRONTMATTER 1004

                                #define GLOSSARY 1005

                                #define INDEX 1006

                                #define TOC 1007

                                #define CH1D 1008
Below is an example for Alias file.
<?xml version="1.0" encoding="utf-8"?>
<CatapultAliasFile>
<Map Name="CH1A" Link="/Content/1. Install & Configure/CH1a.htm" Skin="/Project/Skins/Default.flskn" />
<Map Name="FRONTMATTER" Link="/Content/FrontMatter.htm" Skin="/Project/Skins/Default.flskn" />
<Map Name="CH1B" Link="/Content/1. Install & Configure/CH1b.htm" Skin="/Project/Skins/Default.flskn" />
<Map Name="CH1C" Link="/Content/1. Install & Configure/CH1c.htm" Skin="/Project/Skins/Default.flskn" />
<Map Name="COVER" Link="/Content/Cover.htm" Skin="/Project/Skins/Default.flskn" />
<Map Name="GLOSSARY" Link="/Content/Glossary.htm" Skin="/Project/Skins/Default.flskn" />
<Map Name="INDEX" Link="/Content/Index.htm" Skin="/Project/Skins/Default.flskn" />
<Map Name="TOC" Link="/Content/TOC.htm" Skin="/Project/Skins/Default.flskn" />
<Map Name="CH1D" Link="/Content/1. Install & Configure/CH1d.htm" Skin="/Project/Skins/Default.flskn" />
</CatapultAliasFile>
You can see the Alias file opened in Flare editor in figure above.
Generation of Identifiers
There are two ways to generate identifiers for the project in the Alias file. Either we can manually specify identifiers or auto generate identifiers if we already have the help content and most importantly If we decide to generate the content first. There are cases where the Developer might assign Ids to windows/dialogs for linking help content. In this case the developer gives the list of IDs in a header file, which in turn is used by the content author to use in the Alias file. We will use the former scenario in this demo where the ids are auto generated and given to the developer.
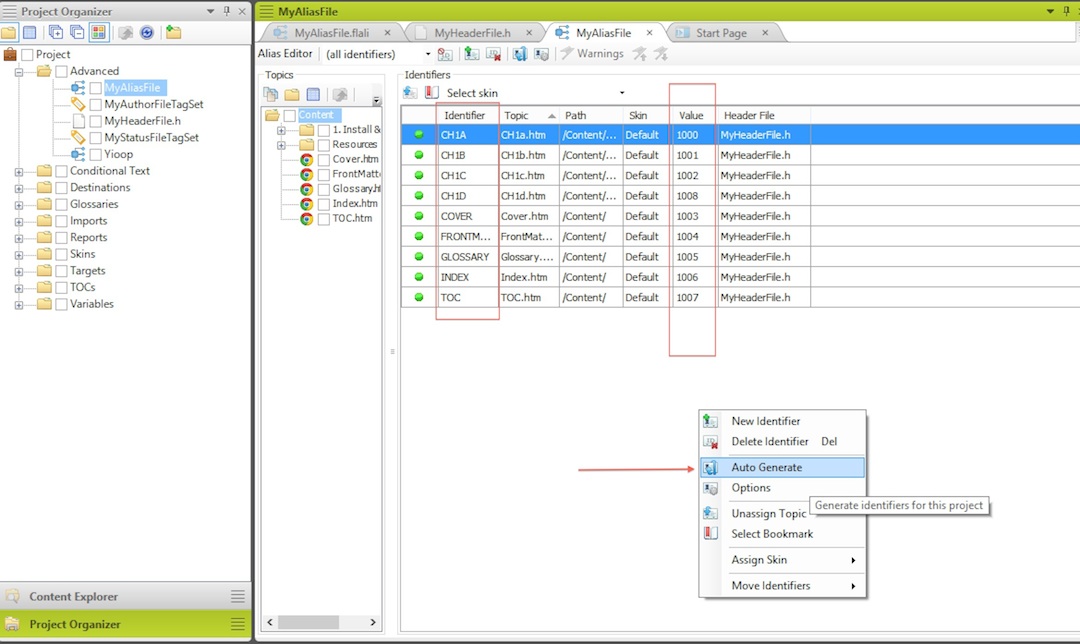
Figure above shows the context menu in the Alias file editor. The option Auto Generate is what we will use to auto generate. I have already generated the Identifiers, so you can see the generated Identifiers in the figure above highlighted.
Building and publishing content
Now we navigate to the Project ribbon menu in Flare. The Build and Publish options are present in this menu. Figure below shows the same.

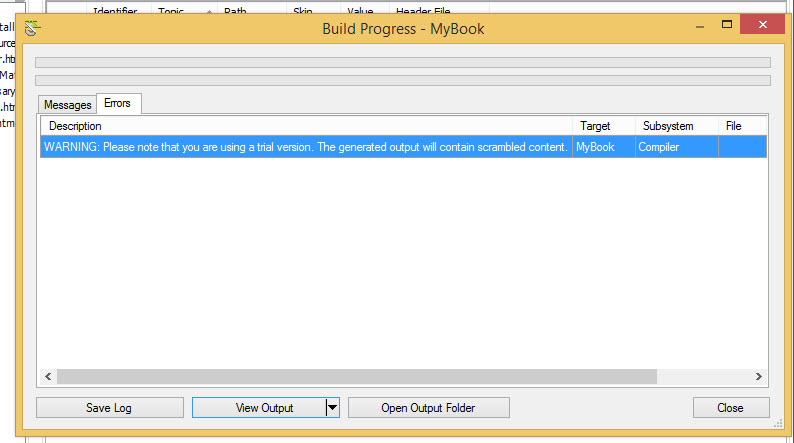
We should now click on Build Primary button. This will show the available help content books that are available for build. Let's select My book, which is the only book present at this time.Once we click on build, the help content will be compiled with all the meta data and the build will be completed. We can see one warning in the output dialog box prompting that the build on the trial version on Flare inserts random characters into the help content. This is a limitation of Trial version in Flare.
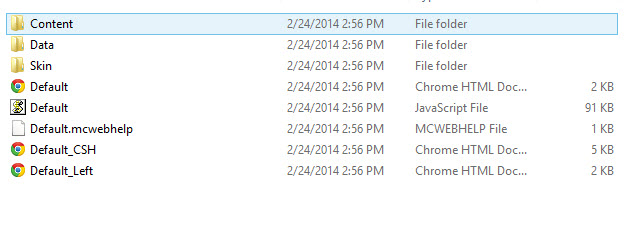
Now we can explore the output folder by clicking on Open Output Folder. This folder contains all the HTML content generated along with some JavaScript files that enable the developer to integrate help content in his application.
Help content Integration with Yioop!
There are two ways to publish the content to the web server on which Yioop! is installed. We can either copy the contents of the CSH output folder to a subdirectory on the web server or we can use the integrated Publish via Ftp tool in the CSH system. For now, we can just copy over the contents to the web server. I have created a subdirectory under Yioop! Directory, and called It CSH. We can now copy all the contents of the output folder to this subdirectory.
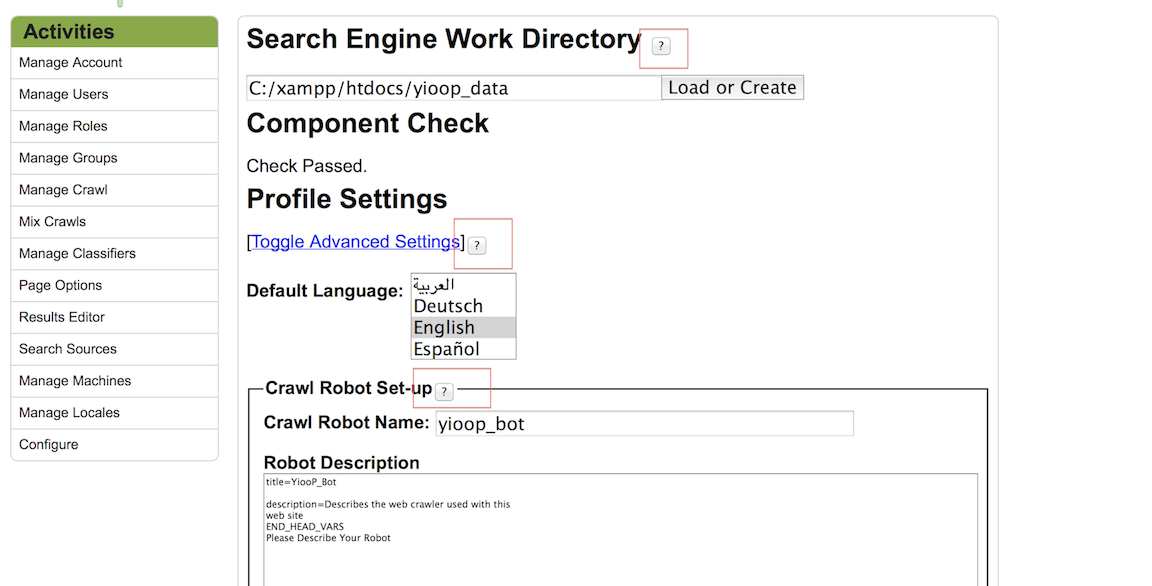
Now the output folder is located at http://localhost/yioop/csh . We can hit this directory to test if we can load the help pages. Once loaded the help pages look like in figure 12.
The help is displayed in a pop-up and HTML buttons are used to trigger the help pop-ups. In order to integrate the pop-up based help in the configuration page of Yioop, we need to add the HTML buttons that fire the pop-ups. First of all we need to find the View page that displays the configuration page. This is a PHP file "yioop/views/elements/configure_element.php". This is a server side PHP file that dynamically generated the HTML content on the configuration page. We need to include the JavaScript helper file that holds the CSH functions In the page. We do this by linking the "csh/Default.js" file in the Yioop HTML source.
The three HTML elements where we need to integrate help buttons are usually titles of the elements. The titles are specified in HTML labels with concerned for attribute.
The labels which we use to integrate help buttons are :
directory-path Install and Configure Help topic. CSH ID - 1001
configure_element_toggle_advanced Advanced help topic. CSHID - 1002
configure_element_robot_description Crawl-Robot Help topic. CSHID -1008
Now we add the function calls beside each of these HTML elements with the snippet below :
<input type="button" value="?" onclick="FMCOpenHelp('CSHID ',null, null, null );" />
Once the integration is complete, the final page looks like figure below.
Finally embedded help looks like figure below. You can also try out the demo by following this demo.
