3 The Document-View Architecture
3.1 Overview
More complex MFC applications use the Document-View architecture, which decouples the user interface (the view) from the application data and logic (the document). After we describe this architecture, we demonstrate it with two examples. The purpose of Four Seasons, the first example, is to simply demonstrate the implementation and consequences of this decoupling. The second example is a usable stack calculator. Three versions are presented. Version two allows users to perform rational number arithmetic; version three adds an undo/redo mechanism.
The calculator's number stack is contained in its document component. This is a common pattern. Often the data of an MFC application will consist of many objects. In these cases the document becomes the manager of these objects, using a container of some type to store and organize them. Lists, arrays, stacks, queues, tables, and sets are familiar examples of containers. MFC provides templates for some of these containers, which are introduced in the Programming Notes section at the end of the chapter.
3.1.1 Prerequisites
Although templates and containers (a.k.a. collections) are reviewed at the end of the chapter, readers with no prior exposure to these topics may need to consult an outside reference such as [STR]. The same is true for throwing and catching exceptions, the error handling strategy employed by the calculator, and file I/O, the serialization mechanism used by both examples.
3.2 The Document-View Architecture
What's wrong with the following function?
double Cube(double x)
{
double result = x * x * x; // compute
x^3
cout << "cube = "
<< result << endl; // display x^3
return result;
}
It correctly computes x3, but it does more; it displays a "cube = ..." message in the console window. Although this may seem like a nice added touch, it greatly reduces the reusability of the function. For example, the "cube = ..." messages would be disruptive in a program that already had a user interface. The Cube() function violates an important design principle: application logic (computing x3) should be decoupled from presentation logic (displaying x3).
In commercial applications decoupling application logic from presentation logic is critical. For example, spread sheet logic (updating linked cells containing formulas and data, etc.) is relatively stable (i.e., doesn't change that often) and platform independent, but users are always demanding new ways to display spreadsheet data (pie charts, bar graphs, worksheets, etc.), and of course most of these displays require platform-dependent graphics and windows libraries. If presentation logic and application logic are tightly coupled, then each time we want to add a new feature to the user interface or port the application to a new platform, we will need to modify the entire program instead of just the user interface.
Decoupling presentation logic from application logic is the basic motive behind the Document-View architecture used by MFC applications. For example, assume we use the App Wizard to create an application called Demo (accepting all of the default features). Among the classes generated are CDemoDoc and CDemoView derived from CDocument and CView, respectively:
class CDemoDoc : public CDocument { ... }; // in DemoDoc.h
class CDemoView : public CView { ... }; // in DemoView.h
Here is a class diagram showing the relationships between these four classes, as well as some of their member variables and functions:
CDemoDoc is the application's document class. Instances of this class are simply called documents. A document is responsible for managing the application's data (app data) as well as providing the application's logic (app logic). A document might represent a budget in a spread sheet application, a memo in a word processor, or a part model in a CAD/CAM system.
Notice the association between the CDemoDoc class icon and the drum labeled "app data". Instances of the drum icon (which is not an official UML icon) are files. Each document is linked with zero or more files. It is the responsibility of the document to store application data into and load application data from an associated file. This is done by the document's Serialize() member function. The App Wizard generates a stub for this function in the CDemoDoc class:
void CDemoDoc::Serialize(CArchive& ar)
{
if (ar.IsStoring())
{
// TODO: add storing code here
}
else
{
// TODO: add loading code here
}
}
The file is represented by an instance of the CArchive class, which is similar to a file stream. Serialize() is automatically called when the user chooses [Save], [Save As ...], or [Open ...] from Demo's [File] menu.
CDemoView is the application's view class. Instances of this class are simply called views. A view is responsible for presentation logic. This includes output— displaying application data— and input— reacting to mouse and keyboard events. Control panels, diagrams, charts, maps, images, and text windows are examples of views.
3.3 The Model-View-Controller Design Pattern
MFC's Document-View architecture is a version of the Model-View-Controller design pattern:
Model-View-Controller [POSE]
Other Names
MVC, Model-View-Controller architecture, Model-View architecture, Model-View Separation pattern, Document-View architecture.
Problem
The user interface is the component most susceptible to change. These changes shouldn't propagate to application logic and data.
Solution
Encapsulate application logic and data in a model component. View components are responsible for displaying application data, while controller components (broker, buttons, boxes, menus, etc.) are responsible for modifying application data. There are no direct links from the model to the views and controllers.
3.3.1 Static Structure
Note that navigation from views and controllers to their associated model is allowed, but not the reverse. This is how a model achieves independence from the user interface: it simply doesn't know about the views and controllers. In our diagram we also assign to the model the responsibility of saving and loading application data to and from a file or database:
For example, suppose we are using a spreadsheet to create a budget for our company. In this case the budget is the model; menu selections and toolbar buttons are examples of controllers; and pie charts, bar graphs, and worksheets are examples of views (worksheets might also be classified as controllers).
The following object diagram gives an abstract view of memory at the moment when three views of the budget are open, two pie charts and a bar graph. There are also two controllers, a menu and a pie chart:
When the user clicks a toolbar button or selects an item from a menu, the controller's Handle(Msg) function might call the model's ChangeData() function, perhaps to modify the number of paper clips the company will purchase in December:
theModel->ChangeData("paper clips", "December", 50000);
Now the Draw() function of each open view (v1, v2, and v3) must be called. The Draw() function will fetch the budget changes using the budget's GetData() function, then redraw the pie chart or bar graph:
int height = theModel->GetData("paper clips",
"December");
DrawDecemberPaperClipsBar(height);
3.3.2 Control in the Document-View Architecture
Clearly CDemoDoc is the model component while CDemoView is the view component of the Model-View-Controller design pattern. But where is the controller? Some user input events can be handled by almost any MFC component, while others are typically handled by the view component. One might say that the Document-View architecture distributes controller functions rather than designate a specific controller component.
Of course the message handlers provided by views, documents, and other application objects are passive. They must be called by a lower level object that actively listens for user input events, then forwards them to their targets. This, of course, is the job of theApp, the MFC message dispatcher introduced in Chapters 1 and 2:
CDemoApp theApp; // from Demo.cpp
We shall identify the primary controller component of the Model-View-Controller design pattern with this object.
3.4 Event Notification
In a typical application there may be many views associated with a single document. Perhaps each view displays a different perspective or region of the document. For example, a word processor user may open four views of a particular document: an outline view, a page layout view, and two normal views, one showing the first page of the document, the other showing the last. A CAD/CAM user may open three views of a part model he is designing: a front view, a side view, and a top view. A flight simulator user may open four views of the simulated airplane he is flying: a cockpit view, a control tower view, a tail view, and a text view that displays important statistical information about the plane.
What happens when the selected view of a document receives a message that a mouse or keyboard event has occurred? Obviously, the view may inform its associated document, which may result in some changes to the application data. If this happens, how will the document's other views be informed of this change? The selected view knows the location of its associated document, but not the location of other views. Because the document is decoupled from its views, it doesn't have direct knowledge of their locations either. The best it can do is to broadcast the fact that it has changed and hope its current views are listening. MFC's CDocument and CView base classes provide an event notification mechanism for this purpose.
MFC's CView class maintains a protected pointer to an associated document. It also provides virtual OnUpdate() and OnDraw() functions. These functions are usually implemented in derived classes:
class CView : public CWnd
{
public:
virtual void OnUpdate(CView* pSender,
...) {}
virtual void OnDraw(CDC* pDC) = 0;
protected:
CDocument* m_pDocument;
// etc.
};
The CDocument class maintains a list of pointers to associated views. Views can add or remove themselves from this list using the AddView() and RemoveView() functions, respectively:[1]
class CDocument : public CCmdTarget
{
public:
virtual void SetModifiedFlag(BOOL
bModified = TRUE);
void AddView(CView* pView);
void RemoveView(CView* pView);
void UpdateAllViews(CView* pSender);
protected:
CPtrList m_viewList; // list of views
BOOL m_bModified; // changed since last saved?
// etc.
};
The m_bModified flag indicates if there are unsaved changes to the application data. This flag is automatically set to FALSE after each save.
Returning to our event notification problem, the view that receives the user input event locates its associated document. This is done by calling the GetDocument() member function, which simply returns the retyped document pointer inherited from the CView base class:
CDemoDoc* CDemoView::GetDocument()
{
ASSERT(m_pDocument->IsKindOf(RUNTIME_CLASS(CDemoDoc)));
return (CDemoDoc*)m_pDocument;
}
Now the view may call some of the document's member functions. Some of these calls may modify the application data stored in the document:
CDemoDoc* pDoc = GetDocument();
pDoc->ModifyAppData();
In this case the document must notify all associated views of this change. This is done by calling the inherited UpdateAllViews() member function, which traverses the list of associated views, m_viewList, calling the OnUpdate() function of each view.
OnUpdate() is implemented in the CDemoView class. This function locates the associated document (by calling GetDocument()), fetches the application data, then updates its window. If the view involves a customized graphical display, then the view informs the operating system that its window needs to be redrawn. This automatically triggers a call to the OnDraw() member function, which is redefined by the programmer to supply the required graphics code.
We can summarize this dynamic with a sequence diagram. Assume there are two views of a single document, and view v1 receives a user input event:
3.5 The Publisher-Subscriber Design Pattern
Event notification is a common design problem: one object needs to notify unknown numbers and types of other objects that its state has changed. There are many design patterns that solve this problem. MFC's event notification mechanism is a special case of one of these patterns:
Publisher-Subscriber [Go4], [POSA]
Other Names
Publishers are also called senders, observables, subjects, and notifiers. Subscribers are also called receivers, listeners, observers and callbacks.
Problem
Various monitors need to be notified when a device changes state, but the number and types of monitors can vary dynamically. We want to avoid polling, and we don't want to make assumptions in the device code about the numbers and types of monitors.
Solution
The device should maintain a list of pointers to registered monitors. Monitors can be different, but each must implement the same interface, which includes an update() function that the device will call when it changes state. The list of monitor pointers can be managed by a reusable Publisher base class. An abstract Subscriber base class defines the interface monitors must implement.
3.5.1 Static Structure
Each publisher maintains a list of pointers to subscribers. Subscribers can be added to this list using the Subscribe() function and removed from the list using the Unsubscribe() function. The Notify() function traverses the list of subscribers, calling the Update() function of each one.
Subscriber::Update() is a pure virtual function. This makes Subscriber an abstract class. The Update() function will need to be implemented in the classes derived from Subscriber. Of course different derived classes may choose different implementations. Each derived class inherits a pointer from the Subscriber base class that points back to the publisher. This pointer can be used by subscribers to inspect the publisher.
3.5.2 Dynamic Structure
Assume two monitors subscribe to a device. When the device changes state, monitor1.F() and monitor2.G() must be called. The following sequence diagram represents this scenario:
3.5.3 Models as Publishers
The Publisher-Subscriber pattern is often used to refine the Model-View-Controller pattern. In particular, the model is a publisher that notifies subscribing views of changes to the application data:
The model's ChangeData() function must be modified so that it calls the inherited Notify() function:
void Model::ChangeData(Data newData)
{
data = newData;
Notify(); // notify all registered
subscribers
}
When a new view is created, it immediately subscribes itself to the model:
View::View(Model* m) { m->Subscribe(this); }
The view's Update() function might simply call the Draw() function:
void View::Update() { Draw(); }
Returning to MFC's Document-View architecture, we can say that it combines the Model-View-Controller design pattern with the Publisher-Subscriber pattern. In the case of the Demo application, CDemoDoc is the document component, which is derived from CDocument, the publisher component. CDemoView is the view component, which is derived from CView, the subscriber component. Finally, CDemoApp, the message dispatcher class, is the controller component.
3.6 Example: The Four Seasons
We begin with a trivial application to demonstrate how the Document-View architecture is used. The Four Seasons application simply displays the name of a season— Winter, Spring, Summer, or Fall— in a read-only edit box.
When we start Seasons, we see a single view of a Seasons document, framed by a child window of the application's main window:
Repeatedly clicking the [Change] button changes the displayed season from Fall to Winter to Spring to Summer, and back to Fall again. We can also change the displayed season by selecting a season from the [Seasons] menu or by clicking one of the colored buttons on the toolbar. Notice that the menu item and toolbar button corresponding to the displayed season is disabled. Presumably, it wouldn't make sense to select [Season]/[Fall] if Fall is already the displayed season.
We can open additional views of the current Seasons document by selecting the [Window]/[New Window] menu item. At this point we see two child windows titled [Season 1:1] and [Season 1:2]. We can interpret [Season N:M] to mean "View M of document N."
We can create new Seasons documents, together with a corresponding view, by selecting the [File]/[New] menu item. We can create an additional view of this new document by selecting [Window]/[New Window] menu item. Select [Window]/[Tile] menu item to tile the view windows:
Observe that clicking the [Change] button in the [Season 1:1] window changes the season in this window and the [Season 1:2] window. This is the UpdataAllViews() mechanism at work. But why didn't the seasons change in the other two windows?
Next, we close the [Season 1:2] and [Season 2:2] windows. We set the season in one window to "Spring" and set the season in the other window to "Summer". With the "Summer" window on top, we select the [Save] item from under the [File] menu or press the [Save] button on the tool bar. A [Save As] dialog box should appear. We type the name "summer" in the [File name:] box, then press the [Save] button. Now we quit the application either by selecting [File]/[Exit] or by pressing the close button in the upper right corner. Notice that as the "Spring" window closes a dialog box appears containing the message "Save changes to Season2?" We click the [Yes] button. Again the [Save As] dialog box appears. We type the name "spring" in the [File Name:] box, then press the [Save] button.
If we use a DOS command shell to list the directory where Seasons.exe lives, we notice that it also contains two files named spring.sea and summer.sea. These are the files we created earlier. The .sea extension indicates that they are files created by the Seasons application. If we view this directory using Windows Explorer, we can see icons representing the spring and season files. If we double click on the [spring] icon, the Seasons application automatically starts. Notice that the displayed season is "Spring" instead of the default, "Fall".
3.6.1 Designing the Four Seasons
The Four Seasons application will instantiate the Document-View architecture. The document class, CSeasonsDoc, will encapsulate a string called m_season that holds the current season. CSeasonsDoc also provides a Change() function for changing m_season and a Serialize() function for saving and loading m_season. CSeasonsDoc is derived from MFC's CDocument class, which is a publisher responsible for notifying all interested subscribers (i.e., the views) when the season changes.
The CSeasonsView class generated by the App Wizard derives from MFC's CFormView class, which derives from MFC's CView class. Despite its name, the CSeasonsView class is both a controller class and a view class. As a controller, CSeasonsView provides a member function called OnChange() that will be called each time the [Change] button is clicked. This function calls the Change() function of the associated document.
As a view, CSeasonsView provides a member function called OnUpdate() that will be indirectly called by the document's Change() function. OnUpdate() will copy the document's m_season variable to the view's m_season variable, then display it in the edit box of the associated form.
The following class diagram summarizes the design:
We can better understand the architecture by looking at snapshot of memory at a given moment of time. For example, at the end of our demonstration the application window contained four view windows. Two windows were displaying a document in which Summer was the current season, while the other two windows were displaying a document in which Fall was the current season. Internally, there are four view objects and two document objects at this moment. Their relationship is shown by the following object diagram:
3.6.2 Implementing the Four Seasons
The Seasons application is an example of a multi-document application. A multi-document application allows users to simultaneously have multiple views of multiple documents. The difference between a multi-document and single-document application is determined in the first step of the App Wizard.
Step 1:
i. Start Visual C++. Choose [File]/[New]/[Projects]/[MFC AppWizard (.exe)] to create a project named "Seasons" in an appropriate directory, then click the [OK] button.
ii. This time we will accept the default [Multiple Documents] option presented by the [Step 1] dialog box.
ii. Accept the default options in the [Step 2 of 6] through [Step 5 of 6] dialogs, too, but not before pressing the [Advanced ... ] button in the [Step 4 of 6] dialog.
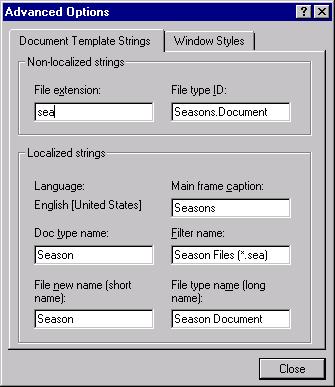
iii. This will display the [Advanced Options] dialog box, where we can enter "sea" in the [Document Template Strings]/[File extension:] box, then click the [Close] button (see below).
iv. The [Step 6 of 6] dialog displays the names of the classes and files that the App Wizard will generate. As in the Calculator project, select CFormView as the base class for the CSeasonView class, then press the [Finish] button.
v. Click the [OK] button of the [New Project Information] dialog box and let the App Wizard do its job.
How did Windows know to use the Seasons application to open the spring.sea file? Obviously the .sea extension identified this file as a Seasons document, but how did this extension get appended to "spring" the name we typed in the [Save As] dialog's [File name:] box? This was specified using the [Advanced Options] box in step 4 of the App Wizard:
3.6.2.1 Implementing the Document
The initial programming effort should begin with the document class. Once we have established the basic application data and logic, the job of deciding how to present it becomes easier. The first step is to decide what the application data should look like. We only need to keep track of the name of a season. This could simply be a character array— i.e., a null-terminated array of characters— but object oriented programmers dislike using arrays, pointers, and other error-prone, non-objects.
Instead, we could use the wrapper-body design pattern discussed in Chapter 1 to create a class of wrapper objects with character array bodies. These wrapper objects would manage the character arrays on behalf of clients. When the array filled up, the wrapper could automatically increase its size. The wrapper could detect out of range indices, and the wrapper could provide member functions that performed append, compare, extract, and other basic string operations.
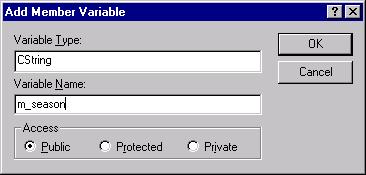
We add a CString variable called m_season to the document class.
Step 2:
i. Click the right mouse button on the CSeasonsDoc node of the [Workspace]/[Class View] tree control. This will display the shortcut menu for the CSeasonsDoc class.
ii. Choose the [Add member variable] option to add a public, CString member variable called m_season.
Here's what the [Add Member Variable] dialog box looks like:
Now that we've decided on the form of our data, we can add
the basic logic for changing seasons.
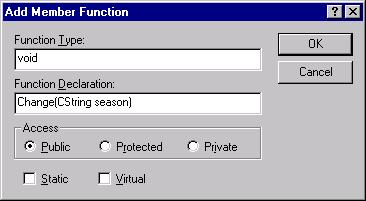
Step 3: Choose the [Add member function] option on the
CSeasonsDoc shortcut menu to add a public function called Change() that returns
a void and has CString parameter.
Here's the prototype of the CSeasonsDoc::Change() member
function:
void Change(CString season);
Here's what the [Add Member Function] dialog box looks like:
We can see the newly added members in the CSeasonDoc class:
class CSeasonsDoc : public CDocument
{
public:
void
Change(CString season);
CString m_season;
// etc.
};
The Change() function will change m_season to the season specified by its argument. But more often, m_season will be changed to the next season in the year. Rather than writing a separate function to do this, let's manually add a default argument to Change() called "next". This argument tells Change() to figure out the next value for m_season.
Step 4: Locate the declaration of the CSeasonsDoc class in the file SeasonsDoc.h. (Simply double click on the CSeasonsDoc icon in the [Class View] of the [Workspace] window.) Add a default argument as shown below.
class CSeasonsDoc : public CDocument
{
public:
void Change(CString season = "next");
CString m_season;
// etc.
};
Whenever a member variable is added to a class, it usually needs to be initialized in by the constructor.
Step 5: Locate the definition of the CSeasonsDoc() constructor in the SeasonsDoc.cpp file, and add the initialization of the m_season variable.
Here is a listing:
CSeasonsDoc::CSeasonsDoc()
{
m_season
= "Fall";
}
3.6.2.1.1 Mutation
Functions that change application data are called mutators. The Change() function in the CSeasonsDoc class is a mutator, because it changes the m_season member variable. All document mutators must do two things when they are finished mutating the document's data. First, they must call:
SetModifiedFlag(TRUE);
This function is inherited from the CDocument class. It sets the m_bModified flag, also inherited from the CDocument class, to TRUE. This flag is checked when the user attempts to terminate the application or close the last open view of a document. If it is true, MFC will prompt the user to save the modified application data.
The second thing a document mutator must do is notify all registered views of the change in the document's data. This is done by calling:
UpdateAllViews(NULL);
This function is also inherited from the CDocument class. It will traverse the list of all registered views, calling the OnUpdate() function of each. The UpdateAllViews() parameter is used to point to any view that shouldn't be notified. For example, a view might call its document's UpdateAllViews() function like this:
CSeasonsDoc* pDoc = GetDocument();
pDoc->UpdateAllViews(this);
In effect, this says, "update all of the other views, but not me, I've already made the changes." In our case there will be no exceptions. We want all of the views to be notified, so we pass MFC's null pointer, NULL, to UpdateAllViews().
Step 6: Locate the definition of Change() in the SeasonsDoc.cpp file and finish its implementation.
Our algorithm isn't very clever. If the default argument is used, then a multi-way conditional determines the current season and updates to the next season. Otherwise, the season is set to the argument. In either case, the modified flag is set and the views are updated:
void CSeasonsDoc::Change(CString season /* = "next" */)
{
if
(season == "next")
{
if (m_season == "Fall")
m_season = "Winter";
else if (m_season ==
"Winter")
m_season = "Spring";
else if (m_season ==
"Spring")
m_season = "Summer";
else
m_season = "Fall";
}
else
m_season = season;
SetModifiedFlag(TRUE);
UpdateAllViews(NULL);
}
3.6.2.1.2 Persistence and Serialization
A persistent object is an object that can be saved to and read from a file or database. Saving an object to a file is called serialization, because all of the object's properties, components, sub-components, etc. are converted into a linear sequence of bytes or characters and inserted into a file. Reading an object from a file is called de-serialization. Serialization and de-serialization problems and techniques will be discussed in Chapter 7.
Not all objects need to be persistent. Non-persistent objects are called transient objects. For example, user interface objects like views, menus, and tool bars are transient, because they can easily be reconstructed at program start-up time. By contrast, documents need to be persistent, because they contain application data that can't be reproduced at program start-up time.
What component is responsible for serializing and de-serializing persistent objects? In some cases this job is assigned to special resource manager objects, but a simpler strategy is to make every persistent object responsible for serializing and de-serializing itself. For persistent MFC objects both tasks are done by a single member function called Serialize():
void Persistent::Serialize(CArchive& ar)
{
if (ar.IsStoring())
{
// ar << data;
}
else // ar.IsLoading()
{
// ar >> data;
}
}
The parameter passed to Serialize is a reference to a CArchive object. The CArchive class is similar to the fstream class defined in the standard C++ library:
class CArchive
{
public:
CString m_strFileName; // file name
BOOL IsLoading() const; // write mode
BOOL IsStoring() const; // read mode
// insertion operators:
CArchive& operator<<(double
d);
CArchive& operator<<(int i);
CArchive& operator<<(char
ch);
// etc.
// extraction operators:
CArchive&
operator>>(double& d);
CArchive& operator>>(int&
i);
CArchive&
operator>>(char& ch);
// etc.
protected:
CFile* m_pFile; // the file
// etc.
};
Instances of the CArchive class are called archives and represent files. When open for writing, we can insert data into an archive using the insertion operator:
ar << data;
When open for reading, we can extract data from an archive using the extraction operator:
ar >> data;
The App Wizard has anticipated that CSeasonsDoc objects will need to be persistent, and has taken the liberty of generating a partial implementation of a Serialize() member function. This function will automatically be called when the user selects [Save], [Save As], or [Open] from the application's [File] menu. All that's left for us to do is to insert m_season when we are in "storing mode," and extract m_season when we are in "loading mode."
Step 7: Locate the definition of Serialize() in the SeasonsDoc.cpp file and finish its implementation.
Here is a listing:
void CSeasonsDoc::Serialize(CArchive& ar)
{
if (ar.IsStoring())
{
ar
<< m_season;
}
else
{
ar
>> m_season;
}
}
The implementation of the document class is complete. Now would be a good time to build the application and fix any compiler or linker errors.
3.6.2.2
Implementing Presentation and Control
Now that we've completed the implementation of the document class, we can shift our attention to the view class. The first step is to create the form using the dialog editor and connect the form's controls to view class member variables and functions using the Class Wizard.
Step 8:
i. Use the Dialog Editor to add a label, button, and edit box to the IDD_SEASONS_FORM dialog box.
ii. Use the [Layout] menu and mouse to arrange the controls so your form is similar to the example shown earlier.
iii. Use the property sheets of the controls to set the label caption to "Season:", the button caption to "Change", the button ID to "IDC_CHANGE", and the edit box ID to "IDC_SEASON.
iv. Make the edit box read-only.
We use the Class Wizard to "wire" the edit box to the view.
Step 9:
i. Use the [View]/[Class Wizard ...]/[Member Variables] dialog to add a CSeasonsView member variable called m_season of type CString that will be "wired" to the IDC_SEASON edit box.
ii. Use the [View]/[Class Wizard ...]/[Message Maps] dialog to add a CSeasonsView member function called OnChange() that will be called each time the IDC_CHANGE button sends a BN_CLICKED message.
3.6.2.2.1 Control: Implementing the Button Handler
Despite the name, MFC view classes frequently play the role of view and controller in the model-view-controller architecture. However, it is often possible to separate those view member functions concerned with control— updating the model— from those member functions responsible for presentation— displaying the model's data.
From this perspective, the CSeasonsView OnChange() member function is a controller function. It will be called when the user clicks the [Change] button. It navigates (i.e., follows a pointer) to the document, and changes the season by calling the document's Change() function.
Step 10: Locate the definition of OnChange() in the SeasonsView.cpp file, and finish its implementation.
Here is a listing:
void CSeasonsView::OnChange()
{
CSeasonsDoc*
pDoc = GetDocument();
pDoc->Change();
}
3.6.2.2.2 Presentation: Implementing OnUpdate()
Recall that the document's Change() function calls UpdateAllViews(), which will call the OnUpdate() function of every registered view. All views inherit an OnUpdate() function from the CView base class. Unfortunately, this function does nothing. MFC provides a do-nothing OnUpdate() function because some applications— like the calculator application in the previous chapter— don't need an OnUpdate() function.
CSeasonsView does need an OnUpdate() function. We can use the Class Wizard to add common functions like OnUpdate() the same way we use it to add message handlers:
Step 11:
i. Display [View]/[Class Wizard ...]/[Message Maps]. Make sure that CSeasonsView is displayed in the [Class Name:] box, and make sure it is selected in the [Object IDs:] list.
ii. Select the OnUpdate function in the [Messages:] list, then click the [Add Function] button. Click the [OK] button.
What should OnUpdate() do? First, it needs to find out the new season. It does this by copying its document's m_season member variable to the m_season variable of its implicit parameter. After we assign the correct season to the view's m_season variable, we can copy it to the IDC_SEASON edit box by simply calling UpdateData(FALSE):
Step 12: Locate the definition of the function OnUpdate() in SeasonsView.cpp file and add the following code.
void CSeasonsView::OnUpdate(CView* pSender,
LPARAM
lHint, CObject* pHint)
{
CSeasonsDoc*
pDoc = GetDocument();
m_season = pDoc->m_season;
UpdateData(FALSE); // IDC_SEASON =
m_season
}
The implementation of the view class is complete. Now would be a good time to build and test the application.
3.6.2.3 Adding Menu Items
Because we selected the multiple document option, the Seasons application will have a main application window containing view windows of all of the open documents. Therefore, Seasons has two menu bars: IDR_MAINFRAME, which is used when no views are open, and IDR_SEASONTYPE, which is used when views are open. Open the IDR_SEASONTYPE menu in the Menu editor. Be careful not to edit the IDR_MAINFRAME menu.
Step 13:
i. Create a new menu. Use its property sheet to set its caption to "&Season". Add an item under the Season menu.
ii. Use its property sheet to set its caption to "&Fall". Set its prompt string to "Change season to Fall." Select ID_SEASON_FALL for its ID.
iii. Repeat this procedure to create "&Winter", "&Spring", and "S&ummer" items.
Next, use the class wizard to add menu item handlers and
updaters. Updaters are functions that are called just before a menu item is
displayed. These functions provide us with an opportunity to disable or check
individual menu items.
Step 14:
i. Display [View]/[Class Wizard]/[Message Maps]. Make sure
CSeasonsView is displayed in the [Class Name:] box. This is vitally important,
because menu item and toolbar button messages can be handled by any object. If
the Class Wizard is awakened when the Menu Editor is active, it will assume you
want to handle menu item messages in the CMainFrame class.
ii. Select ID_SEASON_FALL from the [Object IDs:] list.
iii. Add functions to handle the COMMAND and UPDATE_COMMAND_UI
messages.
iv. Repeat this procedure for ID_SEASON_SPRING,
ID_SEASON_SUMMER, and ID_SEASON_FALL.
Unlike the [Change] button handler, the menu item handlers
change the document's season to a specific value.
Step 15: Locate the declarations of OnSeasonFall() and the
other menu item handlers in CSeasonsView, and complete their implementations
following the example given below.
void CSeasonsView::OnSeasonFall()
{
CSeasonsDoc*
pDoc = GetDocument();
pDoc->ChangeSeason("Fall");
}
Menu item updaters are functions that are called just before a menu item is displayed. The argument passed to an updater is a pointer to an odd object called a UI command. This object describes any changes that should be made to the appearance of the menu item such as enabled or disabled, checked or unchecked, modifications to the caption, etc.:
class CCmdUI
{
public:
// enable or disable menu item:
virtual void Enable(BOOL bOn = TRUE);
// check or uncheck menu item:
virtual void SetCheck(int nCheck = 1);
// change menu item caption:
virtual void SetText(LPCTSTR lpszText);
// etc.
};
Readers should consult the on-line documentation for a complete description of this class.
Step 16: Locate the declarations of OnUpdateSeasonFall() and
the other menu item updaters in CSeasonsView, and complete their
implementations following the example given below.
void CSeasonsView::OnUpdateSeasonFall(CCmdUI* pCmdUI)
{
if
(m_season == "Fall")
pCmdUI->Enable(FALSE); // disable
[Season]/[Fall]
}
3.6.2.4 Adding Toolbar Buttons
To complete the application, we only need to add toolbar buttons that correspond to the items on the [Season] menu. Recall that this can be done simply by assigning to each button the resource identifier of the corresponding menu item.
Step 17:
i. Following the techniques described in the previous chapter,
add toolbar buttons that correspond to the items on the [Season] menu.
ii. Build and test the application.
Notice that the toolbar buttons are automatically disabled or enabled when the corresponding menu item is enabled or disabled.
3.7 Example: A Stack Calculator
The document often is or uses a container to hold application data. (Containers are discussed in the Programming Notes section at the end of this chapter.) Our next example demonstrates this idea. Let's begin with some informal definitions. Recall that a stack is a data container that offers Push(), Pop(), and Top() operations:
stack.Push(item); // stores item in stack
stack.Pop(); // removes last item pushed onto stack
stack.Top(); // returns last item pushed onto stack
A stack calculator is a number stack that offers Push(), Pop(), and Top() operations plus Add(), Mul(), Div(), and Sub() operations:
calc.Add(); // replace top two numbers with sum
calc.Mul(); // replace top two numbers with product
calc.Sub(); // replace top two numbers with difference
calc.Div(); // replace top two numbers with quotient
Here's a snap shot of our stack calculator in action:
At this point the top four numbers on the stack are 7, 6, 3, and 8. Here's what happens if we press the [MUL] button followed by the [ADD] button:
Notice that the top three numbers have been replaced by 45 = 6 * 7 + 3. In other words, when the [MUL] button was pressed, 7 and 6 were replaced by 7 * 6 = 42. Next, when the [ADD] button was pressed, 42 and 3 were replaced by 42 + 3 = 45.
Pressing an arithmetic button when there are fewer that two items on the stack, or pressing the [POP] button when the stack is empty causes an error dialog box to appear:
Of course we can have multiple views of multiple stack calculators:
This might come in handy if we need to carry out several lengthy computations at the same time or if the stack is so large that we need multiple views to see the whole thing.
Of course selecting the [File]/[Save] menu item saves the stack in a file with a .cal extension.
3.7.1 Designing the Stack Calculator
Naturally, the stack calculator makes use of the document-view architecture. We could have made the document a stack, but we decided to implement stack as a separate template class, CStack<T>. This will make it easier to reuse stacks in future applications. To simplify our implementation of CStack<T>, we use MFC's CList<T> template as a base class.
At this point we could have made CDocument and CStack<Number> base classes of the document class (C++ allows classes to have multiple base classes). In this case the document class would inherit the ability to perform push, pop, and top operations. We explore this design further in the exercises. Instead, we chose delegation as the relationship between document and stack.
Delegation means that one class forwards client requests to another class. For example, in the wrapper-body design pattern the wrapper often delegates to the body. Delegation is often used as a less efficient but more flexible alternative to inheritance as a code reuse mechanism. Of course the document class won't inherit push, pop, and top functions. It will need to implement versions that delegate to the corresponding stack functions. The document also provides arithmetic operations and serialization. Naturally, all member functions that alter the stack use the CDocument base class to notify all registered views of the change.
The view class does double duty as a view and a controller. As a controller, it provides handlers for the calculator buttons: OnAdd(), OnPush(), OnPop(), etc. These functions simply call the corresponding document member functions. Presentation duties are assigned to the OnUpdate() function, which will be indirectly called each time the stack changes. This function erases the list box control, then inserts every stack element back into the list box control.
The following class diagram summarizes our design.
3.7.2 Implementing the Stack Calculator
We begin by letting the App Wizard generate an application similar to the Seasons application:
Step 1:
i. Start Visual C++. Choose [File]/[New]/[Projects]/[MFC AppWizard (.exe)] to create a project named "Calc" in an appropriate directory, then click the [OK] button.
ii. Accept the default options in [Step 1] through [Step 5 of 6] dialogs, but not before pressing the [Advanced ... ] button in the [Step 4 of 6] dialog.
iii. This will display the [Advanced Options] dialog box, where we can enter "cal" in the [Document Template Strings]/[File extension:] box, then click the [Close] button.
iv. The [Step 6 of 6] dialog displays the names of the classes and files that the App Wizard will generate. As in the Calculator project, select CFormView as the base class for the CCalcView class, then press the [Finish] button.
v. Click the [OK] button of the [New Project Information] dialog box and let the App Wizard do its job.
3.7.2.1 Implement Stacks and the Adapter Design Pattern
Unfortunately, stacks are not among the MFC container classes. It looks like we'll need to dust off our data structures books and review the various implementations. Fortunately, the adapter design pattern saves us from this fate:
Adapter [Go4]
Other Names
Wrapper
Problem
An existing server implements the functions required by a client, but the interface doesn't match the required interface.
Solution
Insert an adapter between the client and the server. The adapter implements the interface required by the client by calling the appropriate server functions. The adapter and server can be related by generalization or delegation.
Static Structure
All of the MFC container classes provide data storage and access functions, but none provide the familiar Push(), Pop(), and Top() functions expected by stack clients. To remedy the problem, we simply need to create a stack adapter for CLists (or CArrays):
The best way to add a new class to a project is to use the [Insert]/[New Class...] menu:
Step 2:
i. Select the [Insert]/[New Class ...] menu item. This displays the [New Class] dialog box.
ii. The [Class Type:] list box at the top allows us to choose the type of class we want to add: MFC class, Generic Class, or Form Class. Set the type to Generic Class. Type CStack in the [Name:] box, then press the [OK] button.
Visual C++ creates two files: Stack.h and Stack.cpp. The Stack.h file contains the declaration of CStack. The Stack.cpp file contains the implementation of the CStack default constructor and destructor. Both files have been added to the Calc project.
Our plan is to derive CStack from CList. But what should we use for the template parameters? We could, of course, derive CStack from CList<double, double>, but our CStack class will be easier to reuse if we make CStack a template derived from CList<Data, Data>, where Data is the CStack template parameter.
Step 3:
i. Remove the constructor and destructor declarations from Stack.cpp. (All template member functions must be declared in the header file.)
ii. Include <afxtempl.h> at the top of Stack.h.
iii. Make CStack a template parameterized by Data.
iv. Derive CStack from CList<Data, Data>.
v. Add the implementations of Push(), Pop(), and Top() (See below).
Here's the complete declaration of CStack:
template<class Data>
class CStack: public CList<Data,
Data>
{
public:
void Push(Data item) { AddHead(item); }
void Pop()
{
if (IsEmpty())
throw CString("Stack already
empty");
RemoveHead();
}
Data Top()
{
if (IsEmpty())
throw CString("Stack already
empty");
return GetHead();
}
};
3.7.2.1.1 Exceptions
Push(), Pop(), and Top() call AddHead(), RemoveHead(), and GetHead(), respectively. That's straight forward. The tricky part is deciding what to do when a client attempts to call Pop() or Top() when the stack is empty. We could display an error message and/or terminate the program. This might be okay for the stack calculator, but it might limit the reusability of our stack class in future applications. In general, stack clients will expect stacks to notify them of errors, but will want to decide for themselves how to handle these errors.
The C++ catch and throw mechanism is intended for exactly this situation. When a stack detects an error, it creates an exception— an object that describes the error— then uses the throw operator to return the exception to the client:
Exception e("stack already empty");
throw e;
try
{
m_stack.Pop();
// etc.
}
catch(Exception e)
{
// handle e here
}
If the call to stack.Pop() throws an exception, control is immediately transferred to the following catch-block, where the client may decide what remedy should be taken.
How should the Exception class be defined? There are four choices. The standard C++ library provides a hierarchy of pre-defined exception classes derived from a class named exception. The MFC library provides a hierarchy of pre-defined exception classes derived from a class named CException, we could define our own hierarchy of exception classes, or we could simply use CStrings as exceptions. We choose the last option because it is simple and it avoids the idiosyncrasies of CExceptions. The penalty is that clients will not be able to use complex exception handling strategies based on the type of exception caught.
3.7.2.2 CCalcDocument
As always, we want to complete the definition of the document before moving on to the view. The first step is to add member variable and member function declarations to the CalcDoc.h file.
Step 4:
i. Manually add the declaration of a private member variable named m_stack of type Stack<Number> to the declaration of CCalcDoc in CalcDoc.h.
ii. Don't forget to include Stack.h at the top of the file.
iii. Use a typedef to introduce Number as another name for double.
iv. Add member functions Push(), Pop(), Add(), Sub(), Mul(), and Div() to CCalcDoc.
v. Add the functions GetHeadPosition() and GetNext(POSITION& pos).
Here's a partial listing of the CalcDo.h after this step:
#include "Stack.h"
typedef double Number;
class CCalcDoc : public CDocument
{
public:
POSITION GetHeadPosition();
Number GetNext(POSITION& pos);
void Pop();
void Push(Number n);
void Div();
void Mul();
void Sub();
void Add();
// etc.
private:
CStack<Number> m_stack;
// etc.
};
Now we turn to CalcDoc.cpp and the implementations of these member functions.
Step 5:
i. Implement the four arithmetic functions. In each case make sure there are at least two elements on the stack. Replace the top two elements by their sum, product, quotient, or difference. Set the modified flag and update all the views.
ii. Also implement Push() and Pop().
The division function is the most complicated, because it must check for division by 0 errors. Div() begins like all of the arithmetic functions: by checking that there are at least two numbers on the stack. If there aren't enough numbers on the stack, an exception is thrown. Remember, error detection is generally the responsibility of the document, while error handling is generally the responsibility of the view. Of course if an exception is thrown, then Div() terminates immediately.
Next, the top two numbers are removed from the stack. If the second number is 0, then another exception is thrown, but not before the stack is restored to its original state. This is an example of another important error handling principle: when an error is detected, try to restore the application data to its last known consistent state.
Finally, the quotient is pushed onto the stack, the modified flag is set, and all registered views are notified of the change. Here's a complete listing:
void CCalcDoc::Div()
{
if (m_stack.GetCount() < 2)
throw CString("not enough items
on stack");
Number n1 = m_stack.Top();
m_stack.Pop();
Number n2 = m_stack.Top();
m_stack.Pop();
if (n2 == 0)
{ //
restore stack:
m_stack.Push(n2);
m_stack.Push(n1);
throw CString("Can't divide by
0");
}
m_stack.Push(n1 / n2);
SetModifiedFlag(TRUE);
UpdateAllViews(NULL);
}
The implementation of the Pop() function demonstrates an important feature of C++:
void CCalcDoc::Pop()
{
m_stack.Pop();
SetModifiedFlag(TRUE);
UpdateAllViews(NULL);
}
Unlike Div(), the Pop() function doesn't bother to check if the stack is empty before calling the stack's Pop() function. This isn't necessary, because CStack::Pop() will throw an exception if the stack is empty. This will automatically cause CCalcDoc::Pop() to throw an exception at the point where it calls CStack::Pop(). More formally, we say that CStack::Pop() explicitly throws an exception because we can see the call to throw in the implementation, but CCalcDoc::Pop() implicitly throws the exception.
3.7.2.2.1 Traversing
Generally speaking, a class needs to provide clients with a way to traverse any containers it encapsulates. One solution is to provide "getter" functions that simply return the containers to the client. For example, CCalcDoc might provide a GetStack() member function:
CStack<Number> CCalcDoc::GetStack() { return m_stack; }
This approach has several drawbacks. The way we have implemented it, the client will get a copy of the stack. Copying the stack can be very inefficient if the stack is large. We could improve performance by returning a stack reference:
CStack<Number>& CCalcDoc::GetStack() { return m_stack; }
But this solution violates encapsulation. Now the client can bypass the document's stack functions and directly manipulate the stack.
The best solution is to provide clients with iterators for traversing and inspecting the container.
Step 6: Implement GetHeadPosition() and GetNext(). These simply delegate to the corresponding CStack operations (which were inherited from CList).
POSITION CCalcDoc::GetHeadPosition()
{
return m_stack.GetHeadPosition();
}
Number CCalcDoc::GetNext(POSITION& pos)
{
return m_stack.GetNext(pos);
}
Notice that the GetNext() parameter is passed by reference rather than by value. Why is this necessary?
3.7.2.2.2 Serializing
The last step is to implement the Serialize() function so that it saves and loads the stack. We could save the serialize by inserting each number into the archive and de-serialize the stack by extracting each number from the archive and pushing it onto the stack. Fortunately, this isn't necessary. CList has a Serialize() function that already serializes and de-serializes each element it contains. Since CStack is derived from CList, CStack inherits this function. But CStack is simply an adapter. It doesn't have any data members of its own, so the inherited Serialize() function also saves and loads the stack.
Step 7: Implement Serialize(). CStack is derived from CList which is derived from CObject, so the stack should know how to serialize and de-serialize its contents.
We don't even need to check if the archive is in storing or loading mode, because the CList Serialize() function will perform this check. Here's the complete implementation:
void CCalcDoc::Serialize(CArchive& ar)
{
m_stack.Serialize(ar);
}
Now would be a good time to build the application and fix any compiler and linker errors.
3.7.2.3 Implementing the View
Begin by using the Dialog Editor to create the form:
Step 8:
i. Use the Dialog Editor to add a label, six buttons, and edit box, and a list box to the IDD_CALC_FORM dialog box.
ii. Use the [Layout] menu to arrange the controls using the screen shots given earlier as a guide.
iii. Use the property sheets of the controls to set the label caption to "stack", and the button captions to "PUSH", "POP", "ADD", "SUB", "MUL", and "DIV" with IDs "IDC_PUSH", "IDC_POP", "IDC_ADD", "IDC_SUB", "IDC_MUL", and "IDC_DIV" respectively.
iv. Set the ID of the edit box to IDC_ARG and the ID of the list box to IDC_STACK.
Next, we use the Class Wizard to "wire" the form to the CCalcView class:
Step 9:
i. Use the [View]/[Class Wizard ...]/[Member Variables] dialog to add a CCalcView member variable called m_arg of type double that will be "wired" to the IDC_ARG edit box.
ii. Use the [View]/[Class Wizard ...]/[Message Maps] dialog to add a CCalcView member function called OnAdd() that will be called each time the IDC_ADD button sends a BN_CLICKED message.
iii. Do the same for the other buttons, too. Also use the class wizard to create an OnUpdate() member function.
We are now ready to implement the functions in the CalcView.cpp. Let's begin with controller function. These are the functions that handle button press messages sent by the user.
Step 10: Implement the button handlers. These simply delegate to the corresponding CCalcDoc member function.
Except for OnPush(), the button handlers are similar to each other. A pointer to the document is acquired, and the corresponding document member function is called. Of course the document functions may throw exceptions, so we need to call them inside try blocks. If an exception is thrown, control will immediately be transferred to the following catch block where a message dialog containing the error message will be displayed:
void CCalcView::OnDiv()
{
CCalcDoc* pDoc = GetDocument();
try
{
pDoc->Div();
}
catch(CString e)
{
AfxMessageBox(e);
}
}
The [Push] button handler uses UpdateData() to transfer the number typed into the edit box into the associated CCalcView member variable, m_arg. This number is then passed to the document's Push() function:
void CCalcView::OnPush()
{
CCalcDoc* pDoc = GetDocument();
UpdateData(TRUE); // m_arg = IDC_ARG
pDoc->Push(m_arg);
}
3.7.2.3.1 OnUpdate()
It may seem strange that the CCalcView's Add() function doesn't display the result in the view's list box, but the Add() function is responding to a button click message from the user. In this capacity CCalcView is a controller responsible for updating the document's data. The document notifies each view of the change by calling UpdateAllViews(), which calls each CCalcView's OnUpdate() function. In this capacity the CCalcView now behaves like a view responsible for displaying the document's data. Remember, only the view with input focus changes the document's stack, but all views need to update themselves.
What should happen in OnUpdate()? A simple strategy is to remove everything in the list box, then re-insert each number from the document's stack into the list control. Of course the Win32 API provides global C functions that performing these operations, but we would rather deal with MFC wrapper objects rather than handles and C functions.
Of course we didn't create a wrapper for the list box control. Fortunately, it's never too late. Every view inherits a function named GetDlgItem() (Get Dialog Item) from the CWnd base class:
CWnd* CWnd::GetDlgItem(int nID) const;
Given the identification number of a control, GetDlgItem() creates a temporary wrapper for that control and returns its address. The type of wrapper created by GetDlgItem() is determined by the system object specified by the identification number. If this object is a button, then a pointer to a newly created instance of the CButton class is returned. If the object is a scroll bar, then a CScrollBar pointer is returned; if the object is an edit control, a CScrollBar pointer is returned, and so on.
How can one function return such a variety of pointers? Although one control wrapper is very different from another, they are all derived from the CWnd class:
This means the pointer returned by GetDlgItem() can be consistently typed as a CWnd pointer. Of course if we are given a CWnd pointer to a CListBox, and we want to use it to call some CListBox member functions, we'll need to explicitly cast the CWnd pointer to a CListBox pointer:
CListBox* pLB = (CListBox*) GetDlgItem(IDC_STACK);
It may seem unfair that an explicit cast is required to retype a CWnd pointer to a CListBox pointer, but that the cast happens automatically when GetDlgItem() wants to re-type a CListBox pointer as a CWnd pointer.
Re-typing a pointer to a derived class as a pointer to a base class is called an upcast. Re-typing a pointer to a base class as a pointer to a derived class is called a downcast. In C++ upcasting is automatic because there is no chance of an error. A pointer to a CListBox is a pointer to a CWnd. But downcasting requires an explicit cast because there is a chance for an error. A pointer to a CWnd might not point to a CListBox. It might point to a CButton, instead. If we downcast a CButton pointer to a CListBox pointer and try to call a CListBox member function, then the program will crash.
The CListBox class provides member functions for inserting and deleting strings, as well as getting and setting the positions of selected items:
class CListBox : public CWnd // from afxwin.h
{
public:
int GetCount() const;
int GetSel(int nIndex) const;
int SetSel(int nIndex, BOOL bSelect =
TRUE);
int AddString(LPCTSTR lpszItem);
int DeleteString(UINT nIndex);
int InsertString(int nIndex, LPCTSTR
lpszItem);
void ResetContent();
// etc.
};
We are now ready to implement OnUpdate().
Step 11: Implement OnUpdate(), which should traverse the list of numbers in the document's stack, inserting each one into the list box control.
Here's a complete listing of the function:
void CCalcView::OnUpdate(CView* pSender,
LPARAM
lHint, CObject* pHint)
{
CListBox* pLB = (CListBox*)
GetDlgItem(IDC_STACK);
pLB->ResetContent();
CCalcDoc* pDoc = GetDocument();
POSITION pos =
pDoc->GetHeadPosition();
Number num;
while(pos != NULL)
{
num = pDoc->GetNext(pos);
pLB->InsertString(-1, ToCString(num));
}
}
One small technical point remains. The document's stack is a list of numbers, while the list control is a list of strings. Therefore, we will need helper functions that convert between numbers and CStrings:
Step 12: Implement ToNumber() and ToCString() in CalcView.cpp. These don't need to be declared in CalcView.h because they won't be used outside of this file.
These functions are discussed in the CString section of the Programming Notes. Here is a listing:
Number ToNumber(CString str)
{
return atof(str); // atof() from
<stdlib.h>
}
CString ToCString(Number num)
{
CString str;
str.Format("%f", num);
return str;
}
We are now ready to build and test the application.
3.8 Example: A Stack Calculator for Rational Numbers
Let's modify the stack calculator so that it does rational number arithmetic. (Recall that a rational number is a ratio of two integers, a/b, where b > 0. We call a the numerator and b the denominator.) Here's a screen shot of our modified calculator:
Notice that 3 is on the stack. This is allowed because every integer can be regarded as a rational number with denominator one. Users might be annoyed if we displayed or required them to type the denominator when it is equal to one, so the calculator automatically converts integer entries like 3 into 3/1 and automatically displays 3/1 as 3. Also notice that the edit box contains the last number pushed onto the stack, 6/8, although the [stack] box shows 3/4 was the last number pushed onto the stack. Apparently the stack calculator automatically reduced 6/8 to 3/4. Naturally, we can save and load stacks of rational numbers.
3.8.1 Implementing the Rational Number Calculator
We begin by adding a rational number class to the Calc project.
Step 1:
i. Select [New Class] from the [Insert] menu. Select "Generic Class" in the [Class Type] control at the top of the [New Class] dialog box.
ii. Type "CRational" in the name field, then click the [OK] button. This automatically generates files called Rational.h and Rational.cpp. The Rational.h file already contains the declaration of the CRational class. Both files have been added to the Calc project.
We need to make a few modifications to Rational.h. First, we add member variables representing numerator and denominator and functions for accessing, reducing, and initializing them.
Step 2:
i. Add private integer member variables called m_num and m_den to the CRational class declaration. These hold the numerator and denominator, respectively.
ii. Add public "getter" functions so clients can retrieve the numerator and denominator.
iii. Add a private member function named Reduce(). This will be used to reduce the numerator and denominator.
iv. Finally, replace the default constructor with an inline constructor that initializes then reduces the numerator and denominator.
Here's a partial listing of the class declaration:
class CRational
{
public:
CRational(int
n = 0, int d = 1)
{
m_num = n;
n_den = d;
Reduce();
}
int GetNum() const { return m_num; }
int GetDen() const { return m_den; }
// etc.
private:
void
Reduce();
int m_num; // numerator
int m_den; // denominator
};
Notice that we specified default arguments in the constructor. This means the constructor can be called with two, one, or no arguments:
Rational(6, -8); //
constructs -3/4
Rational(6); // constructs 6/1 = 6
Rational(); // constructs 0/1 = 0
Providing a constructor that expects a single integer argument means we can use integers in contexts where rationals are expected. The compiler will automatically use this constructor to coerce the integers into equivalent rationals.
Providing a constructor that expects no arguments— i.e., a default constructor— means, among other things, that we can create arrays of rationals:
Rational rats[100]; // rats[i] = 0/1
The compiler will uses the default constructor to initialize rats[i] to 0 for each i. Generally speaking, every class should have a default constructor. C++ automatically provides each class with a default constructor, but this gift is withdrawn if we choose to define any type of constructor at all.
Our list box and edit box only display CStrings, so we'll need to add member functions that can translate between CStrings and CRationals.
Step 3:
i. Add a constructor that expects a CString as an argument. This will be used to convert CStrings such as "3/4" into equivalent rational numbers.
ii. Also add the prototype of a member function called ToCString() that will be used to reverse the process, converting a rational number such as 3/4 into the CString "3/4":
Here's a partial listing:
class CRational
{
public:
CRational(CString
str);
CString ToCString() const;
// etc.
};
3.8.1.1 Overloading the Arithmetic Operators
The CCalcDoc arithmetic functions combine numbers using the C++ arithmetic operators:
m_stack.Push(n1 + n2);
m_stack.Push(n1 * n2);
m_stack.Push(n1 - n2);
m_stack.Push(n1 / n2);
In most languages only built-in numbers can be combined using arithmetic operators, but in C++ the expression n + m translates into the function call:
operator+(n, m);
Thanks to overloading— the ability to define several functions that have the same name— we can create our own variant of operator+() that works with rational numbers. If we define rational number variants for all of the arithmetic operators, then we won't need to change any of the code in CalcDoc.cpp.
Step 4: Add prototypes for global, overloaded arithmetic and equality operators:
CRational operator+(const CRational& r1, const CRational&
r2);
CRational operator*(const CRational& r1, const CRational& r2);
CRational operator-(const CRational& r1, const CRational& r2);
CRational operator/(const CRational& r1, const CRational& r2);
bool operator==(const CRational& r1, const CRational& r2);
We include the equality operator because CCalcDoc::Div() uses it to test if the divisor is 0:
if (n2 == 0) { /* restore stack and throw exception */ }
The condition n2 == 0 will be translated into:
operator==(n2, Rational(0, 1))
Notice that the compiler uses the constructor with default denominator 1 to coerce 0 into 0/1.
Also notice that this works even if the condition is 0 == n2. The translation then becomes:
operator==(Rational(0, 1), n2)
If we had made operator==() a member function of CRational instead of a global function:
bool CRational::operator==(const CRational& r) const { ... }
then the comparison n2 == 0 works, but the comparison 0 == n2 fails! Why?
Now we turn to the implementations of these functions in Rational.cpp.
Step 5: Implement the arithmetic operators.
For example, here's how operator+() could be implemented:
CRational operator+(const CRational& r1, const CRational&
r2)
{
int n = r1.GetNum() * r2.GetDen() +
r2.GetNum() * r1.GetDen();
int d = r1.GetDen() * r2.GetDen();
return CRational(n, d);
}
Next we implement the functions that translate between rational numbers and strings. Converting a rational number into a string is fairly easy.
Step 6: Implement the ToCString() member function.
This function makes use of CString::Format(), which expects a format string and substitutions as arguments (similar to printf). Notice that we suppress the denominator if it is equal to one:
CString CRational::ToCString() const
{
CString str;
if (m_den != 1)
str.Format("%i/%i", m_num,
m_den);
else
str.Format("%i", m_num);
return str;
}
The best way to convert strings into rationals is to provide a constructor that expects a string as input.
Step 7: Implement the constructor that expects a CString as argument.
The constructor uses many of the CString member functions to extract the numerator prefix and denominator suffix, then uses the atoi() function from the standard C library to convert these functions into integers. The atoi() function returns 0 if its argument is "0" or if its argument is a string that can't be interpreted as an integer (e.g., "zero"). In the second case an exception is thrown:
CRational::CRational(CString str)
{
int n = 0, d = 1;
m_num = 0;
m_den = 1;
int pos = str.Find('/'); // find
position of '/'
if (0 < pos) // user typed a '/'
{
CString num = str.Left(pos);
CString den =
str.Right(str.GetLength() - (pos + 1));
// trim leading & trailing white
spaces:
num.TrimLeft();
num.TrimRight();
den.TrimLeft();
den.TrimRight();
// convert strings to ints:
n = atoi(num);
d = atoi(den);
if ((!n && num !=
"0") || (!m && d != "0"))
throw CString("Invalid
input");
}
else // user typed an int
{
str.TrimRight();
str.TrimLeft();
n = atoi(str);
if (!n && str !=
"0")
throw CString("Invalid
input");
}
m_num = n;
m_den = d;
Reduce();
}
The Reduce() function guarantees that the denominator will always be positive and that it will have no factors in common with the numerator.
Step 8:
i. Implement the Reduce() member function.
ii. Implement a global gcd() function that can be used by the Reduce() function to compute greatest common divisors.
The Reduce() function is a convenient place to insure the denominator isn't zero. If it is, then an exception is thrown. After determining the sign of the number— 1 if numerator and denominator have the same sign, -1 otherwise:
int s = (m_num * m_den) < 0? -1: 1;
the numerator and denominator are replaced with their absolute values. Their greatest common divisor is computed, and the numerator and denominator are replaced again with the result of division by their greatest common divisor. Finally, the numerator is multiplied by the sign.
For example, assume m_num = 8 and m_den = -12. In this case the sign is –1 and the greatest common divisor of |8| and |-12| is 4. The Reduce() function replaces m_num by:
m_num = -1 * |8|/4 = -2
and m_den by:
m_den = |-12|/4 = 3
In other words, the rational number 8/(-12) has been reduced to –2/3. Here's a complete listing of the Reduce() function:
void CRational::Reduce()
{
if (m_den == 0)
throw CString("Denominator must
be positive");
int s = (m_num * m_den) < 0? -1: 1;
int n1 = abs(m_num);
int d1 = abs(m_den);
int q = gcd(n1, d1);
m_num = s * n1/q;;
m_den = d1/q;
}
The Reduce() function uses a global gcd() function to compute the greatest common divisor of the numerator and denominator. We implement this function using an efficient recursive algorithm attributed to Euclid:
int gcd(int n, int m)
{
if (n < 0 || m < 0)
return gcd(abs(n), abs(m));
if (n < m)
return gcd(m, n);
if (m == 0)
return n;
else
return gcd(m, n % m);
}
Let's trace a call to this function to see how it works:
gcd(8, -12) =
gcd(8, 12) =
gcd(12, 8) =
gcd(8, 12 % 8) =
gcd(8, 4) =
gcd(4, 8 % 4) =
gcd(4, 0) =
4
The function works because gcd(n, m) = gcd(m, n % m) when 0 < m <= n. The proof of this fact is left to the interested reader. The function is efficient because instead of reducing its second argument by one each time it calls itself, the second argument is reduced to n % m, hence the base case is reached after only a few steps.
3.8.2 Changes to the Calculator
Unfortunately, we must make some changes to our original code. The only change to the document class is to redefine Number.
Step 9: Include Rational.h in CalcDoc.h. Change the definition of Number from double to CRational.
#include "Rational.h"
typedef CRational Number;
// typedef double Number;
Recall that we used helper functions in CalcView.h to convert between numbers and strings. This was needed in OnUpdate() when it filled the list box with the contents of the stack.
Step 10: Replace the definitions of CStringToNumber() and NumberToCString() in CalcView.cpp.
The replacements have the same prototypes, but use CRational member functions to perform the conversions:
Number CStringToNumber(CString str)
{
return CRational(str);
}
CString NumberToCString(Number num)
{
return num.toCString();
}
CCalcView's m_arg variable was created and wired to the edit control by the Class Wizard. We asked the Class Wizard to type this variable as a double. Ideally, we should now use the Class Wizard to delete this variable, then re-create it as a CRational. Of course the Class Wizard doesn't know about CRationals, so we'll have to ask it to re-create it as a CString.
Step 11: Use the [Class Wizard]/[Member Variables] dialog to remove the m_arg variable, then re-add it as a variable of type CString.
Recall that CCalcView's OnPush() function used UpdateData() to transfer the number in the edit box to m_arg, then passed this number to the document's Push() function. Now we need to convert m_arg to a CRational before passing it to the document.
Step 12: Change CCalcView::OnPush() so that if first converts m_arg from a CString into a rational before pushing it onto the stack.
Recall that CStringToNumber() calls the CRational constructor, which may throw exceptions. Therefore, the function is called inside a try-catch block:
void CCalcView::OnPush()
{
CCalcDoc* pDoc = GetDocument();
UpdateData(TRUE); // m_arg = IDC_ARG
//
Rational num(m_arg);
try
{
Number num = CStringToNumber(m_arg);
}
catch(CString e)
{
AfxMessageBox(e);
}
pDoc->Push(num);
}
We may now build and test the application.
3.8.2.1 Serialization
m_stack.Serialize(ar);
The stack inherits the Serialize() function from its CList base class, which makes a bit-wise copy of each item it contains. This is fine as long as none of these items are objects that encapsulate pointers that will lose their meaning after they have been saved to a file. A rational number is simply two integers, so bit-wise copy works here.
3.9 Mementos
Most applications provide an undo/redo mechanism that allows users to return to previous document states. This is normally done by maintaining state information on two stacks called the undo stack and the redo stack. Every document mutator function is modified so that it pushes the current document state onto the undo stack just before modifying the document. Selecting [Undo] from the [Edit] menu pops the top state off of the undo stack, restores the model to this state, then pushes the state onto the redo stack. Selection [Redo] from the [Edit] menu reverses the process. The top state is popped off of the redo stack, the document is restored to this state, and the state is pushed onto the undo stack.
Two design question arise: which object should be responsible for managing the undo and redo stacks, and what are the state objects that live on these stacks?
Obviously, the stack manager must be accessible to the document. If there are additional responsibilities for the stack manager, such as supporting atomic transactions or scheduling, then it would make sense to define a separate command processor object. We don't need to be this elaborate. Our design simply assigns stack management duties to the document.
What gets pushed onto the undo and redo stacks? There are two possibilities. We could define command objects that are created by input handlers. Each command would have a pointer to the document, and each would know how to execute, undo, and redo itself:
class Command
{
public:
Command(CDocument* d = 0) { pDoc = d; }
virtual void Undo() {};
virtual void Execute() = 0; // same as
redo
protected:
CDocument* pDoc;
};
Commands are sent to the document, executed, and pushed onto the undo stack. Selecting [Edit]/[Undo] moves the top command from the undo stack to the redo stack, and call's the command's Undo() function.
This design — called the Command Processor design pattern— is particularly useful if there are a small number of commands, if memory is scarce, or if there is no significant performance penalty for repeatedly calling the Execute() and Undo() functions of the stored commands.
An easier solution is to define objects called mementos that encapsulate all or part of the document's state (i.e., the values off its member variables). Of course we must add to the document the ability to restore its state from a memento. The memento design has a small problem, though: it violates encapsulation. It appears as if the document must grant access to its private data to the memento. The Memento Design Pattern solves this problem.
Memento [Go4]
Other Names
Token
Problem
An undo mechanism
restores the model to a previous state, but this seems to require granting the
undo mechanism access to the model's private state information.
Solution
A memento is an object created by a model that encapsulates some or all of its internal state at a given moment in time. The object that stores the memento is called a caretaker. The memento's undo() function simply passes the memento back to the model, where the encapsulated data is extracted and used to restore the model's state to what it was at the time the memento was created. Thus, the caretaker never needs to access the memento's data.
3.10 An Undo/Redo Mechanism for the Stack Calculator
It's pretty easy to add an undo/redo mechanism to the rational number stack calculator. We insert a Memento class into the project, supply CCalcDoc with two Memento stacks, modify the document operations to use these stacks, and implement handlers for the [Edit]/[Undo] and [Edit]/[Redo] menu items.
A stack calculator memento needs to encapsulate the type of operation that created it (command), the operation's arguments (arg1 and, if necessary, arg2), and, in the case of an arithmetic operation, the result of the operation (result).
Step 1:
i. Use the [Insert]/[Class ...] menu to insert a new, generic class named Memento to the Calc project.
ii. Add three private member variables named arg1, arg2, and result of type Number.
iii. Add a private member variable named command of type Command, where Command is a nested enumeration type containing identifiers for all of the calculator operations. Memento will need two additional constructors to initialize these members.
iv. Declare CCalcDoc to be a friend class.
Here's the complete implementation:
class Memento
{
public:
enum Command { UNKNOWN, PUSH, POP, ADD,
MUL, DIV, SUB };
Memento() { command = UNKNOWN; }
Memento(Number a1, Command cmmd)
{
arg1 = a1;
command = cmmd;
}
Memento(Number a1, Number a2, Number
res, Command cmmd)
{
arg1 = a1;
arg2 = a2;
result = res;
command = cmmd;
}
private:
friend class CCalcDoc;
Number arg1;
Number arg2;
Number result;
Command command;
};
Notice that CCalcDoc has been declared a friend class. This solves the encapsulation problem. While any object can create a memento, only documents will be able to access the private member variables. Here are the some of the type definitions we will need to place at the top of Memento.h:
class CCalcDoc; // forward reference
#include "Rational.h"
typedef Rational Number;
Next, we add the undo and redo stacks to the CCalcDoc declaration.
Step 2: Add two private member variables named undoStack and redoStack of type CStack<Memento> to the CCalcDoc class.
class CCalcDoc : public CDocument
{
private:
CStack<Memento>
undoStack, redoStack;
// etc.
};
Of course we need to include Memento.h at the top of CalcDoc.h:
#include "Memento.h"
Each member function of CCalcDoc that modifies the document's number stack (i.e., each mutator) needs to create a memento and push it onto the undo stack.
Step 3: Modify all of the CCalcDoc mutator functions so that they create a Memento and push it onto the undo stack: Add(), Sub(), Mul(), Div(), Push(), and Pop().
For example, the Add() function creates a memento encapsulating the original top two stack items and their sum, and pushes it onto the undo stack:
void CCalcDoc::Add()
{
if (2 <= stack.GetCount())
{
Number r1 = stack.Top();
stack.Pop();
Number r2 = stack.Top();
stack.Pop();
Number result = r1 + r2;
stack.Push(result);
undoStack.Push(Memento(r1, r2,
result, Memento::ADD));
SetModifiedFlag(TRUE);
UpdateAllViews(NULL);
}
else
AfxMessageBox("not enough items
on stack");
}
As another example, the Pop() function creates a memento encapsulating the number removed from the stack:
void CCalcDoc::Pop()
{
if (stack.IsEmpty())
AfxMessageBox("stack is already
empty");
else
{
Number res = stack.Top();
stack.Pop();
undoStack.Push(Memento(res),
Memento::POP);
SetModifiedFlag(TRUE);
UpdateAllViews(NULL);
}
}
Lastly, we need to create and implement handlers for the [Edit]/[Undo] and [Edit]/[Redo] menu items.
Step 4:
i. Use the Menu Editor to add an item to the [Edit] menu labeled [Redo].
ii. Use the Class Wizard to add handlers for the COMMAND and UPDATE_COMMAND_UI messages sent by ID_EDIT_UNDO and ID_EDIT_REDO menu items to the CCalcDoc class.
iii. Implement these handlers (see below).
The handler for [Edit]/[Undo] removes the top memento from the undo stack. Uses the memento's command member variable to sdetermine what needs to be undone, then pushes the memento onto the redo stack.
void CCalcDoc::OnEditUndo()
{
if (!undoStack.IsEmpty())
{
Memento m = undoStack.Top();
undoStack.Pop();
if (m.command == Memento::PUSH)
stack.Pop();
else if (m.command == Memento::POP)
stack.Push(m.arg1);
else // m.command == ADD, MUL, DIV,
or SUB
{
stack.Pop(); // pop result
stack.Push(m.arg2);
stack.Push(m.arg1);
}
redoStack.Push(m);
SetModifiedFlag(TRUE);
UpdateAllViews(NULL);
}
}
The [Edit]/[Redo] handler reverses the [Undo] handler. It removes the top memento from the redo stack. Uses the memento's command member variable to determine what needs to be redone, then pushes the memento onto the undo stack.
void CCalcDoc::OnEditRedo()
{
if (!redoStack.IsEmpty())
{
Memento m = redoStack.Top();
redoStack.Pop();
if (m.command == Memento::PUSH)
stack.Pop();
else if (m.command == Memento::POP)
stack.Push(m.arg1);
else // m.command == ADD, MUL, DIV,
or SUB
{
stack.Pop();
stack.Pop();
stack.Push(m.result);
}
undoStack.Push(m);
SetModifiedFlag(TRUE);
UpdateAllViews(NULL);
}
}
The handlers for the UPDATE_COMMAND_UI messages sent by the menu items moments before they are displayed provides us with an opportunity to disable the item if the corresponding stack is empty. For example:
void CCalcDoc::OnUpdateEditUndo(CCmdUI* pCmdUI)
{
if (undoStack.IsEmpty())
pCmdUI->Enable(FALSE);
}
3.11 Programming Notes
3.11.1 CString
![]()
A CString object manages this array for its clients. Thus, we can think of CStrings as another example of the Wrapper-Body design pattern introduced in Chapter 1. In this case CStrings are wrappers and dynamic character arrays are their bodies.
class CString
{
public:
CString(char* str);
int GetLength() const;
int Find(char c) const;
BOOL IsEmpty() const;
char operator[](int index) const;
BOOL operator==(const CString& str)
const;
BOOL operator<(const CString&
str) const;
CString operator+(const CString&
str) const;
void Format(char* fmt, ...);
// etc.
protected:
char* m_pchData; // character array
body
// etc.
};
For example, here's a function that uses an old C library function called isdigit() (declared in <ctype.h>) to compute the number of digits in a CString. Notice how the subscript operator is used to extract each character. Also notice that CStrings keep track of their lengths, which can be accessed using the GetLength() member function:
int DigitCount(CString str)
{
int count = 0;
for(int i = 0; i < str.GetLength(); i++)
if (isdigit(str[i])) count++;
return count;
}
Thanks to an overloaded casting operator, CStrings can be used in most contexts where character arrays are expected. For example, we can pass CStrings to the C library string manipulation functions (declared in <string.h>):
CString str("Mississippi");
int n = strlen(str); // = 11
This works because the C++ compiler translates the strlen() call to:
strlen( (const char*) str) )
Of course why would anyone want to use the C library string functions when CString member functions already do so much?
The Format() member function is called the same way the C library printf() function is called. The first parameter is a format string. Subsequent parameters specify values to be substituted into the format string. The Format() function is often used to convert numbers into CStrings:
inline CString ToCString(double x)
{
CString str;
str.Format("%f",
x);
return str;
}
inline CString ToCString(int x)
{
CString str;
str.Format("%i",
x);
return str;
}
There is no fancy trick for going the other way, i.e., for converting CStrings into numbers. We are forced to use the old fashion C library atox() functions (declared in <stdlib.h>):
inline double ToDouble(CString str)
{
return atof(str);
}
inline int ToInt(CString str)
{
return atoi(str);
}
For console applications that use CStrings it is sometimes useful to be able to insert CStrings into output streams and extract them from input streams:
ostream& operator<<(ostream& os, const CString&
str)
{
os << (const char*) str;
return os;
}
istream& operator>>(istream& is, CString& str)
{
char s[80];
is >> s;
str = s;
return is;
}
Of course we can append CStrings using + and += operators:
CString str1("cat");
CString str2 = "bat";
CString str3, str4, str5, str6;
str3 = "fish";
str4 = "man";
// str5 = "batman ate a catfish"
str5 = str2 + str4 + " ate a " + str1 + str3 + '\n';
And we can compare CStrings using the ==, <, <=, >, and >= operators:
bool IsPalindrome(CString str)
{
CString temp = str;
temp.MakeReverse();
return str == temp;
}
Here's a simple, MFC console application that tests for palindromes:
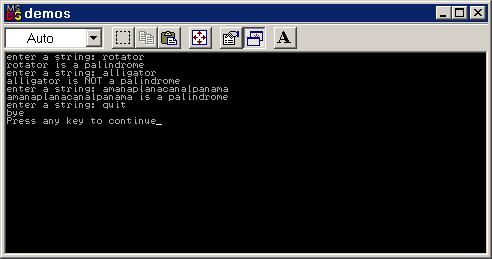
Step 1:
i. Start Visual C++. From the [File]/[New]/[Projects] dialog create a "Win32 Console Application" called "pal".
ii. Add a file called util.h to the pal project. This file should have the following form:
// file: util.h
#ifndef UTIL_H
#define UTIL_H
#include <afx.h> // MFC classes
#include <iostream>
using namespace std;
// declarations go here
#endif
Step 2: Add the definitions of the inline functions given earlier to this file. Also add the prototypes of the CString insertion and extraction operators.
Step 3:
i. Add a file called util.cpp to the pal project.
ii. Include util.h at the top of util.cpp.
iii. Add the definitions of the CString insertion and extraction operators given above to util.cpp.
Step 4:
i. Add a file called pal.cpp to the pal project.
ii. Include util.h at the top of pal.cpp.
iii. Add the definition of IsPalindrome() given above to pal.cpp.
iv. Add the definition of main() given below to pal.cpp.
main() is a typical read-eval-print loop. It perpetually prompts the user for a string, determines if the string is a palindrome, then reports this finding to the user:
int main()
{
CString str;
bool more = true;
while(more)
{
cout << "enter a string:
";
cin >> str;
if (str == "quit")
more = false;
else if (IsPalindrome(str))
cout << str << "
is a palindrome\n";
else
cout << str << "
is NOT a palindrome\n";
}
cout << "bye\n";
return 0;
}
Step 4:
i. Select "Use MFC in a shared DLL" in the [Microsoft Foundation Classes] box of the [Project]/[Settings]/[General] dialog.
ii. Build and test the application.
3.11.2 Templates
A template is a parameterized family of classes or functions. For example, the stack<T> template in the standard C++ library defines a family of stack classes. The family is parameterized by the type of elements stacked. For example, here is how a programmer might declare three stacks:
stack <string> s1;
stack <Shape*> s2;
stack <stack <int> > s3;
Note that s1 stacks strings, s2 stacks shape pointers, and s3 stacks stacks of integers.
Programmers can declare their own templates. For example, here is how the declaration of the stack template begins in the file stack.h:
// from stack.h
template <typename T>
class stack
{
public:
T top() const { ... }
void push(const T& x) { ... }
void pop() { ... }
// etc.
};
When the compiler bumps into a stack declaration:
stack<string> s1;
it simply replaces all occurrences of the parameter, T, in the stack template, by the argument, string, thus generating a C++ declaration for a string stack.
Of course the stack template includes member function implementations, too. For this reason, template member functions are usually implemented in header files instead of .cpp files. Therefore, programmers only need to include stack.h at the beginning of each file that declares stacks.
Programmers can also declare global function templates:
typedef <typename T>
void swap(T& x, T& y)
{
T temp = x;
x = y;
y = temp;
}
Assume the following global variables have been declared:
string a1 = "cat", a2 = "rat";
int b1 = 6, b2 = 91;
Here are a few calls to swap():
swap(a1, a2);
swap(b1, b2);
The compiler needs to work a little harder when it bumps into these statements, because it must infer the type arguments. By looking up the types of a1 and a2, the compiler infers that T = string. It replaces all occurrences of T in the definition of swap(), by string, thus generating a new function definition. In the next line, the compiler infers the types of b1 and b2, then replaces all occurrences of T by int in the definition of swap().
3.11.3 Exceptions
Errors are often detected by low-level functions. Unfortunately, error handling policies are usually determined by high-level functions in the user interface. For example, assume we want to write a reusable square root function:
double sqrt(double x);
Of course we should verify that the parameter, x, is non negative. (Why?) But if it is negative, what should we do? We could generate an error message and terminate the application:
double sqrt(double x)
{
if (x < 0)
{
cerr << " negative input
in sqrt(): " << x << endl;
exit(1); // gracefully terminate
application
}
// etc.
}
This might be the right thing to do when we are debugging sqrt(), but it will make sqrt() very unpopular in applications that have different ideas about handling errors. A better solution is to throw an exception.
An exception is an object that represents an error. Libraries often provide intricate hierarchies of exception classes. For example, the library containing our sqrt() function might define the exception class:
class BadInput
{
public:
BadInput(int i = 0)
{
irritant = i;
}
string GetGripe()
{
return "bad input: " +
irritant;
}
int GetIrritant() { return irritant; }
private:
int irritant;
};
If the parameter, x, is negative, sqrt() simply creates a BadInput object and throws it:
double sqrt(double x)
{
if (x < 0)
{
BadInput expt(x);
throw expt;
}
// etc.
}
Like a return statement, a throw statement immediately terminates the throwing function. In fact, any calling function is also immediately terminated. For example, the following function calls our sqrt() function:
// = height of a right triangle
double height(double hypotenuse, double base);
{
double hypSquared = hypotenuse *
hypotenuse;
double baseSquared = base * base;
double result = sqrt(hypSquared -
baseSquared);
return result;
}
If hypSquared - baseSquared, the operand of sqrt(), is negative, then sqrt() throws a BadInput exception, expt. This causes height() to throw expt at the point where sqrt() is called. Thus, height terminates immediately, before completion of the assignment statement.
Of course the function that called height() also throws expt to its caller, which throws expt to its caller, etc. Where does it all stop? Usually the user interface handles exceptions. This is done by calling functions that might throw exceptions in a try-catch block:
try
{
// call functions that can throw bad
input exceptions here
}
catch(BadInput e)
{
// handle bad input exceptions here
}
If a function call in the try block throws a BadInput exception, then control is immediately transferred to the following catch block. The exception thrown is passed into this block as the parameter, e.
For example, the control loop of a console user interface might look like this:
while(true)
try
{
cout << "enter hypotenuse
and base: ";
cin >> hyp >> base;
cout << "height = "
<< height(hyp, base) << endl;
}
catch(BadInput e)
{
cerr << e.GetGripe() <<
endl;
cout << "try
again\n";
}
3.11.4 Containers
Data structures are abstractions of simple memory devices that store bytes in cells with unique addresses. Instead of bytes, a data structure can hold any type of data, and instead of addressing, a data structure can provide a variety of ways to access its stored data. Sequential access structures include files and linked lists, random access structures include static and dynamic arrays, dictionaries and sets provide associative access, stacks provide last-in-first-out access, and queues provide first-in-last-out access. Internally, data structures are usually made up of nodes intricately linked by pointers. Often, delicate memory management, re-linking, re-balancing, or shifting operations need to be performed each time data is stored or deleted.
We can use the Wrapper-Body pattern introduced in Chapter 1 to shield clients from the rigors of these operations. In this case the body is the data structure while the wrapper is a C++ object that manages the data structure on behalf of clients:
Clients only deal with the wrapper; they never see the data structure, and they never need to worry about memory management, re-balancing, re-linking, or shifting, because the wrapper takes care of this for them. In fact, clients simply identify the wrapper with the data structure. Even the names we call data structure wrappers — containers, collections, stores— suggest that the wrapper stores the data instead of the data structure it manages.
A library of container classes for different types of data structures is a useful tool. Typically, a C++ container library declares these classes as templates parameterized by the type of data they store. The standard C++ library includes template containers (vector<T>, map<K, V>, list<T>, stack<T>, queue<T>, set<T>, etc.). Of course MFC pre-dates the standard C++ library, so it includes its own template containers, which are defined in:
<afxtempl.h>
3.11.4.1 CArrays
A common programming dilemma is deciding what the capacity of an array should be. For example, suppose we implement an address book as an arrays of person objects:
Person book[MAX];
If MAX is too large, then unpopular people will complain that our address book uses too much memory. If MAX is too small, then popular people will complain that our address book doesn't hold enough names.
A standard solution is to allocate an array on the heap:
Person* book = new Person[MAX];
Arrays that are allocated on the heap are called dynamic arrays (arrays that live elsewhere in memory are called static arrays). When a dynamic array fills up, we can always copy it to a bigger dynamic array:
Person* temp = new Person[MAX + EXTRA];
for(int i = 0; i < MAX; i++)
temp[i] = book[i];
delete[] book;
book = temp;
There are plenty of places to go wrong here. If we forget to delete the old array, there will be a memory leak. If we miscalculate the size of the old array, then we may lose a person or two in the copy operation, and if we miscalculate the size of the new array, then we may cause unnecessary heap fragmentation, too many calls to the memory manager, or a combinatorial explosion in the amount of memory requested.
CArrays are MFC wrappers for dynamic arrays that solve these problems for us:
template<class TYPE, class ARG_TYPE>
class CArray : public CObject
{
protected:
TYPE* m_pData; // pointer to the dynamic array
public:
void SetSize(int newSize, int growBy =
-1);
int GetSize();
Type GetAt(int index);
void SetAt(int index, ARG_TYPE
newElement);
int Add(ARG_TYPE newElement);
Type& operator[](int index);
// etc.
};
For example, the following fragment of code creates a dynamic integer array, then fills it with the squares of the first ten integers:
CArray<int, int> nums;
cout << nums.GetSize() << endl; // prints 0
for(int i = 0; i < 10; i++)
nums.Add(i * i);
Here's an object diagram depicting the relationship between nums and the dynamic array it manages:
MFC containers require two template parameters. The first is the type of data stored by the container, the second is the type of argument passed to member functions that insert data into the container. Normally, the second type is either the same as the first type or is a reference to the first type. For example, here's an alternate declaration of nums:
CArray<int, int&> nums;
In this case the call:
nums.Add(i * i);
causes problems because the argument is a value, not a variable. Instead, we would need to change this to:
int square = i * i;
nums.Add(square);
At this point the size of nums is ten:
cout << nums.GetSize() << endl; // prints 10
The following fragment shows that the subscript operator can be used to access the elements of nums:
cout << "nums = { ";
for(i = 0; i < nums.GetSize(); i++)
cout << nums[i] << ' ';
cout << "}\n";
Executing these statements displays:
nums = { 0 1 4 9 16 25 36 49 64 81 }
3.11.4.1.1 Capacity and Growth Size
When nums is declared, nums.m_pData points to a dynamic array that has capacity 0. Each time nums.Add(x) is called, a new dynamic array is allocated on the heap that has capacity one larger than the current capacity of nums.m_pData. The numbers currently held in nums.m_pData are copied to the new array, x is added to the end of the new array, the old array is deleted, and nums.m_pData is pointed at the new array. Thus, adding 10 integers to nums causes 10 dynamic arrays to be allocated, 9 dynamic arrays to be deleted, and 1 + 2 + ... + 8 = 36 copy operations.
To avoid this inefficiency, we must manually set the initial size and growth size of a CArray before we use it. This is done using the SetSize member function:
void SetSize(int newSize, int growBy = -1);
Choosing a non-zero initial size, say 50, causes 50 "default" elements to be added to the CArray. Using the Add() function inserts new elements beginning at the 51st position. The first 50 default elements will have to be changed or modified using the subscript operator. The default growBy argument, -1, automatically sets the growth size to minimize heap fragmentation. Therefore, programmers who don't want heap fragmentation of default elements should call SetSize(0) before using a CArray:
CArray<int, int> nums;
nums.SetSize(0);
Why the default CArray constructor doesn't simply call SetSize(0) for us is one of many MFC mysteries.
3.11.4.2 CLists
Inserting an element into the middle of an array is inefficient, because all of the elements above the position where the new element will be inserted need to be shifted up by one to make room. Similarly, deleting an element from the middle of an array is inefficient because all of the elements above the position of the deleted element need to be shifted down by one to fill in the vacated space. Linked lists solve this problem by decoupling the logical order of the elements in a container from their physical location in memory.
A doubly linked list is a collection of nodes. Each node consists of a data element, a pointer to the previous node in the list, and a pointer to the next node in the list. Although efficient, inserting an element into the middle of a linked list requires a delicate re-linking operation:
Node* newNode = new Node();
newNode->previous = currentNode;
newNode->next = currentNode->next;
(currentNode->next)->previous = newNode;
currentNode->next = newNode;
Deleting a node from a linked list also requires a delicate re-linking operation:
(currentNode->previous)->next = currentNode->next;
(currentNode->next)->previous = currentNode->previous;
delete currentNode;
CLists are wrappers for doubly linked lists that automatically perform these re-linking operations:
template<class TYPE, class ARG_TYPE>
class CList : public CObject
{
protected:
struct CNode
{
CNode* pNext;
CNode* pPrev;
TYPE data;
} *m_pNodeHead, *m_pNodeTail;
public:
int GetCount() const;
BOOL IsEmpty() const;
Type& GetHead();
Type& GetTail();
POSITION AddHead(Arg_Type newElement);
POSITION AddTail(Arg_Type newElement);
Type RemoveHead();
Type RemoveTail();
POSITION GetHeadPosition() const;
Type& GetNext(POSITION&
rPosition); // = NULL at the end
Type& GetAt(POSITION nPosition);
Type& SetAt(POSITION nPosition,
ARG_TYPE newElement);
void RemoveAt(POSITION nPosition);
POSITION Find(ARG_TYPE searchValue); //
= NULL if fails
// etc.
};
The following code fragment creates a list of five CStrings:
CList<CString, CString&> names;
for(int i = 0; i < 5; i++)
{
CString str;
str.Format("string#%i", i);
names.AddTail(str);
}
cout << names.GetCount() << endl; // prints 5
Here's an object diagram showing the relationship between names and the linked list it manages:
3.11.4.2.1 Iterators and the Iterator Design Pattern
Most of the time clients are grateful that the containers they use hide the messy details of their underlying data structures. But what happens when the client needs to perform a traversal operation? For example, how would a client display each element in a container, or search a container for a particular element? Normally, the client creates a pointer to a particular node in a data structure, then repeatedly:
1. processes node data
2. moves pointer to the "next" node
until each node has been visited. For example, the following code might be used to display a linked list:
for(Node* p = headNode; p != 0; p = p->next)
cout << p->data << ' ';
Of course it would violate the spirit of encapsulation if a container allowed its clients to have pointers to the data structure it encapsulated. Clients would be able to directly modify the data structure.
The solution to this problem is an iterator. An iterator is an object pretending to be a pointer into a container. Clients can increment and dereference iterators the same way they would increment and dereference pointers, but the container creates and manages iterators. There is even an iterator design pattern:
Iterator [Go4]
Other Names
Cursor
Problem
Sharing a data structure such as a linked list or file is difficult, because apparently non destructive operations, such as printing the list, can actually be destructive if they move the list's internal cursor (i.e., the list's pointer to its current element).
Solution
An iterator is an external cursor owned by a client. Modifying an iterator has no effect on iterators owned by other clients.
In MFC iterators are abstract positions within a container. For example, traversing a list is done by getting an iterator that "points" to the head of the list, then repeatedly calling the GetNext() member function, which returns the element at a given position and, as a side effect, increments the iterator. For example, the following fragment of code prints our list of names:
POSITION p = names.GetHeadPosition();
cout << "{ ";
while(p != NULL)
cout << names.GetNext(p) <<
' ';
cout << "}\n";
Notice that the iteration halts when p becomes NULL (MFC's 0 pointer). Here's the output produced by executing these statements:
{ string#0 string#1 string#2 string#3 string#4 }
3.11.4.3 CMaps
Searching an array or a linked list for a particular item can be inefficient. If the elements aren't sorted, then we will need to search the entire collection. This is called a linear search. If the elements are sorted, then we can use a binary search algorithm to restrict our search to a subset of the elements.
Search time can be further reduced if we store our elements in a hash table. A hash table is an array of linked lists called buckets. A hash table has an associated function called a hash function. Given an element as input, the hash function computes the index of the bucket— called the hash code— where this element should be stored if it is in the hash table. This is called an associative search because we only search the bucket associated with the element by the hash function. By choosing the right hash function, we can increase the probability that the buckets will have approximately the same length, and thus shorten the average search time.
Hash tables are commonly used to implement maps (also called dictionaries). A map is a collection of pairs called associations. The first item in an association is called the key. The hash code of the key is used to determine which bucket the association will be stored in. The second item in an association is called the value. For example, we might represent a mapping between countries and their capitols as associations in a map:
CMaps are MFC wrappers for hash table representations of maps:
template<class KEY, class ARG_KEY, class VALUE, class
ARG_VALUE>
class CMap : public CObject
{
protected:
struct CAssoc
{
CAssoc* pNext;
UINT nHashValue;
KEY key;
VALUE value;
} **m_pHashTable; // a dynamic array of
buckets
public:
int GetCount() const;
BOOL IsEmpty() const;
Value& operator[](ARG_KEY key);
BOOL Lookup(ARG_KEY key, Value&
rValue) const;
POSITION GetStartPosition() const;
void GetNextAssoc(POSITION& pos,
KEY& key, Value& val) const;
// etc.
};
For example, a concordance is a table that associates each word in a document with its frequency (i.e., the number of times the word occurs in the document). For example, The Harvard Concordance to Shakespeare lists every word ever written by the Bard. It is 2-and-a-half inches thick and lists about 29,000 different words, many with frequency one! If we represent words by CStrings and frequencies by integers, then the declaration of a concordance would look like this:
CMap<CString, CString&, int, int> concordance;
Suppose a file named Hamlet.txt contains the text:
to be or not to be
Let's generate a concordance for this file. We begin by opening the file:
ifstream ifs("Hamlet.txt");
if (!ifs)
{
cerr << "can't open the
file\n";
exit(1);
}
Next, we traverse the file, using the subscript operator to insert or update CString-frequency associations in our concordance:
CString next;
while(ifs >> next) concordance[next]++;
cout << concordance.GetCount() << endl; // prints 4
To display the concordance, we need to traverse it beginning with its start position:
POSITION p = concordance.GetStartPosition();
CString key;
int val;
We repeatedly call the GetNextAssoc() member function, which assigns the key and value of the current association to the reference parameters provided by us. As a side effect, the position is incremented:
while (p != NULL)
{
concordance.GetNextAssoc(p, key, val);
cout << '(' << key <<
", " << val << ")\n";
}
Here's the output produced by this statement:
(not, 1)
(or, 1)
(be, 2)
(to, 2)
Using a key to search a hash table for its associated value— which is done using the Lookup() member function— is particularly efficient. Naturally, the statement:
int frequency;
CString word = "gadzooks";
if (concordance.Lookup(word, frequency))
cout << "frequency = "
<< frequency << endl;
else
cout << "word not
found\n";
prints "word not found".
3.11.4.3.1 Hash Codes
Hash codes (bucket array indices) are computed using a global MFC hash function called HashKey(), which works well for integer and character keys, but doesn't work when keys are CStrings. To fix this problem, we need to define a variant of HashKey that computes suitable hash codes for CStrings. For example, the following function simply uses the ASCII code of the first letter:
UINT AFXAPI HashKey( CString& key )
{
return (UINT) key[0];
}
3.11.4.4 Type Safe Pointer Containers
Unfortunately, MFC's CArray , CList, and CMap templates don't work well with pointers. MFC does provide an archaic CObArray class that manages a dynamic array of CObject pointers, but of course CObArray doesn't guarantee that all of its members are pointers to the same subclass of CObArray. For example, it's possible to create a CObArray that holds a pointer to an Address, a pointer to a Phone, and a third pointer to a Person. This might be what the programmer intended, but in other situations it can lead to runtime errors.
MFC now has a CTypedPtrArray template that provides a type safe wrapper for CObArray and makes it behave more like CArray:
CTypedPtrArray<Body, Storable>
The first parameter is the type of the body, which is usually CObArray, but may be other type unsafe MFC collections such as CPtrArray. The second argument is the type of elements that will be stored in the array.
MFC also provides CTypedPtrList and CTypedPtrMap templates for lists and maps that store pointers.
3.12 Review Problems
3.12.1 Problem: Inter-Class Dependence
Generally speaking, class A depends on class B if changes to B may require changes to A. In UML we can show the dependence of A on B by drawing a dashed arrow from icon A to icon B:
![]()
Make a list of at least five different ways a dependency of A on B can arise in C++.
3.12.2 Problem: Coupling Degrees
Coupling degree is a measure of the "tightness" or "looseness" of a dependency of class A on class B. A low coupling degree indicates substantial changes can be made to B without requiring changes to A. A high coupling degree indicates minor changes to B may require changes to A. Given the following five point scale:
degree 0 = A does not depend on B
degree 1 = A only depends on a subset of B's public members
degree 2 = A may depend on all of B's public members
degree 3 = A may depend on B's public and protected members
degree 4 = A may depend on all of B's members
find C++ examples of each.
3.12.3 Problem
Given the coupling degree scale from the previous problem, what would you say the coupling degree is of the document on the view in MFC's Document-View architecture? What would you say the coupling degree is of the view on the document? (Assume the programmer hasn't explicitly added dependencies not already present in the code generated by the App Wizard.)
3.12.4 Problem
Modifiability, understandability, and reusability are three goals of software design. Why is loose coupling better than tight coupling in terms of these goals?
3.12.5 Problem: Inter-File Dependence
We often find bi-directional dependencies in programs:
![]()
Assuming we are following standard C/C++ programming practices, we would probably put the declaration of class A in a file called a.h, the declaration of class B in a file called b.h, and the implementations of A and B member functions in files called a.cpp and b.cpp, respectively.
Just as we speak of the dependency between two classes, so to can we speak of the dependency between two files. For example, the following dependency graph shows the dependencies between our four files:
File dependencies must be resolved by programmers before .cpp files can be submitted to the compiler. Normally, a file dependency is resolved by using an include directive. For example, the file a.cpp probably begins with the directive:
#include "a.h"
Unfortunately, using include directives to resolve both directions of the bi-directional dependency between a.h and b.h may cause some preprocessors to get stuck in an infinite loop. (Why?) Another technique is to resolve one direction, say the direction from a.h to b.h, by including a.h in b.h, and to resolve the other direction by placing a forward reference of B at the top of a.h:
class B; // forward reference
What additional dependencies does this technique add to the dependency graph, and why?
3.12.6 Problem
How did the MFC App Wizard resolve the bi-directional dependency between the files CSeasonDoc.h and CSeasonView.h?
3.13 Programming Problems
3.13.1 Problem: A Simple Implementation of Publisher-Subscriber
Implement reusable Publisher and Subscriber classes. Your Publisher class should maintain a list of subscriber pointers using a template container from the standard C++ library or the MFC library.
Test your Publisher and Subscriber classes by implementing a simulated power plant that uses the Model-View-Controller design pattern refined by the Publisher-Subscriber pattern. In this simulation the model is a nuclear reactor that provides member functions for incrementing and decrementing its core temperature by ten degrees. There are two types of views: thermometers and alarms. Thermometers simply print the temperature of the reactor in a console window each time the reactor's temperature changes. Alarms print warning messages in the console window if the reactor's core temperature exceeds 1500 degrees. The controller is a simple console user interface that allows the plant operator to execute INC and DEC commands that increment and decrement the reactor's temperature, respectively.
Here is a sample console display of a reactor with two thermometers and three alarms:
-> INC
THERMOMETER #1: reactor temperature = 1500 degrees Fahrenheit
THERMOMETER #2: reactor temperature = 1500 degrees Fahrenheit
ALARM #1: Warning: the reactor is too hot!
ALARM #2: Warning: the reactor is too hot!
ALARM #3: Warning: the reactor is too hot!
-> DEC
THERMOMETER #1: reactor temperature = 1490 degrees Fahrenheit
THERMOMETER #2: reactor temperature = 1490 degrees Fahrenheit
-> quit
bye
3.13.2 Problem: Days of the Week
Imitate the Four Seasons program to create an application that displays the days of the week.
3.13.3 Problem: The Mod N Counter
The Mod N counter is a multi-document, multi-view application that instantiates the Document-View architecture. The user interface is a form with two edit controls and two buttons. The first edit control allows the user to define a positive integer, N. The second edit control is a read-only control that displays a number M such that 0 <= M < N. The first button is captioned "INC". Pressing this button replaces M by (M + 1) % N. The second button is captioned "DEC". Pressing this button decrements M by 1. If M is 0, then [DEC] changes it to N – 1. Naturally, users can save and load counters.
3.13.4 Problem: Internationalized Four Seasons
Add a [Language] menu to the Four Seasons application. The [Language] menu should list at least three languages, including English. Selecting a language from this menu causes the view with input focus to display its seasons in the selected language. (Readers will need to do a little research to find out the season names in their chosen languages.) Thus, it should be possible for a user to have multiple views of the same document, each displaying the season in a different language. (This version of Four Seasons shows one technique that allows users to open multiple, but functionally distinct views of the same document.)
3.13.5 Problem
Our palindrome detector showed that it was possible to write console user interface applications that used MFC classes. Following this technique, write and test versions of the insertion operator that insert CArrays, CLists, and CMaps into an output stream (ostream). For example, if x is a CArray, y is a CList, and z is a CMap, then all three could be written to the cerr stream as follows:
cerr << x << y << z;
Warning: your overloaded insertion operators will need to be template functions.
3.13.6 Problem: POST
Create a multi-document, multi-view application called POST (Point Of Sale Terminal). POST allows grocery store clerks to enter items purchased by a customer using buttons or menu selections; the running total is computed after each item is entered:
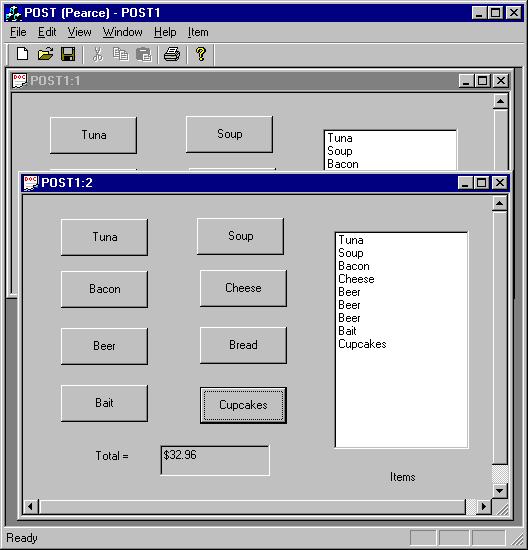
Of course the clerk may save a list of items to a file with a .trs extension ("transaction").
Hint: Insert a new class into your project called CItem that encapsulates a CString description of the item (e.g., "Beer") and the item's price (e.g. 6.20). The document should maintain a CList of purchased items (don't forget to include <afxtempl.h> and "Item.h"). Use the floor() function declared in <math.h> to extract the integer dollars and cents of the running total.
3.13.7 Problem: A CPU Simulator
A CPU simulator is a multi-document, multi-view application that allows users to load, run, and step through programs written in a simple assembly language:
The [Memory] list box displays the contents of the computer's memory, a array of 256 integers:
int Mem[256];
The [Register X] edit boxes display the contents of the computer's three registers: R1, R2, and R3. The [Program Counter] edit box displays the contents of PC a special control register that holds the number of the next program instruction to be executed. The [Program] list box displays a list of assembly language instructions to be executed. The basic assembly language instructions are:
ADD Ri Rj Rk // Ri = Rj
+ Rk
EQUAL Ri Rj Rk // Ri = (Rj == Rk)
LESS Ri Rj Rk // Ri = (Rj < Rk)
NEG Ri Rj // Ri = -Rj
NOT Ri Rj // Ri = !Rj
ASR Ri Rj Rk // Ri = Rj >> Rk
ASL Ri Rj Rk // Ri = Rj << Rk
AND Ri Rj Rk // Ri = Rj && Rk
LOAD Ri n // Ri = n
LOAD Ri Rj // Ri = Mem[Rj]
STORE Ri Rj // Mem[Rj] = Ri
GOTO Ri //
PC = Ri
IF Ri Rj // if (Ri) PC = Rj
Where Ri, Rj, and Rk are registers, PC is the program counter, and n is any integer.
The [CPU] menu contains three selections: [Load], [Run], and [Step]. The [Load] selection displays a file dialog that allows the user to enter the name of a file containing a program. The [Run] selection runs the loaded program. The [Step] selection allows users to execute the loaded program one instruction at a time. The toolbar has buttons that duplicate the [CPU] menu items. Naturally, users can save and load programs, registers, and memory.
3.13.8 Problem: The Stack Calculator
Finish the first stack calculator program. Add a menu called [Calc] and toolbar buttons that duplicate the calculator buttons. Add [log], [exp], [sin], and [cos] buttons to the calculator's [Calc] menu. If the top two elements on the stack are a and b, respectively, then selecting the [log] item replaces them with loga(b). Selecting the [exp] item replaces them with ab. Selecting [sin] or [cos] replaces a with sin(a) or cos(b), respectively.
3.13.9 Problem: The Rational Stack Calculator
Finish the first rational stack calculator program. Add menus and toolbar buttons that duplicate the calculator buttons.
3.13.10Problem: A Stack Calculator for Complex Numbers
A complex number is a number of the form z = a + bi, where a and b are arbitrary real numbers, and i represents the imaginary number √-1. We call a the real part of z and b the imaginary part of z. Like rational numbers, complex numbers can be added, multiplied, subtracted, and divided:
(a + bi) + (c + di) = (a + c) + (b + d)i
(a + bi) - (c + di) = (a + bi) + (-c + -di)
(a + bi) * (c + di) = (ac - bd) + (ad + bc)i
(a + bi) / (c + di) = (a + bi) * (c + -di)
Modify the stack calculator so that it does complex arithmetic.
3.13.11Problem: The Document as a Stack
Modify the first stack calculator so that CCalcDoc uses inheritance rather than delegation to provide push, pop, and top operations:
class CCalcDoc : public CDocument, public CStack<Number>
{
public:
void Pop();
void Push(CRational& r);
void Div();
void Mul();
void Sub();
void Add();
// etc.
};
3.13.12Problem: Brick CAD
Create a multi-document, multi-view application called BC (Brick CAD). Brick CAD is a CAD (Computer Aided Design) program that allows engineers to design and edit bricks by entering the new dimensions, then pressing the [Change] button or selecting the [Edit]/[Change] menu item. Of course the engineers may save bricks to a file with a .bc extension:
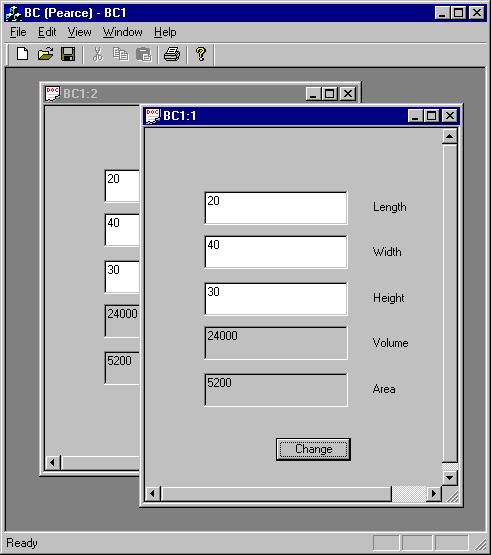
In addition to [Change], the BC [Edit] menu also has [Undo] and [Redo]. Selecting [Edit]/[Undo] undoes the last change operation. Selecting [Edit]/[Redo] undoes the last undo operation. If there are no operations to undo, then the [Undo] selection is disabled. If there are no operations to redo, then the [Redo] selection is disabled. Use the Memento design pattern to implement this feature.
Hint: Insert a new class into your project called CBrick that encapsulates the height, width, length, volume, and area of a brick. Also, insert the CStack template created earlier. The CBCDoc class should have three member variables:
CBrick m_brick; // the current brick
CStack<CBrick> m_undoStack; // undoable bricks
CStack<CBrick> m_redoStack; // redoable bricks
Before the current brick is modified, it gets pushed onto the undo stack. The undo operation pushes the current brick onto the redo stack, then pops the top brick off of the undo stack and assigns it to the current brick. The redo operation pushes the current brick onto the undo stack, then pops the top brick off of the redo stack and assigns it to the current brick. Saving or loading a BC document should also save and load its undo and redo stacks.
3.13.13Problem: The Piano
Piano is a multi-document multi-view application that allows composers to record and play simple musical scores. Each view is a form that displays 13 piano keys (these are simply elongated buttons). Pressing one of these buttons either plays a beep of a particular frequency and duration (Windows NT only) or plays a wave file (if the computer is equipped with a sound card). If the view is in recording mode, then an object representing the note played is stored in a musical score (i.e., a list of notes encapsulated by the document class). The [Duration Control] scroll bar allows users to alter the duration of the next note to be created/played. The [Record] and [Stop Recording] buttons turn the recording mode on and off, respectively. When the recording mode is off, the [Play] button plays back the current score. The [Clear] button erases the score. Naturally, users can save and load scores.
The [Sounds] menu allows users to associate different sounds with the piano keys. [Sounds]/[Beep Mode] toggles between playing a beep and playing a wave file. A check mark next to this item indicates that beep mode is on. In addition, the [Sounds] menu contains 13 other items, one for each key. Selecting any of these items displays a [File Dialog] that allows users to select a wave file to be played when the corresponding key is pressed.
Implement the Piano application.
3.13.13.1 CNote
Begin by using the [Insert]/[New Class ...] menu to create a class called CNote. Instances of CNote represent musical notes. Each CNote encapsulates three integer variables:
m_frequency = frequency in Hz
m_duration = duration in milliseconds
m_id = number of steps above C (= -1 to 12)
We use m_id = -1 to indicate a rest "note", m_id = 0 is C, m_id = 1 is C#, etc., and m_id = 12 is high C.
The CNote constructor expects a duration and an id as inputs:
CNote::CNote(int id /* = 0 */, int dur /* = 100 */) { ??? }
The appropriate frequency is computed by the constructor using the formula:
m_frequency = int(256 * pow(1.05496, id));
This works because 256 represents the frequency of C, and 1.05496 is 21/12, the frequency ratio of a half step. If id = -1, the rest note, then f = 30000 Hz, which should be inaudible.
3.13.13.2 CPianoDoc
You'll need to add the following include directives at the top of PianoDoc.h:
#include <afxtempl.h>
#include "Note.h"
#include <mmsystem.h> // may require a sound card
Instances of the CPianoDoc class encapsulate:
m_beep = TRUE if beep mode is on, FALSE otherwise
m_score = a CList of recorded CNotes
m_sounds =
a CMap of associations between CNote
id's and wave file names
The CPianoDoc class provides member functions for playing a single note, playing all of the notes in m_score, adding a note to m_score, changing the wave file associated with a note:
class CPianoDoc : public CDocument
{
public:
BOOL m_beep; // beep vs. wave mode
void AddSound(int id);
void AddNote(CNote& n);
void Play(CNote note);
void Play();
// etc.
private:
CList<CNote, CNote&> m_score;
CMap<int, int, CString,
CString&> m_sounds;
};
If beep mode is on, Play(CNote note) calls the global Beep() function:
Beep(note.m_frequency, note.m_duration);
Unfortunately, only the Windows NT platform pays attention to this function's parameters. If beep mode is off, Play() uses note.m_id to look up the corresponding wave file, then calls the PlaySound() function declared in <mmsystem.h> and defined in winmm.lib:
PlaySound(waveFile, NULL, SND_FILENAME | SND_SYNC);
Readers can search the on-line documentation for a complete description of PlaySound(). In order to successfully link a program that calls PlaySound(), readers will have to use the [Project Settings] dialog box (select the [Project]/[Settings] menu item) to add the sound card driver. Set the [Settings For:] list box to "All Configurations", select the [Link] tab, and type "winmm.lib" at the end of the libraries listed in the [Object/library modules:] edit box:
(Of course the winmm.lib may not be present if you haven't installed some sort of sound card on your system.)
Readers can handle all of the [Sounds] menu items in CPianoDoc. For example, here's the handler for [Sounds]/[D Sound]:
void CPianoDoc::OnSoundsDsound()
{
AddSound(2); // m_id of D = 2
}
The AddSound() function creates and displays a file dialog box, then enters the path of the selected wave file in the m_sounds map:
void CPianoDoc::AddSound(int id)
{
static LPCTSTR path = NULL;
CFileDialog dialog(TRUE, NULL, path);
dialog.DoModal();
path = dialog.GetPathName();
m_sounds[id] = path;
SetModifiedFlag(TRUE);
}
3.13.13.3 CPianoView
The CPianoView objects encapsulate two variables:
#include "Note.h"
class CPianoView : public CFormView
{
int m_duration; // wired to scroll bar
by Class Wizard
BOOL m_recording; // = TRUE if recording
// etc.
};
We haven't seen scroll bars, yet. OnInitialUpdate() is a good place to initialize the range and thumb tab position:
void CPianoView::OnInitialUpdate()
{
CFormView::OnInitialUpdate();
ResizeParentToFit();
CScrollBar*
pSB = (CScrollBar*) GetDlgItem(IDC_DURATION);
pSB->SetScrollRange(50, 250);
pSB->SetScrollPos(m_duration);
}
Adjusting a horizontal scroll bar sends the WM_HSCROLL message to the scroll bar's parent window (which is CPianoView in our case). Use the Class Wizard to add a handler for this message. This handler has two responsibilities: move the thumb tab to where the user adjusted it to (otherwise it will snap back), and update m_duration. Scroll bars will be explained in the next chapter.
void CPianoView::OnHScroll(
UINT nSBCode, UINT nPos, CScrollBar*
pScrollBar)
{
int pos =
pScrollBar->GetScrollPos();
if (pScrollBar != NULL &&
GetDocument()->m_beep))
{
switch (nSBCode)
{
case SB_THUMBPOSITION:
pScrollBar->SetScrollPos(nPos);
break;
case SB_LINELEFT: // left arrow
if (pos - 10 > 0)
pos = pos - 10;
else
pos = 0;
pScrollBar->SetScrollPos(pos);
break;
case SB_LINERIGHT: // right arrow
if (pos + 10 < 255)
pos = pos + 10;
else
pos = 255;
pScrollBar->SetScrollPos(pos);
break;
} // switch
UpdateData(TRUE);
} // if
CFormView::OnHScroll(nSBCode, nPos,
pScrollBar);
}