Component-Oriented Programming
An object is a program building block that encapsulates services and properties. Typically, objects are custom made for a particular application. A component is a generic, reusable object that can be embedded into any application capable of hosting components. Such applications are called containers. The component provides its services and exposes its properties to its host. The implementation language of the component may or may not be the same as the implementation language of the container application.
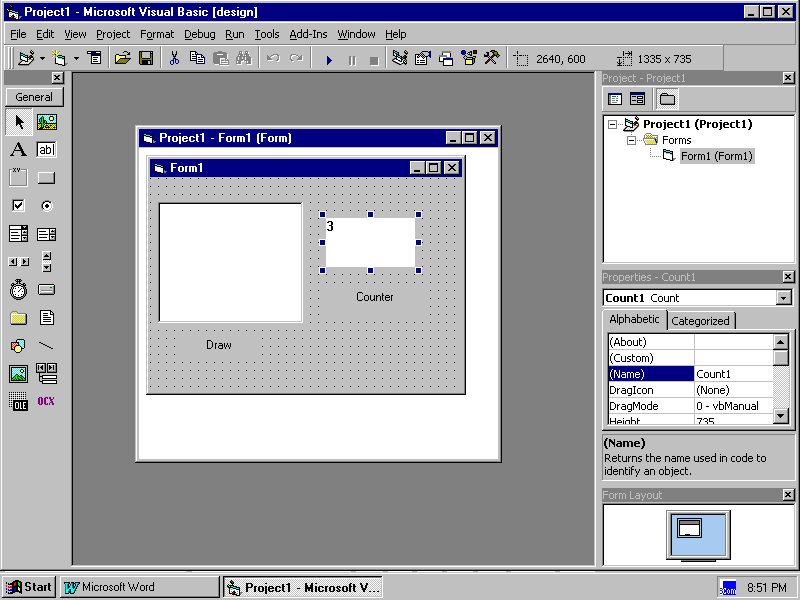
Component-oriented programming-- building programs out of generic components –was made popular by Visual Basic (VB), which features an IDE that allows programmers to drag icons representing components into a container window called a form:

Often, Windows applications are Visual Basic programs built using third-party, generic components implemented in C++. These components are now called ActiveX controls. (They used to be called OCX controls, VBX controls, and OLE controls.) They are called controls because they are similar to edit controls, button controls, slider controls, and other conventional controls that appear in Windows applications. In response to user manipulation, these conventional controls send messages to their parent window (the container, e.g. a dialog box), and their properties can be accessed and modified by the parent (e.g. using DDX functions).
Unlike conventional controls, ActiveX controls communicate with their hosts through a standard component interface defined in COM. This is related to, but different from, object linking and embedding (OLE), which allows programmers to link or embed a view object (i.e., a COleClientItem object) into an OLE container application. The view object provides a window onto a remote document object that allows the OLE container application to ask a full or mini OLE server application to serialized, deserialized, and edited the remote document. In short, OLE (and Automation) allow multiple applications to collaborate:
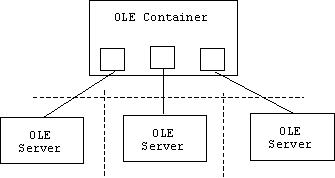
By contrast, an ActiveX control is an in-process server. It combines the view and the remote server into a single object that is dynamically linked into the container application:
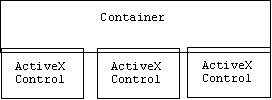
ActiveX controls may be compared to Java Beans, the Java version of a component, and Java Applets—Java programs that can be embedded in a Web page.
Events and Properties
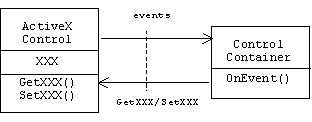
If a control has a property (i.e. member variable) called XXX, then its COM interface has a getter method called GetXXX() that allows the container to learn the current value of the property, and a setter method called SetXXX(...) that allows the container to modify the property's value. A control can send (fire) messages called events that can be handled by the container:
COleControl
ActiveX controls are represented in C++ programs by instances of a CWnd-derived class called COleControl:
Use the MFC ActiveX Control Wizard to create a control called Count. Accept all defaults. Three classes are generated:
dispinterface _DCountEvents
{
properties:
methods:
};
};
Select the Automation tab of the Class Wizard dialog box. Push the "Add Property" button. Create a property with external name "Value" of type short. The class Wizard automatically generates a variable of type short called m_value in the CCountCtrl class.
To initialize this variable to 3, add the following line to CCountCtrl::DoPropExchange():
PX_Short(pPX,
"Value", m_value, (short) 3);
}
Replace the last line of the OnDraw() method with code that writes m_value to the device context:
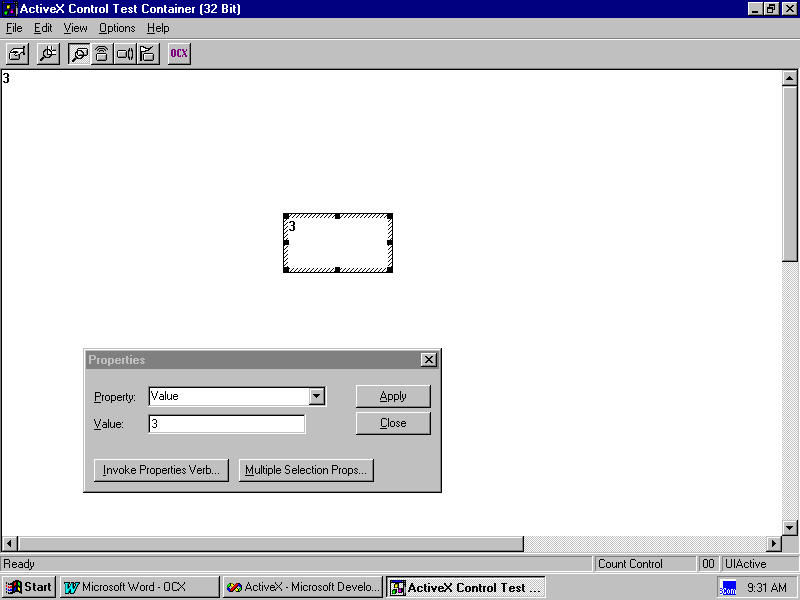
Select Properties from the View menu to display the Properties dialog. Use this dialog to display the value of m_value and to change it to 4, for example.
Adding Events
Display the Class Wizard. Select the "ActiveX Events" tab and click the "Add Event" button. Select Click from the combo box in the dialog that appears.
Select the Class Wizard's "Message Maps" tab. Add a handler for the OnClick message:
Using the Counter Control in an MFC Application
Make an SDI application called Counter. Note that in step 3 of the App Wizard the "include ActiveX Controls" box is already checked.
Start the dialog editor to edit the form view. Select "Components and Controls" from the "Add To Project" submenu of the Project menu. Double click "Registered ActiveX Controls" in the list box of the "Components and Controls Gallery" dialog that appears. Select "Count Control" from the list of controls:

This automatically adds an icon (called OCX unless you made a different icon) to the dialog editor's Controls tool bar. It also asks if you want to add a wrapper class for the control to the project. Agree to this. Here is an edited version of the class added. Note that it is derived from CWnd:
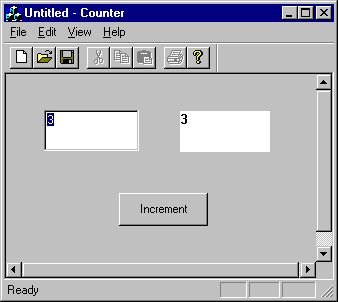
Use the class wizard to add a variable called m_value to the view class that corresponds to the IDC_COUNT edit control. The minimum value of this variable should be 0 and the maximum value should be 7. Also add a variable called m_countControl of type CCount corresponding to the counter control.
While the class wizard is still up, add handlers for the button (OnIncrement) and the count control (OnClick) and add an OnInitialUpdate() function.
The button handler increments m_value modulo 8, updates the edit control, then updates the count control:
Control Registration
Building Count, the ActiveX control project, produces a file called Count.ocx and an associated, globally unique class identifier (CLSID). The association is automatically installed in the system registry, a hierarchical database maintained by the Windows operating system. Container applications use the CLSID to search the registry to locate .ocx files. The CLSID for the count control can be found at the bottom of the project's Count.odl file:
[ uuid(C1DD4A7D-3771-11D2-B53F-00104B22FD84),
helpstring("Count
Control"), control ]
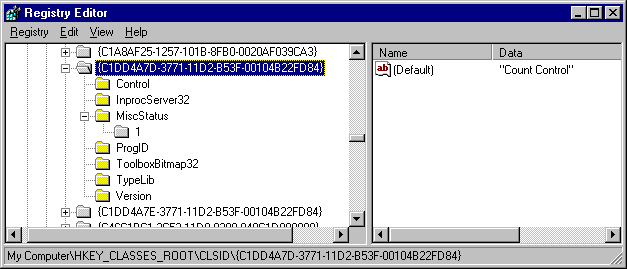
In the container application's wrapper class, this CLSID is returned by CCount::GetClsid() and describes the window class created in the implementation of CCount::Create().
Using the Counter Control in a Web Page
Like Java Applets, ActiveX controls can also be hosted by web pages. Select "HTML Page" from MFC's "New File" dialog. Call the new page Counter. Replace the line:
<OBJECT ID="Counter"
CLASSID="CLSID:C1DD4A7D-3771-11D2-B53F-00104B22FD84"
CODEBASE="file://d:/ddrive/mfc/activex/Counter/Counter"
WIDTH="200"
HEIGHT="200">
Sorry, your browser doesn't run ActiveX controls.
</OBJECT>
Open this HTML document using Internet Explorer:
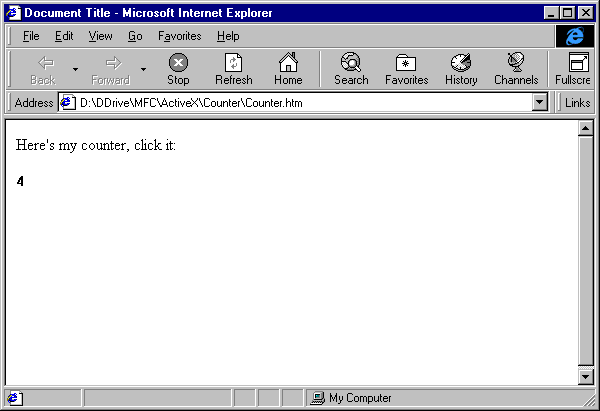
Note that clicking on the control increments it modulo 8.
Now open the same page using a Netscape browser:
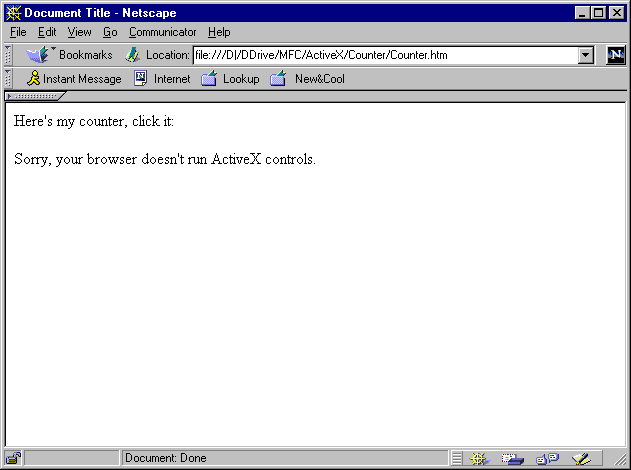
What happened? By itself, Netscape browsers don't support the <OBJECT> tag, hence can't run ActiveX controls. (There are plug-ins available that will.)
Applets vs. ActiveX Controls
Applets live on server machines in .class files along side .html files. Each time a web page is down loaded, the applets it contains must also be down loaded. ActiveX controls also live on server machines in .ocx files. The first time a web page containing ActiveX controls is down loaded, the corresponding .ocx files must also be downloaded. However, the .ocx files are written to the client machine's hard disk, and register themselves in the client machine's registry. If and when the web page is revisited, the local .ocx files are used instead of the remote .ocx files. This makes subsequent downloads faster.
A control guarantees downloaders that it won't do anything unsafe to their computers through a complicated registration process that must be added to the end of:
Using the Counter Control in a VB Application
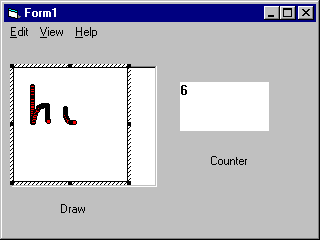
Start Visual Basic. Select VB .exe file. Select Components from the tool bar's shortcut menu. Check the box labeled "Count ActiveX Control Module". This adds a count control icon to the tool bar (We added the same icon to the VC++ dialog editor's tool bar.) Close the dialog, click the OCX icon, and insert a counter control into the form. Click the OLE button on the tool bar and insert a Draw Document into the form. Select "Start with Full Compile" from the Run menu and test the application.
Problem
1. Use the ActiveX Control Wizard to create a control called AAA. The control exposes a property called Color of type short. The control fires no events. The AAA control allows users to create simple drawings using the mouse. Use the Control Test Container to test your control. Changing the color property from 0 to 1 to 2 changes the color of the drawing from red to green to blue.
2. Use MFC App Wizard to generate an SDI application called Test. Choose Form View as the base class for CTestView. The form should contain a AAA control along with three buttons labeled Red, Green, and Blue. Clicking the buttons changes the color of the drawing.
3. Add the AAA control to a web page.
4. Add the AAA control to a VB application.